Creating optimization tests in Edit Mode
In Edit mode, you can create and apply optimization tests to content on a page or to an entire page. You create an optimization test by adding multiple content items to an area in a page or by adding new pages. The additional content items and pages are called variants. Then you specify conditions under which variants display to site visitors.
When a test starts, you can also monitor the results of the test in Edit mode.
Creating an optimization test for content on a page
To create an optimization test for content on a page:
- Navigate to a website page that is powered by Jahia.
- On the page, right-click on the content where you want to add the optimization test. Select Add optimization test.
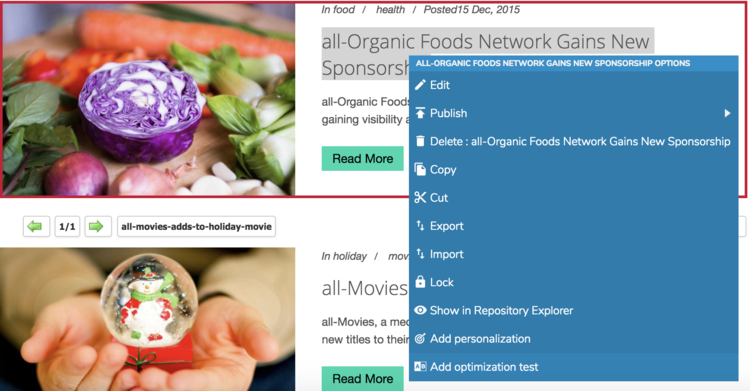
A toolbar displays at the top of the content item.

- To add new content to use in the optimization test, click the button at the top-right of the content item. In this example, the News entry button displays.
- In the New Content page, enter information for the new page.
- Open the Edit Content page by clicking on the content's name:

- Click Save.


Next, specify settings for the optimization test.
Creating an optimization test for a page
To create an optimization test for a page:
- Navigate to a website page that is powered by Jahia.
- In the navigation menu on the left, right-click on the page that you want to create an optimization test for. Select Add optimization test.
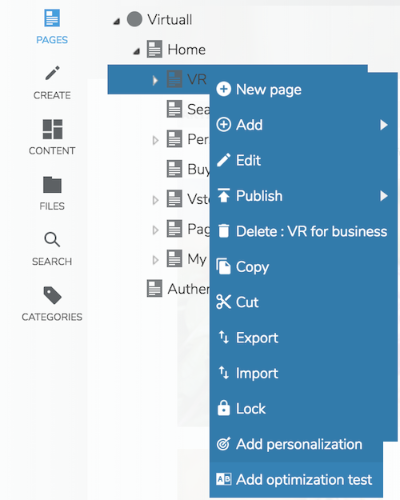
- Click Add on the toolbar that displays at the top-right of the page.

Note: By default, the existing page is copied as the next variant so that you can modify it instead of creating a new page. - To edit the new variant page, select Edit page name in the toolbar.

- In the Edit Content page, modify the variant page as needed. Then, choose Save.


Next, specify settings for the optimization test.
Specifying settings for an optimization test
To specify settings for an optimization test:
- Navigate to the content or page and open it for editing.
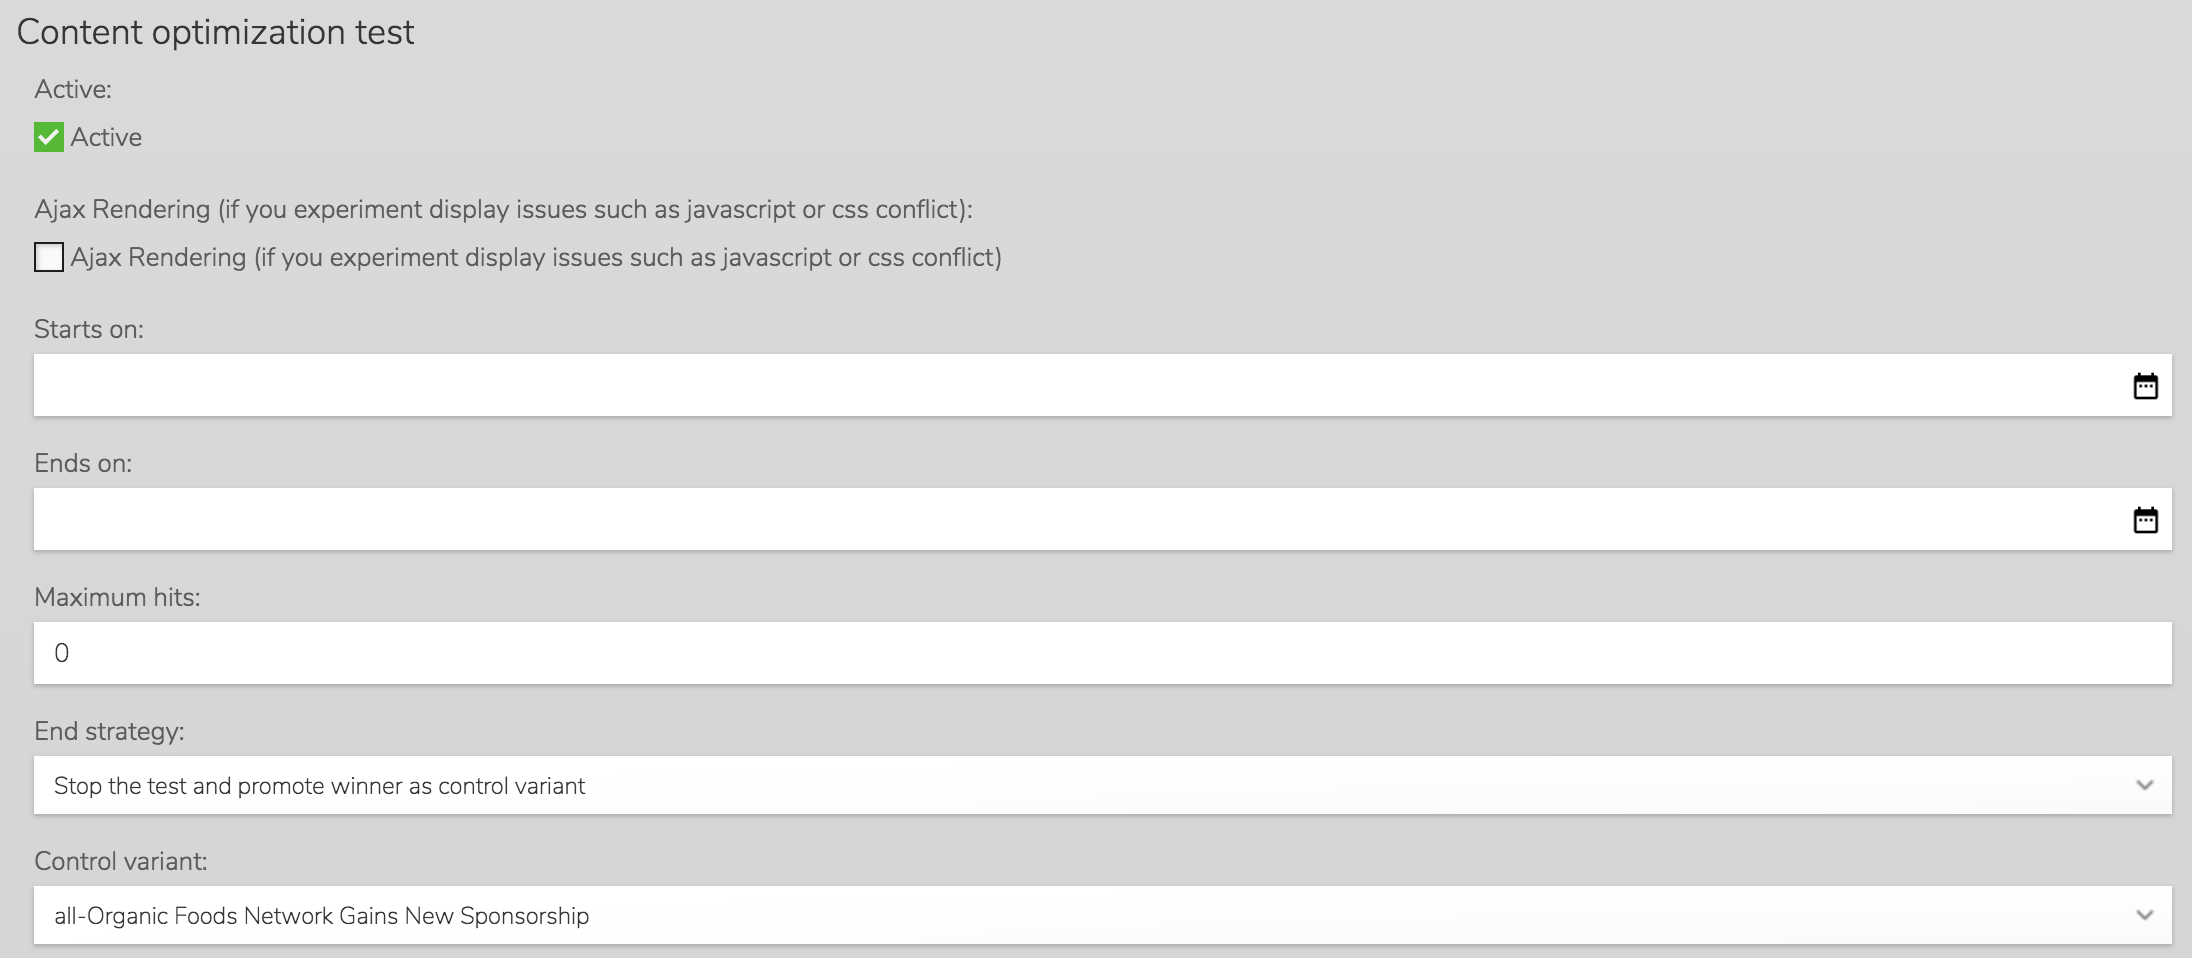
- On the Edit Content page, select Content and complete the following fields.

Field Usage System name Name of the test in the repository Active Whether the optimization is active. Selected by default. Deselect to stop or pause the optimization test. Ajax rendering If you experience issues displaying variants, it may be because of a JavaScript or CSS conflict. This issue may occur with content coming from an external service that is embedded in your page. Select the checkbox to try an alternate type of rendering and see if that resolves the issue. Starts on The date and time that the test will start. If the field is empty, the test will start immediately (as soon as the page is published). Ends on The date and time that the test will stop. If the field is empty, the test continues until it is stopped by a manual action. Maximum hits Maximum number of times the optimization test is served to users before it stops. For example, if you have two variants and specify 4,000 hits, then each variant will display 2,000 times (whatever the number of conversions) and then the test will stop. End strategy Defines what happens when the test ends. You can specify that Jahia automatically uses the winning variant (the one with the highest conversion rate) or continues to serve the current control variant. If you choose to keep the current control variant, then you can decide whether to promote another variant when the test ends. Control variant Defines which variant is the control. - In the navigation pane, select Goal and define a goal to measure your success rate.
Note: As soon as a test has started, you cannot change the goal. This ensures your results are valid. - Click Save.
- Publish the content or page.
When the test starts, you can monitor test results.
Interpreting test results
Once an optimization test has started, you can follow results as they occur.
- Navigate to the page containing your test.
- Open the Edit Content page by clicking on the content's name.
- Click on the Goal tab. Test results display in a table. This level of reporting enables you to easily identify which variant has the highest conversion rate for the overall audience.
Note: When the test is running, you can no longer modify goals for the test. Changing the goal during the test would lead to incoherent data.
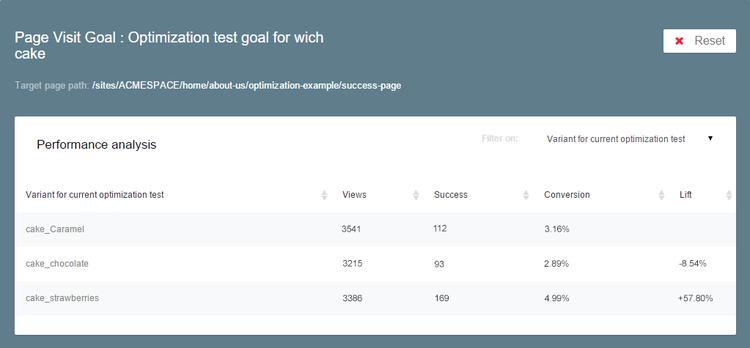
Columns in the table display the following:- Views
Number of times the variant has been displayed - Success
Number of visitors who saw this variant and converted (achieved the goal) - Conversion
Conversion rate - Lift
The percentage difference between your control variant and other test variants
- Views
- To break down test results further, select a filter from the Variants for current optimization test list. You can discover if another variant works better for a subset of the audience.
In this example, promoting the winner will improve the conversion rate. You could also further improve results by creating a permanent personalization to serve the best variant for each segment of the audience.


