In this tutorial, you will learn how to build a new content definition and define a rendering view for the definition. A content definition is a declaration that defines the structure (made of simple properties or child objects) of a content object. A content definition is stored in a CND file. A CND file is a text file that contains content definitions using a standardized syntax (see the Apache Jackrabbit documentation for details). A rendering view is usually, but not only, a Java Server Page (JSP) that transforms the content of an object that complies with a content definition into HTML using JSP tags.
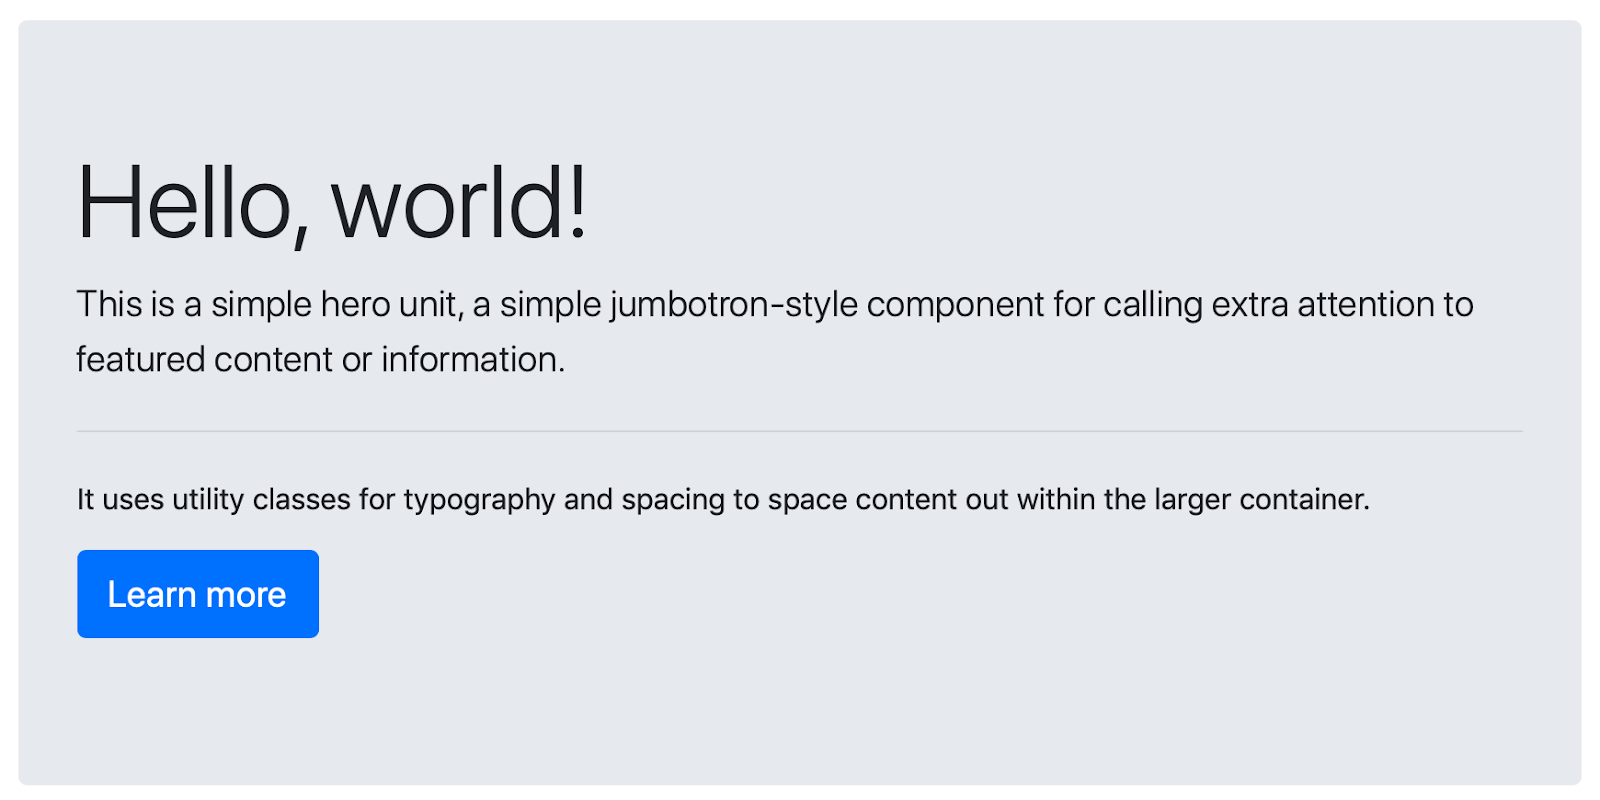
As an example, you will build upon the website that you created in the Creating website templates in Jahia tutorial that uses Bootstrap 4 components. You will add a Jumbotron Bootstrap 4 component that looks like this:
Here’s the HTML for this component:
<div class="jumbotron">
   <h1 class="display-4">Hello, world!</h1>
   <p class="lead">This is a simple hero unit, a simple jumbotron-style component for calling extra attention to featured content or information.</p>
   <hr class="my-4">
   <p>It uses utility classes for typography and spacing to space content out within the larger container.</p>
   <p class="lead">
      <a class="btn btn-primary btn-lg" href="#" role="button">Learn more</a>
   </p>
</div>
The first step is to identify which parts of this HTML will become content definitions. There are multiple ways of doing this. One method is to replace text in the HTML with placeholder names for the content definitions that you will create. For example, you could change the HTML to:
Building the content definition in the Jahia Studio
As you can see in the above example, there are five placeholders that act as the properties of our content definition.
To build the content definition:
Access Jahia using the URL: http://localhost:8080 and log in using the “root/root” credentials.
Click the Jahia logo in the upper-left corner to open the Jahia menu and click Studio.
Create a new module by selecting New>New module in the top toolbar.
Leave the module type as module and enter definition-tutorial for the module name. Click OK.
Jahia generates a new module This typically takes a few minutes and generates faster than when you created a module in the previous tutorial.
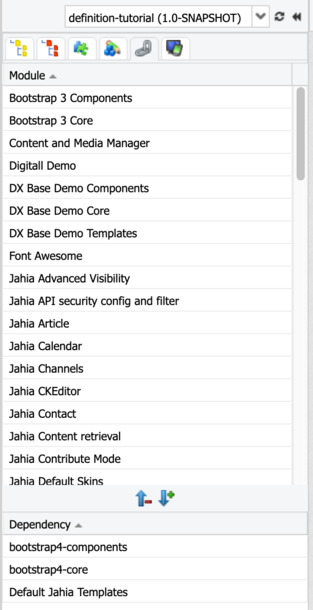
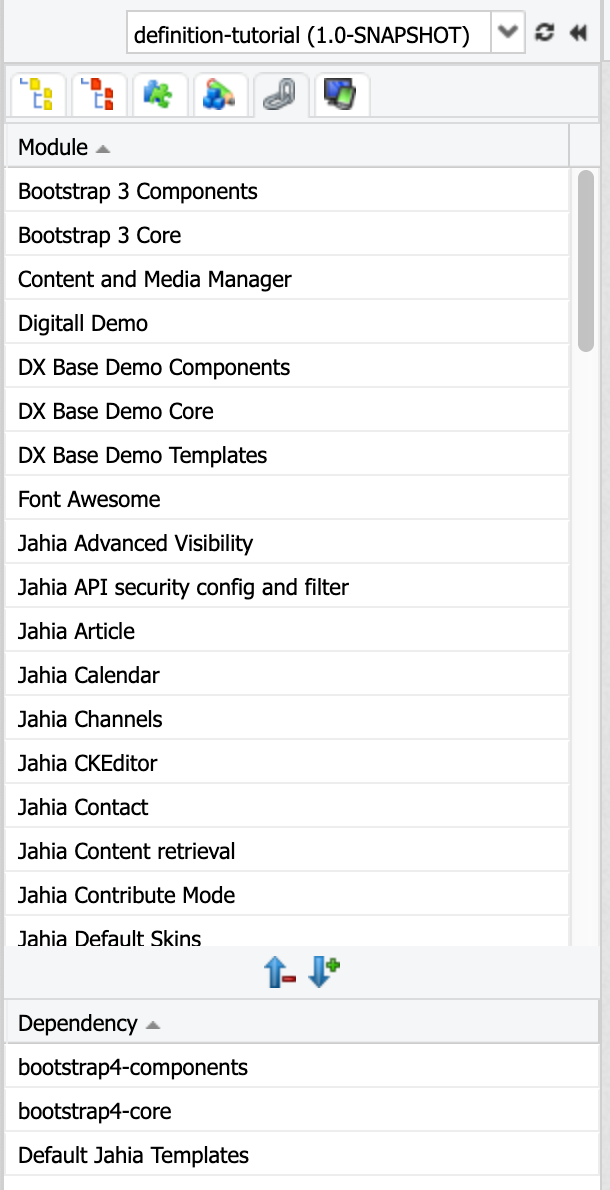
Select the Dependencies tab in the left panel and add move the bootstrap4-components and bootstrap4-core module from the Module to the Dependency section. Your screen should look like this:
Select to File system tab in the left navigation pane and navigate to definition-tutorial/src/main/resources/META-INF/definitions.cnd.
Right-click on the definitions.cnd file and select New node type namespace. Enter mytuto as the prefix and http://www.acme.org/jcr/mytuto/1.0 as the URI. The URI doesn’t really need to exist. It is just a unique identifier that ensures there is no conflict between namespaces. Click Save.
Your file should now look like this:
<mytuto = 'http://www.acme.org/jcr/mytutu/1.0'
Click Save. It is a good idea to do regularly save your work, especially if your network connection is unreliable.
Select the definitions.cnd file again, right-click and select the New node type definition.
A dialog asks you to choose between a Mixin node type and a Primary node type. Mixin node types are types that you can add to an existing type (it’s a form of polymorphism), while Primary node types are the base type of a content definition. Select Primary nodetype and click OK.
You are now ready to start defining your node type. In the Add: Primary nodetype dialog, in Type name, in the first drop down, select mytuto as a prefix, and then type jumbotron as the type name.
Select the Properties tab and click Add. In the Name dialog, enter jumbotronTitle as the item name and click OK.
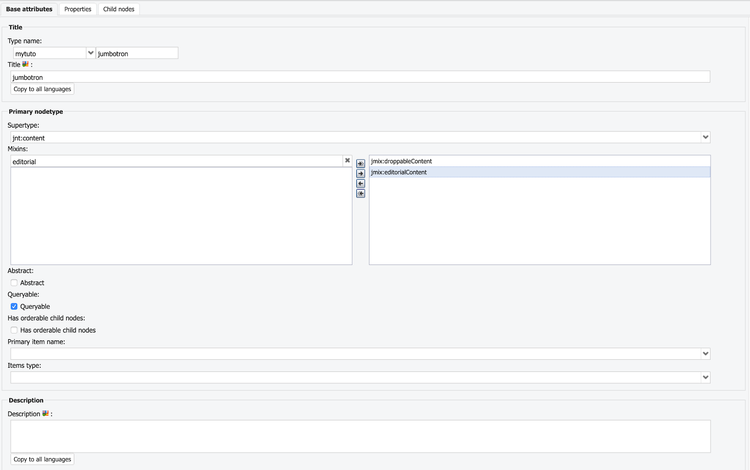
Select the Base attributes tab. In Mixins, add jmix:droppableContent and jmix:editorialContent to the right column to make the definition available in the Edit UI. The first mixin makes it available, the second mixin is the category in which it will become available. Your page show now look like this:
In the Properties tab, add the following properties: jumbotronLead, jumbotronParagraph, jumbotronButtonLabel, and jumbotronButtonLink
For the jumbotronButtonLink property, change its type to WeakReference in the Required type drop down.
In Value constraints, click Add and type jnt:page to restrict linking only to existing pages. jnt:page is the node type used by Jahia to represent pages.
You have created the node type. As you can see, the definition builder makes it easy for you to get started quickly. You don’t have to know (at this point) what all the various options do to build powerful and flexible content definitions.
Now that the definition is in place, let’s build a rendering view for it.
Building the view for the Jumbotron definition
To build the view:
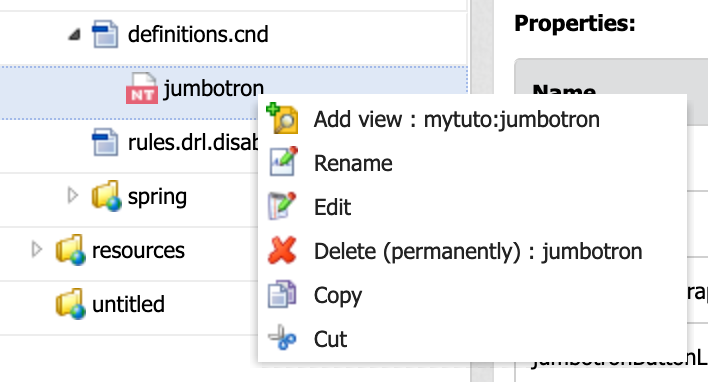
Select the definitions.cnd file. You should be able to expand it and see the jumbotron node type underneath. Select the jumbotron type, right-click and select Add view : mytuto:jumbotron as shown below:
The Add: View file dialog opens.
Copy and paste the following HTML code at the end of the file:
Something is not right with the code. The jumbotronButtonLink is not a string, so you must change its rendering to enable handling of different installations, vanity URLs, and more:
You are now ready to compile and deploy your new module.
Click the Compile and Deploy Module button .
Open the Mode menu in the top toolbar and select Administration.
Click Web Projects and click the Edit site button next to your site in the list.
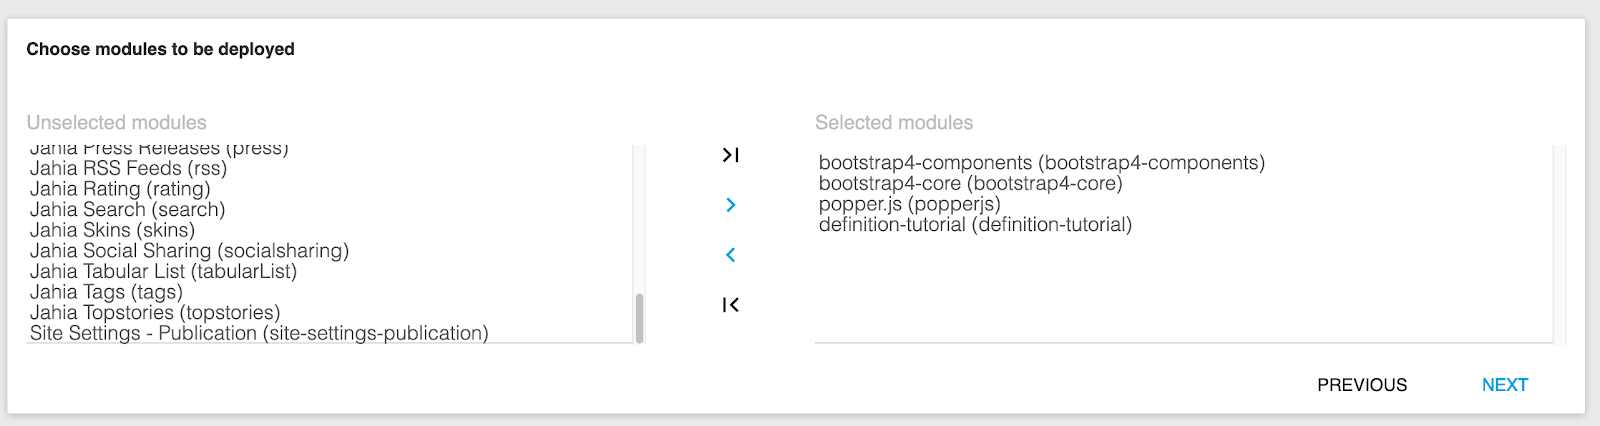
At the bottom of the page, click Choose modules to be deployed.
Add the definition-tutorial module to the site. Your page should look like this:
Click Next and click Go to Edit Mode on your site in the list. You can now see your site in Edit mode.
Click Any content below the Slide button.
Add the base>jumbotron component.
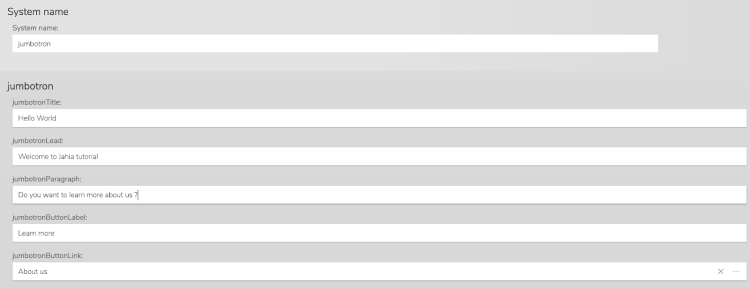
Enter values for all the properties of the Jumbotron. For the link, try selecting another page such as the About us page. For example, enter:
Click Save.
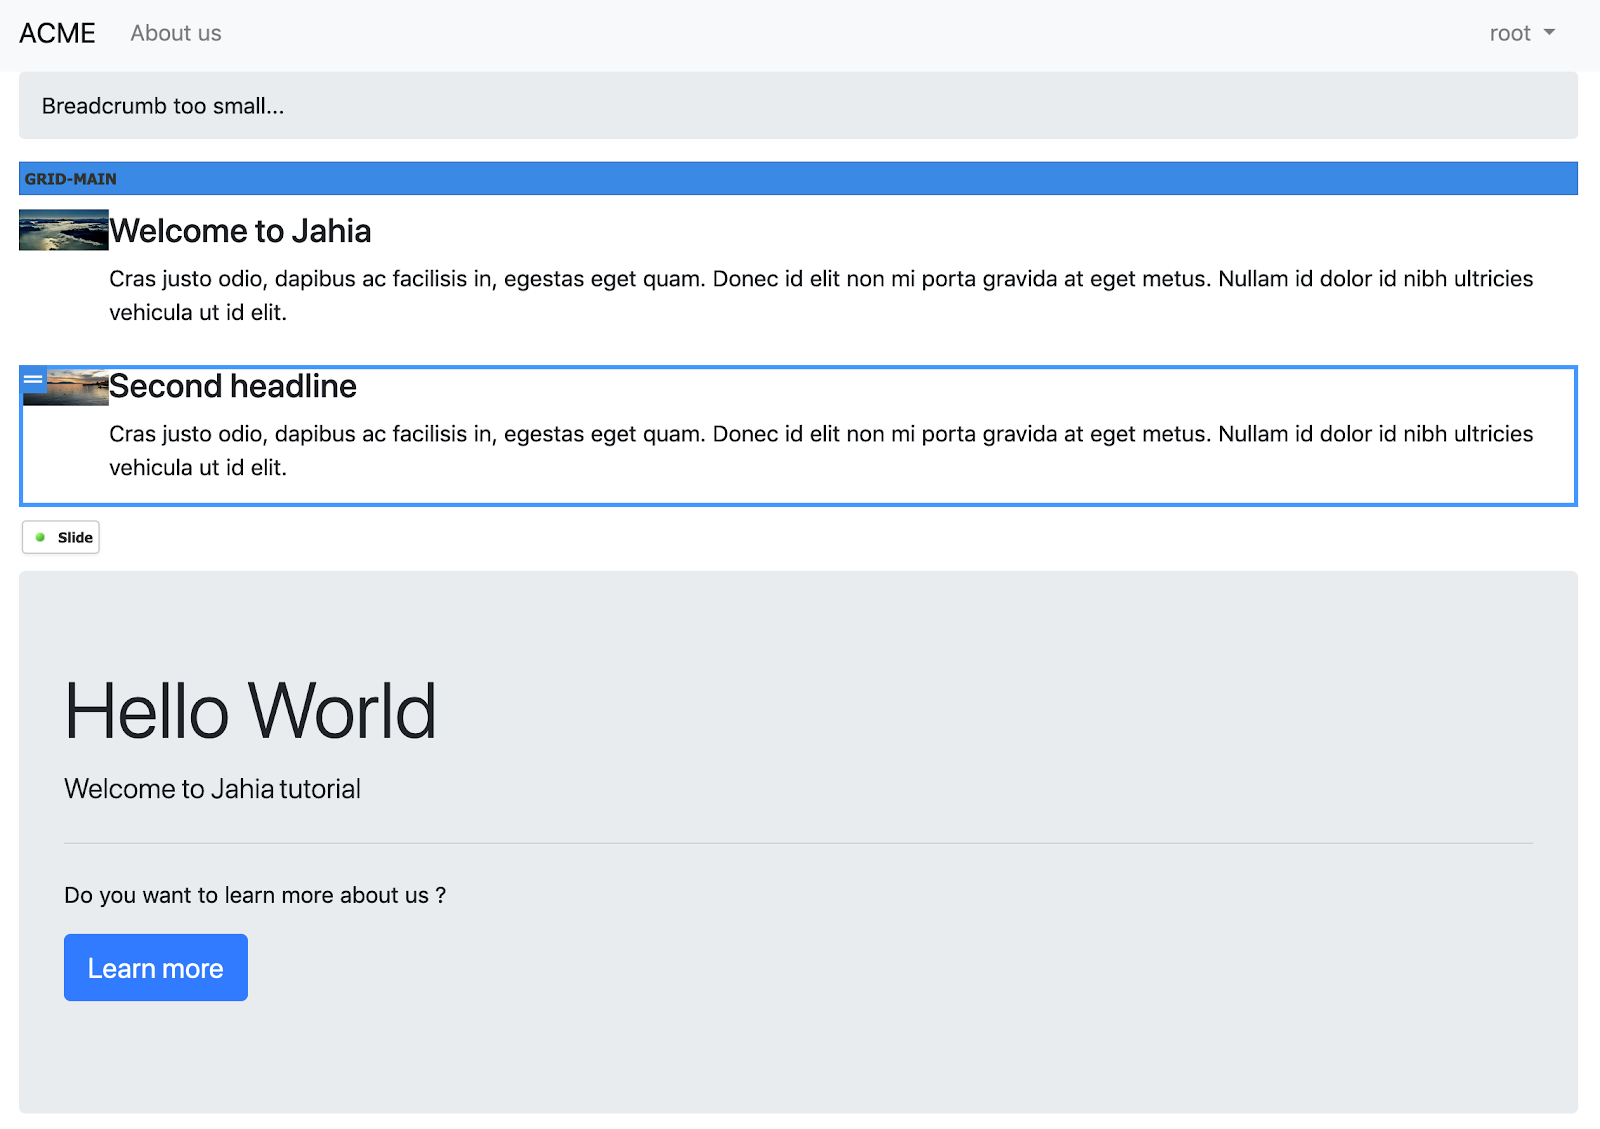
You should now see the jumbotron properly rendered in Edit mode:
Try clicking the Learn more button, which directs you to the linked page.
Congratulations, you have completed this tutorial! Here’s a review of what you have learned. You have:
Created a new standard module using the Jahia Studio
Used Jahia Studio to create new content definitions using the Definition Builder tool
Created a new view using the View Code Editor
Added your module to an existing site
Created an instance of a content object that uses the content definition and validated that the rendering is correct
Note: If at any time you make a mistake and want to go back to the Studio to make modifications, ensure that you Compile and deploy your module after making changes. Jahia will use the updated version of your module.
Did you know?
You can build definitions and views simply by editing the files by hand. The tools here are intended to make it easy for you to get started. You can also edit your modules using your own preferred IDE as they are Maven projects under the hood.
Where to go from here?
About content types
Learn more about the built-in content types and how to use them