Using the Dashboard
The dashboard contains a home page with links to documentation, tutorials, and pages containing your files, projects, pages, and tasks. The dashboard is a tool for editors and a good entry point into the application. The dashboard available to users who have writing privileges on the staging version of the content.
You open the dashboard by clicking the Dashboard button  in the left navigation menu. You select from available dashboard features in the navigation menu to open them in the main window on the right.
Home
The Home page provides easy links to your projects in Page Composer as well as documentation links. Developers can also find direct access to their modules in Studio and other developer resources.
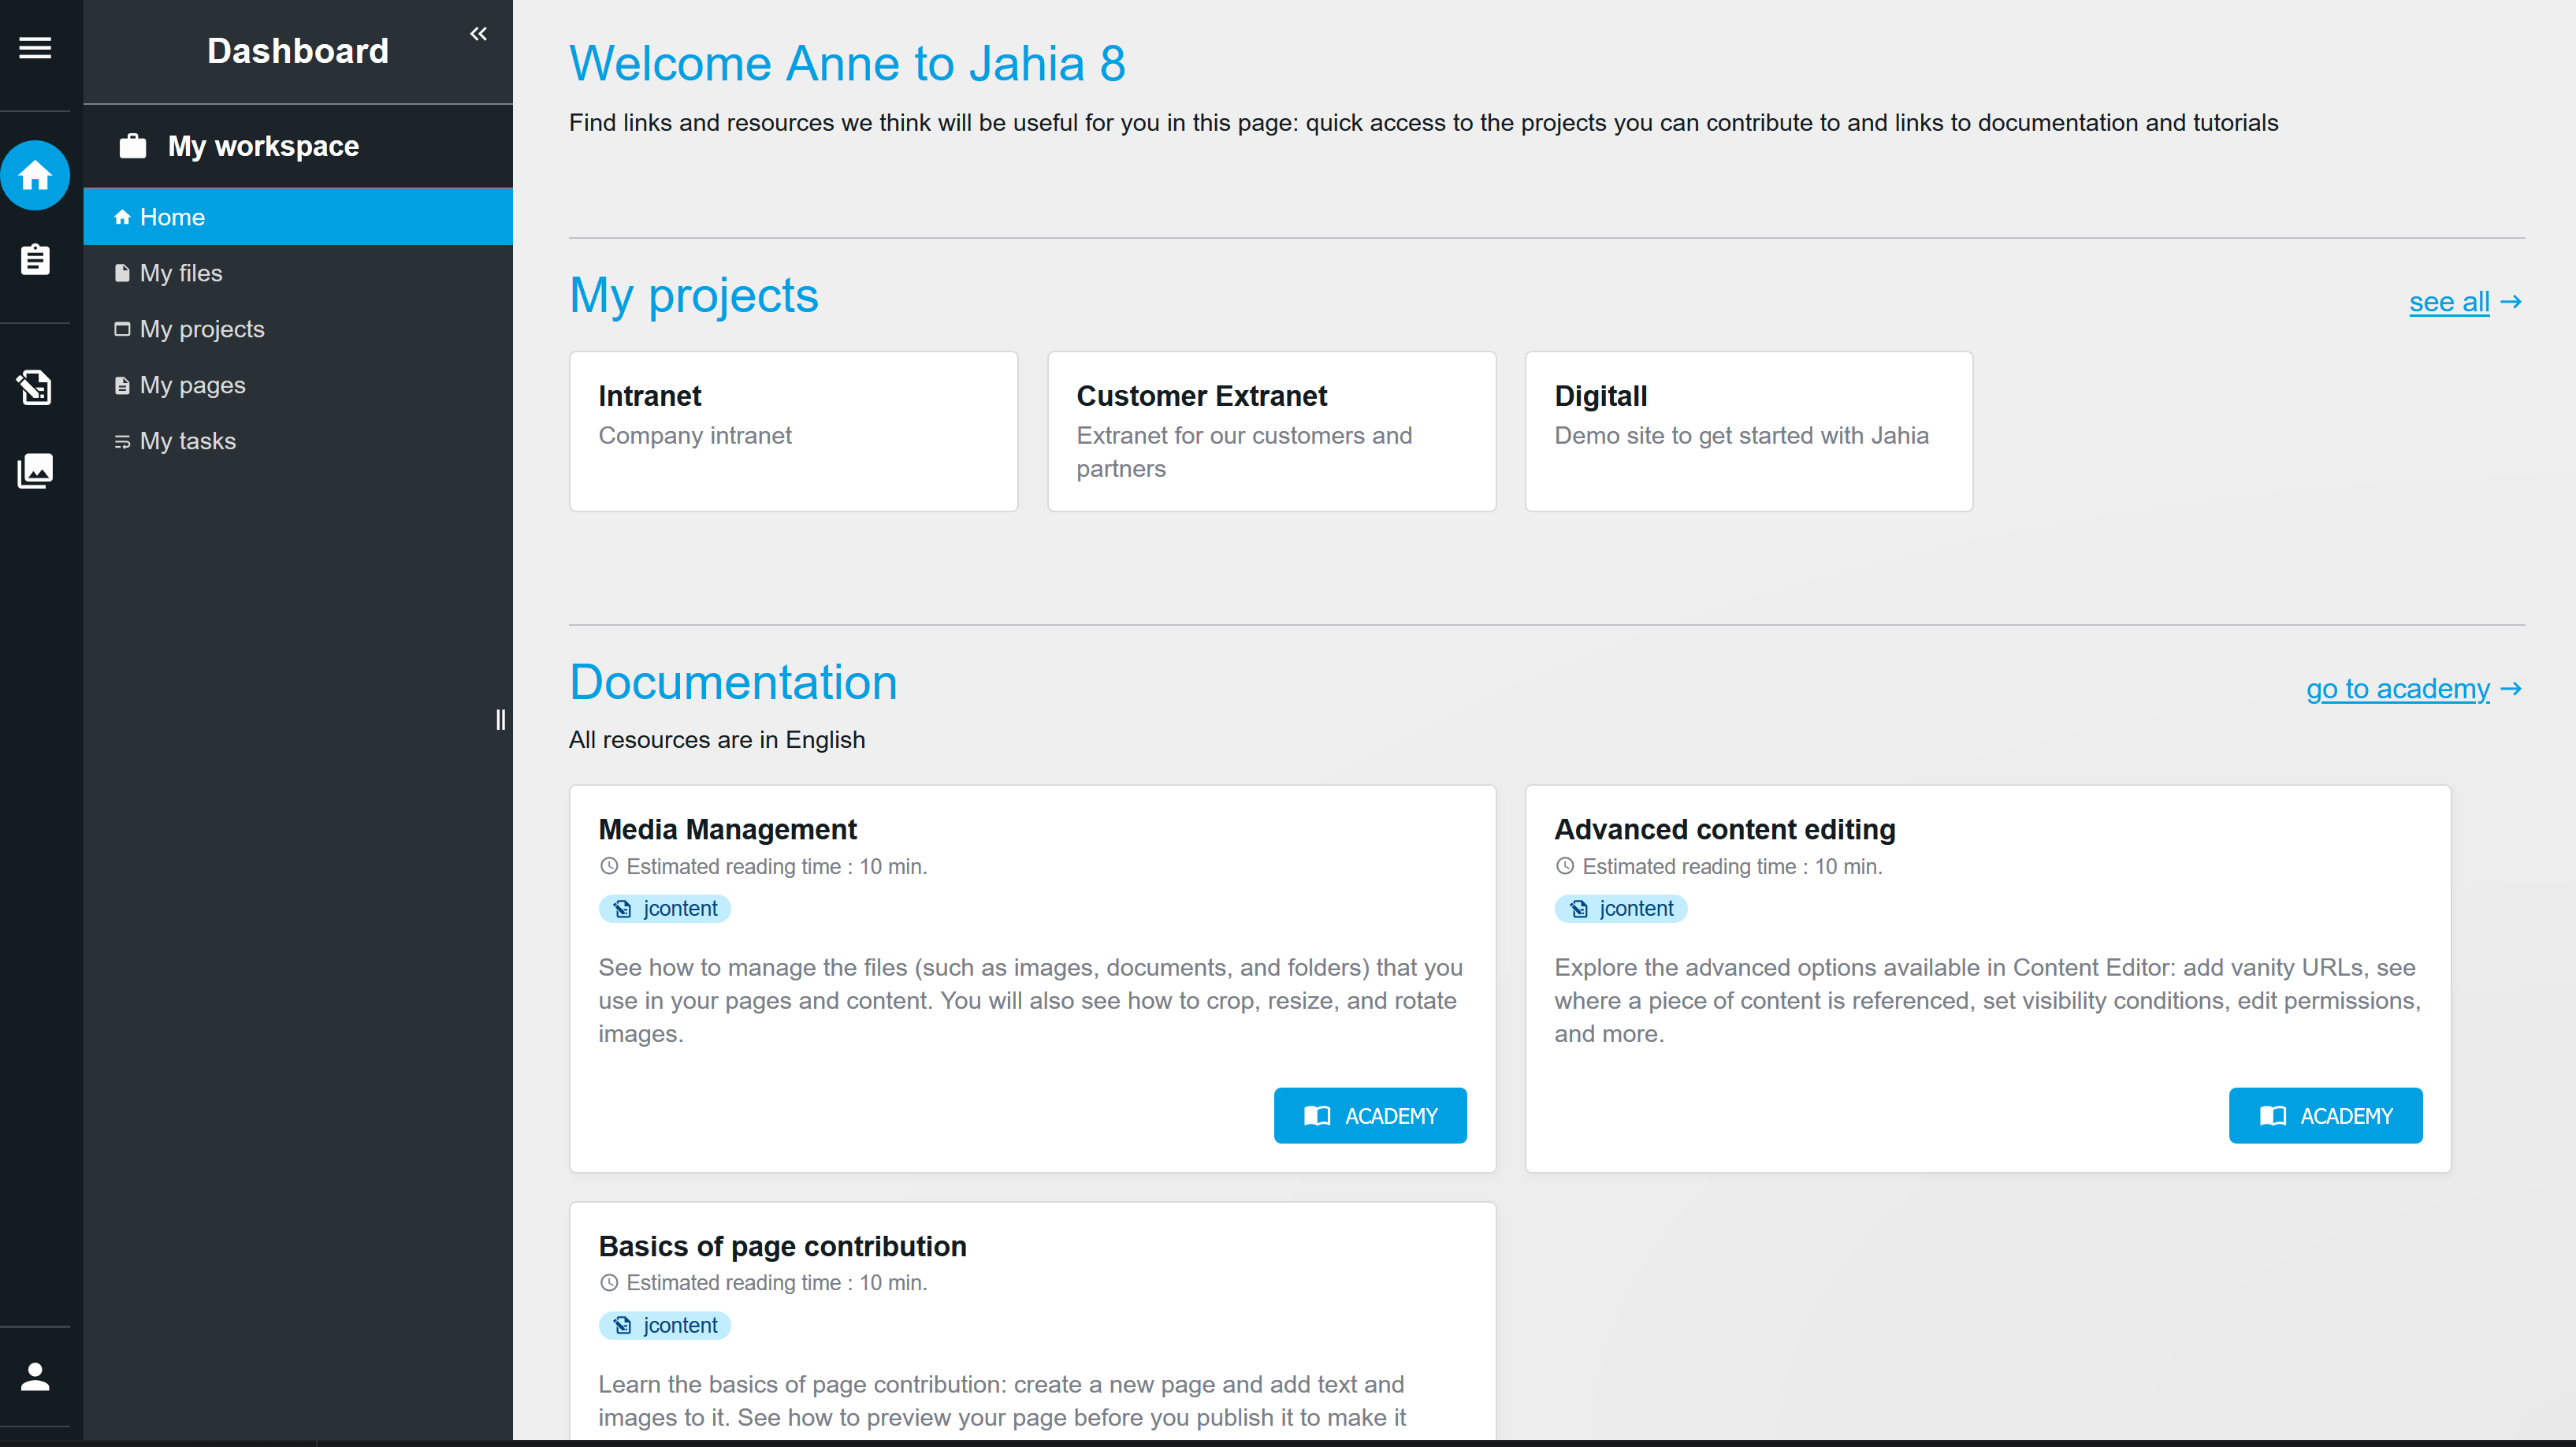
My projects
Under My projects, you can directly access and open your sites and projects in Page Composer. If you have many projects, click see all to open the My projects page where you can see a full list of all your projects.
Administrators with sufficient permissions can click Create new card to open the Projects administration page where they can create a new project.
Modules
Developers can find a list of modules they can access in the Studio, just by clicking on them. Clicking see all opens Studio with the list of all the modules you are working on.

Documentation
The Documentation section contains links to documentation resources. The documentation that you see depends on your role and on how your system is configured. For example, resources can include Jahia documentation or your own internal documentation.
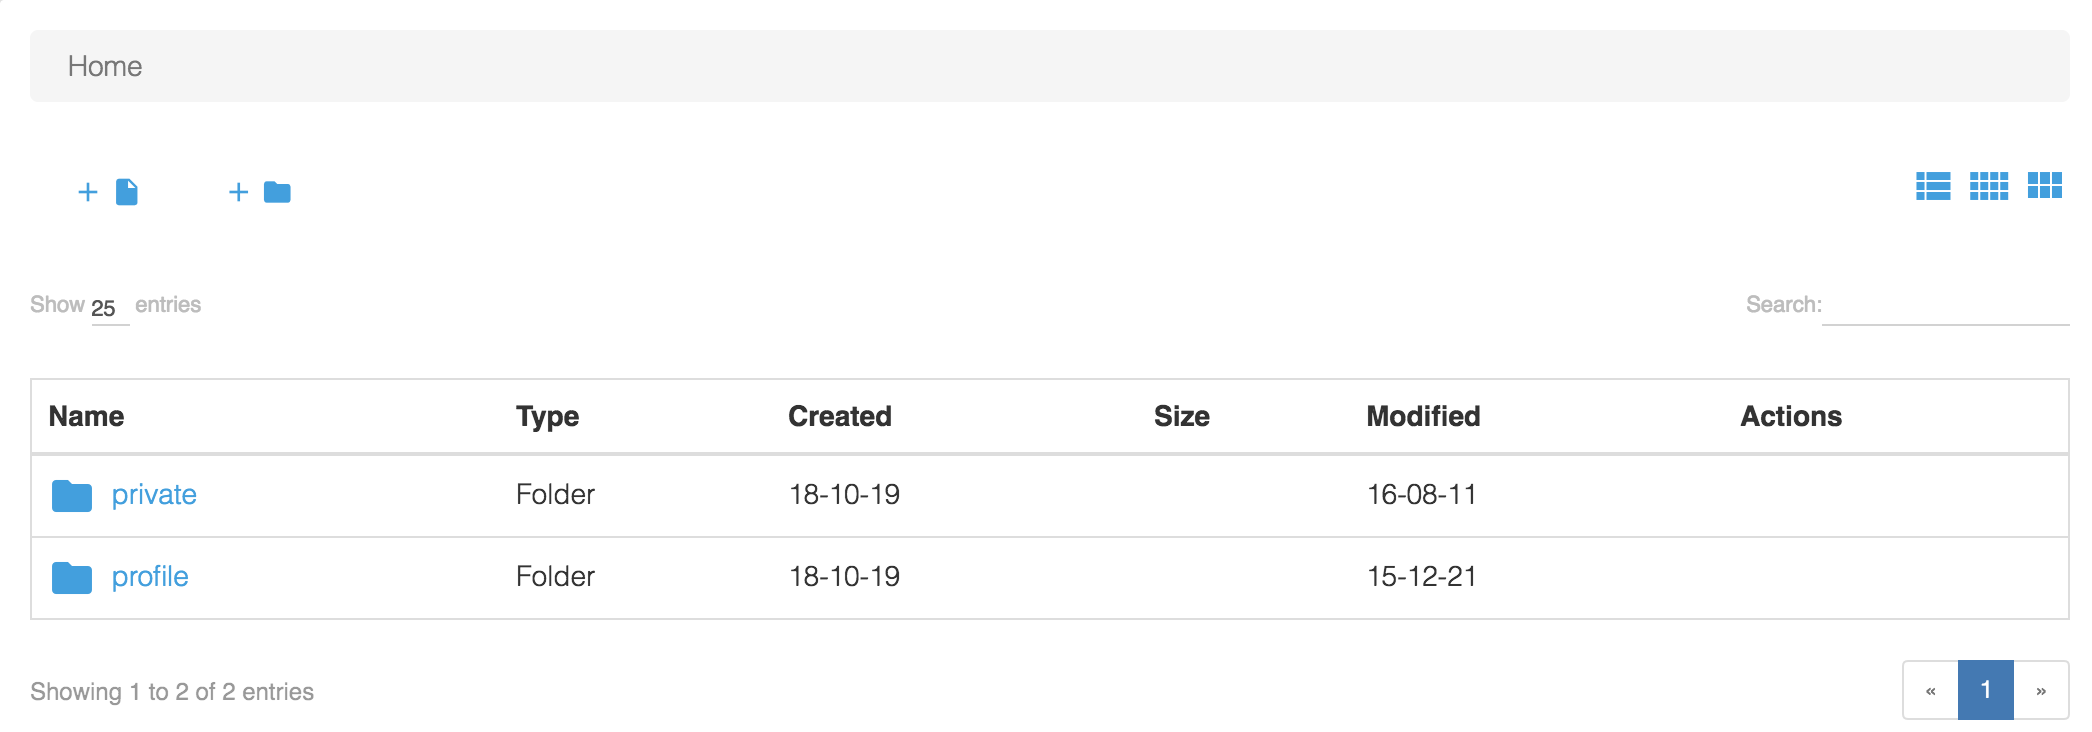
My files
This panel displays the list of files stored in the user personal directory. Under the file directory two subfolders are created by default.
- private
Files and folders stored under this folder cannot be seen by anyone but the user - profile
Contains the picture of the user
All files placed in the user repository but not in the “private” folder can be read by other users. The files located in the user directory can then be used inside pages of the various websites on the platform and will be seen by visitors.
Using the Detailed view, Icon view, and Gallery buttons  located in the top-right of the page, you can browse its personal files repository with three different layouts.
Detailed view
This is the default one. A list of files, with some details for each file, like creation date, modification date, size.
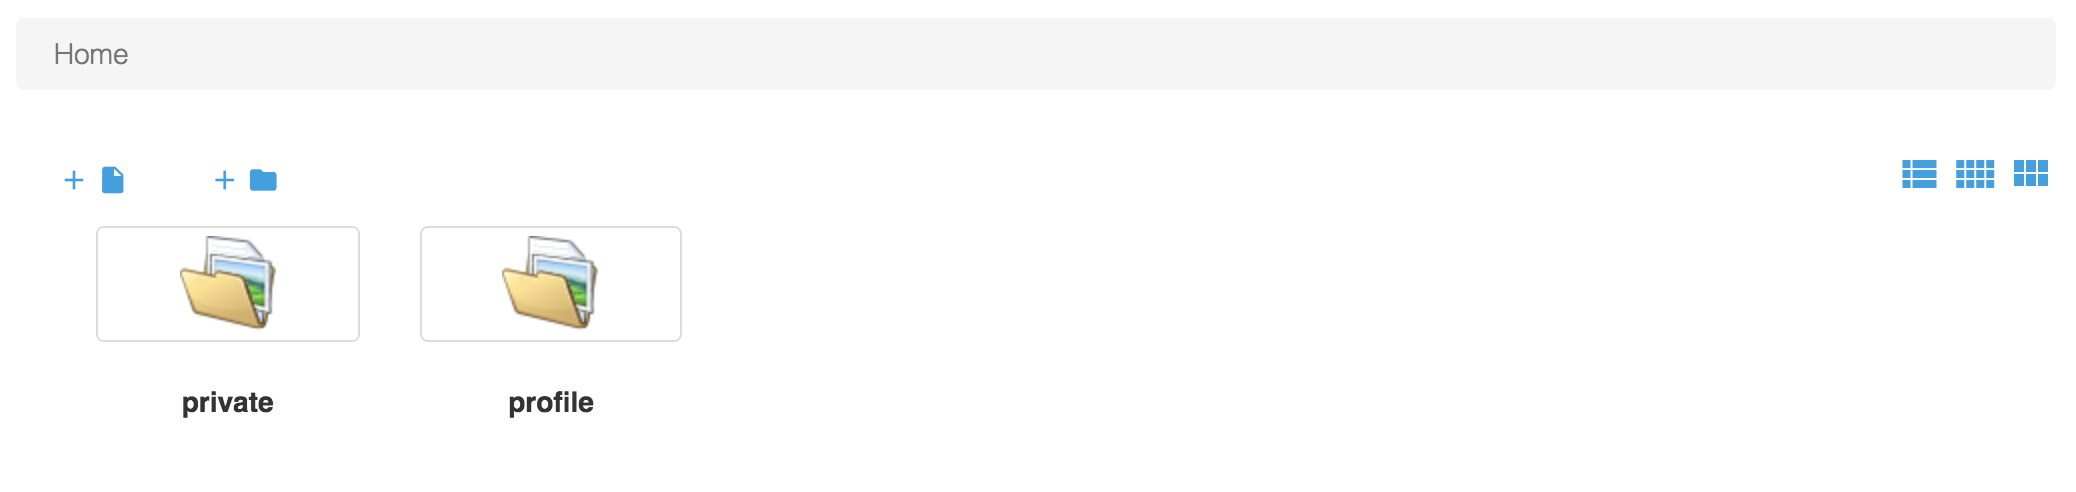
Icon view
Items are displayed by their thumbnails
Gallery
Items are presented one by one in a greatest size (full size when possible) with arrows to navigate to the next or previous item.
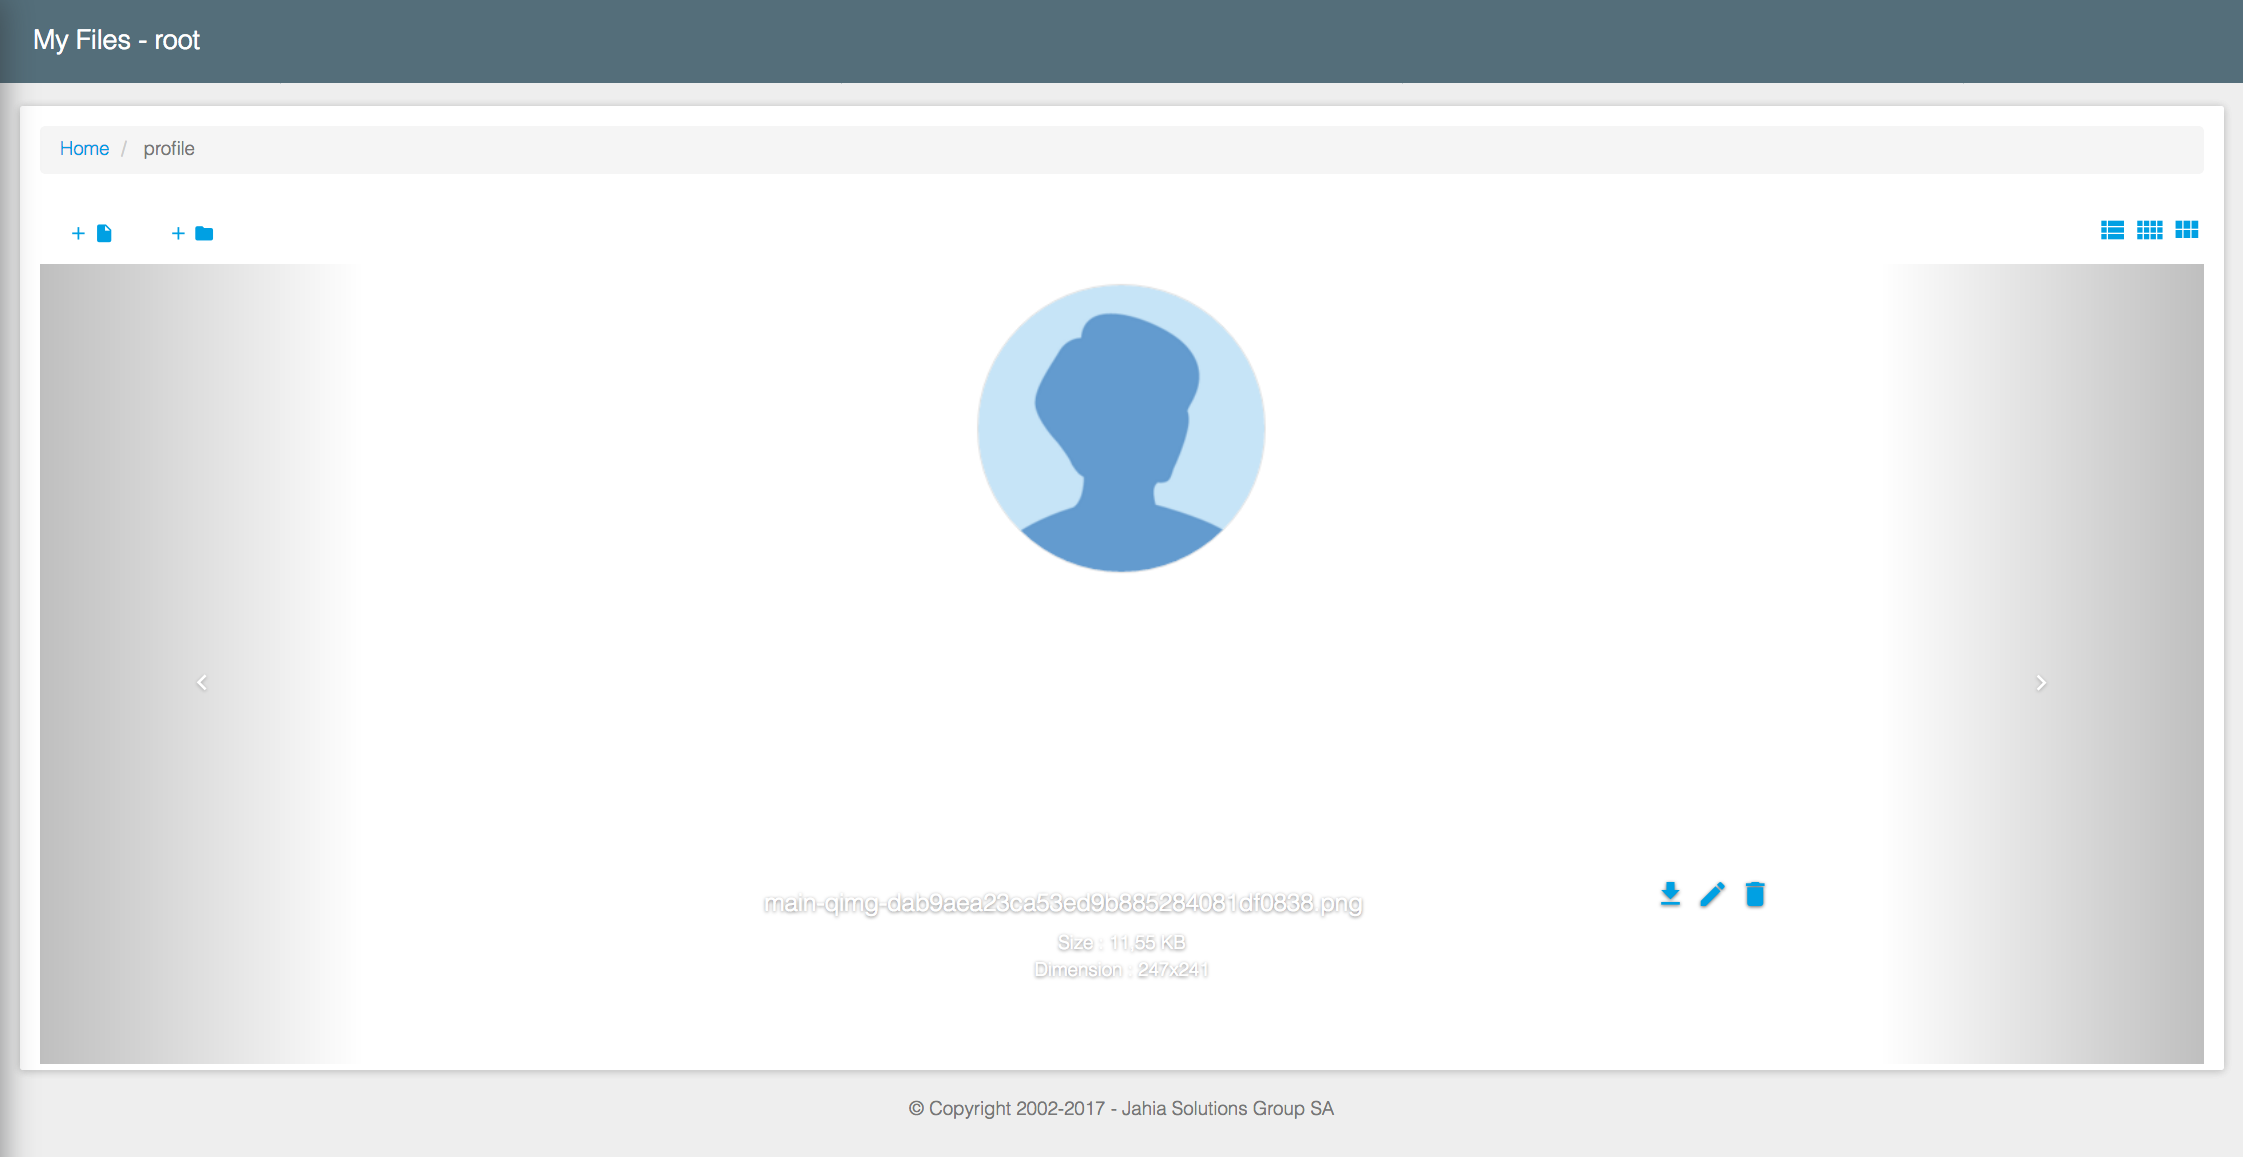
Whatever the layout three operations are always possible on each file, symbolized by the following icons
- Download the file
- Rename the file
- Delete the file
To upload a file, click the Upload files button  and choose one or several files on your disk then submit. A confirmation window lists the uploaded files when the operation is finished.

To create a new folder, click on New directory button  . Then, type a name in the popup window and validate.

To navigate in the folders hierarchy, click on a folder name in the list layout or thumbs layout. You can go back in the hierarchy thanks to the path that appears atop of the files

You can also return at any time to the root folder of the files just by clicking on “My Files” in the menu of the User Dashboard.
My pages
This panel list all the pages created, modified or published by the user. By default the list is ordered by last modification date (the most recent changes first) but can be reordered by clicking on the column headers. Note that this reordering is done on the fly and is not persistent: if the user leave the page and comes back on it, the default sorting will be applied.
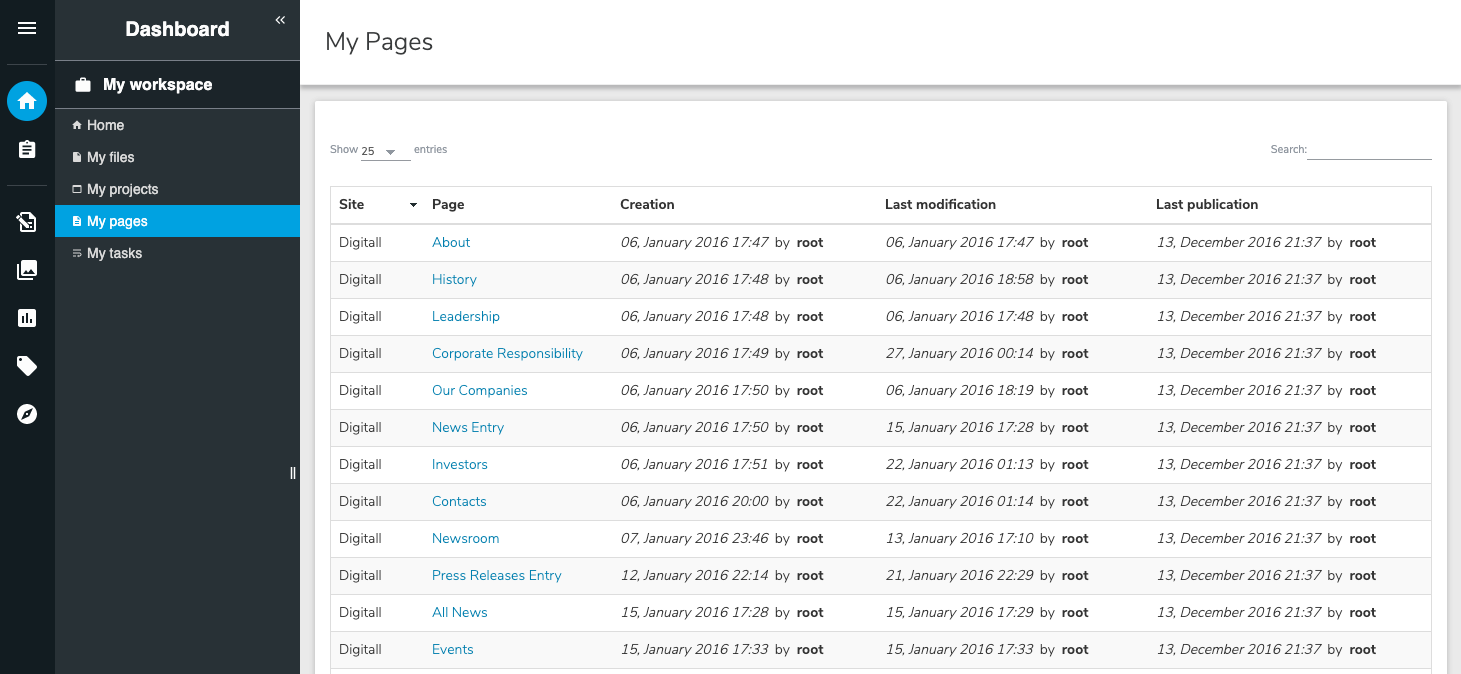
If you click on a page name, it opens in Page Composer.
My projects
This panel lists all the projects that you have access to, depending on his role(s) on the different projects.
On a brand new installation, this screen is empty. When one or several projects exist on the platform, each one appears on a single line.
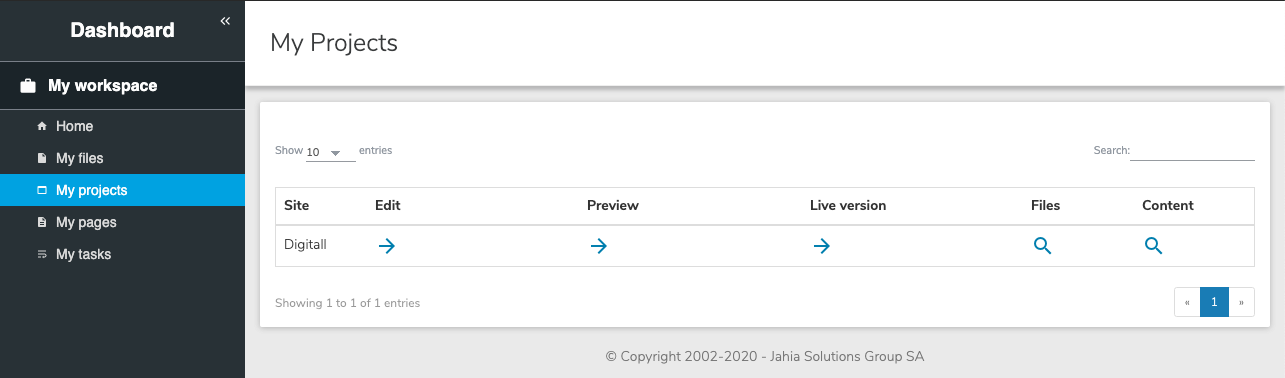
Depending on the user roles for each site and the status of each site (published or not) arrows buttons offer links to the different modes available
Edit(complete editing interface)Preview(view the site with the staging content as if published now)Live(online site)Files(access to the media section of jContent)Content(access to the content folder section of jContent)
This panel is completed by some additional buttons for root and users with the “server administrator” role: export selected sites and create site.
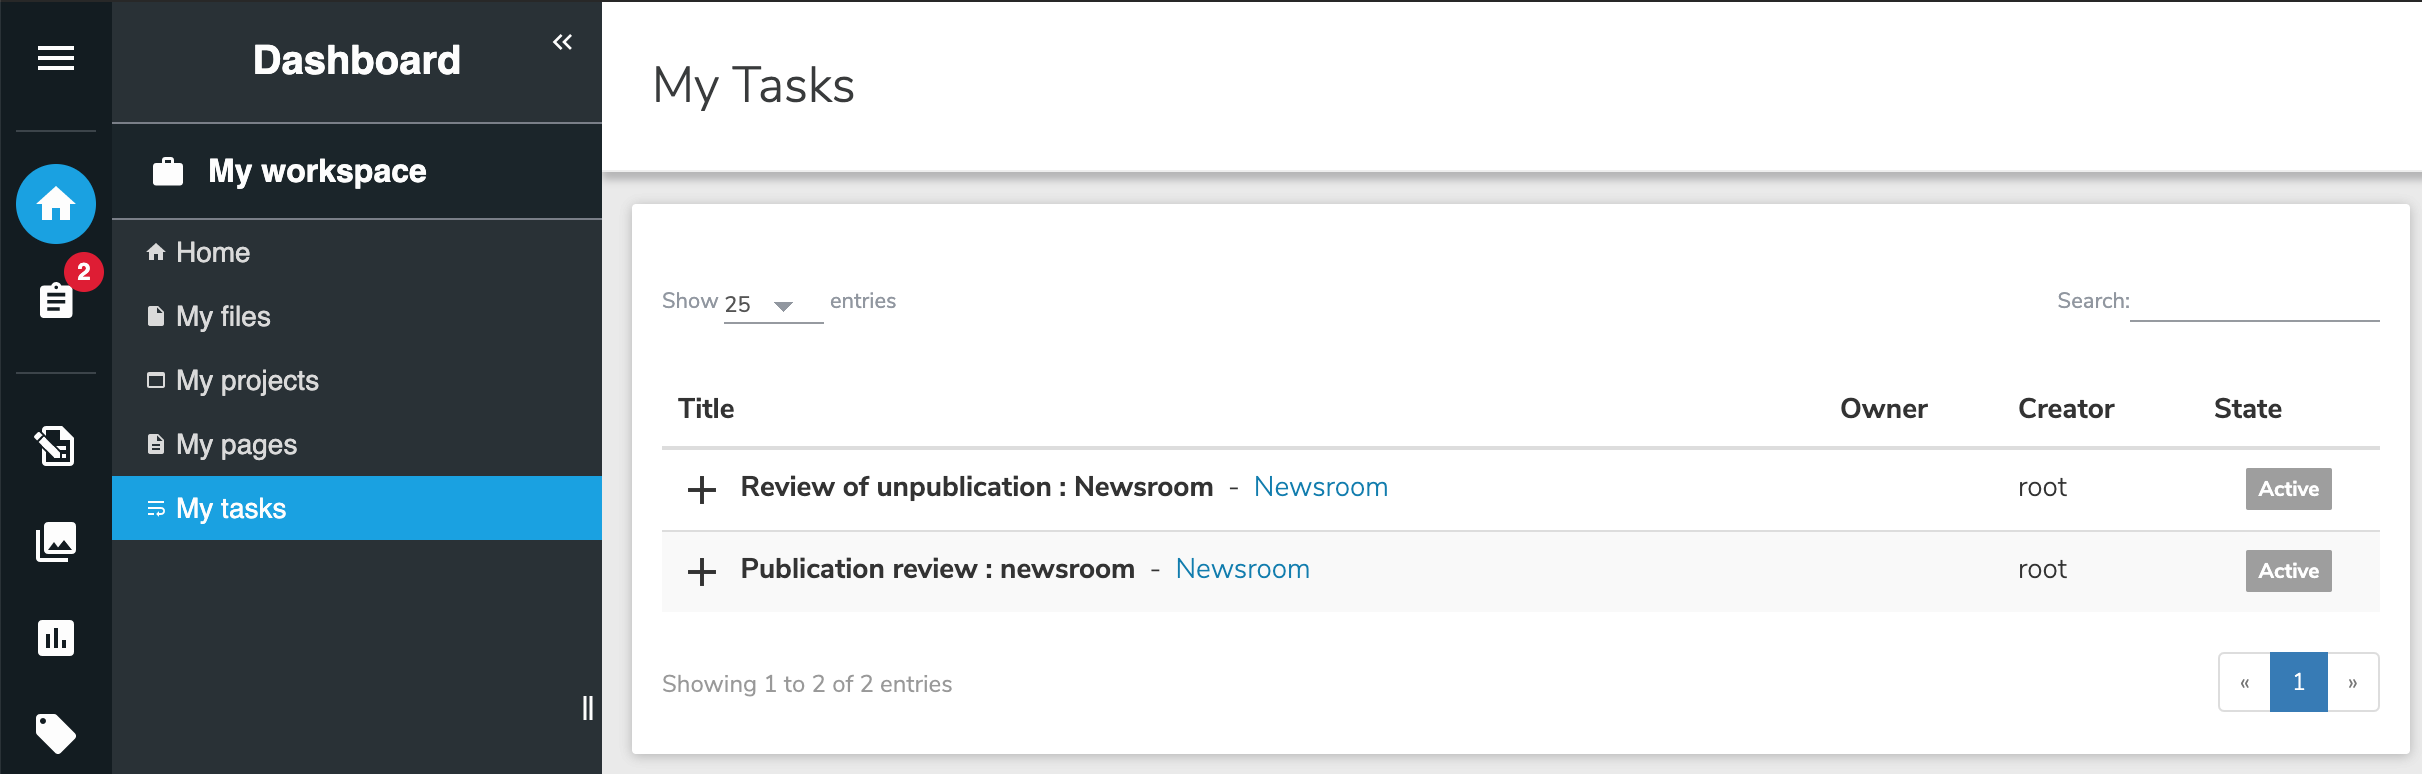
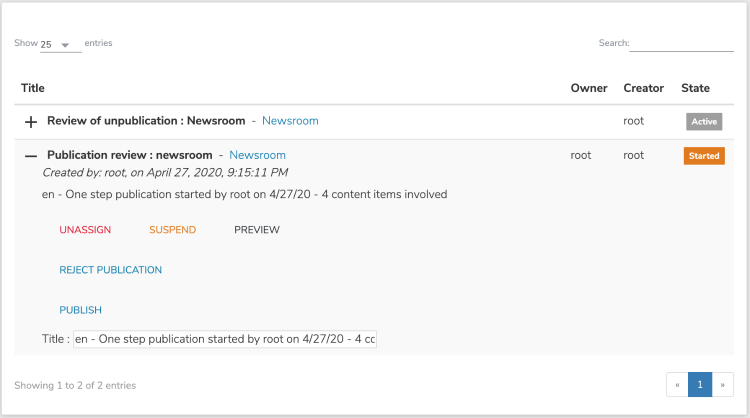
My tasks
The My tasks page displays a list of tasks assigned to you and tasks that are not assigned to anyone, but that you can decide to claim. For example, a simple publication process usually creates a review task that is broadcast to a group of users who can perform the review and not to one person in particular.
If tasks can be handled, they appear in the list. If no tasks are pending, the list is empty.
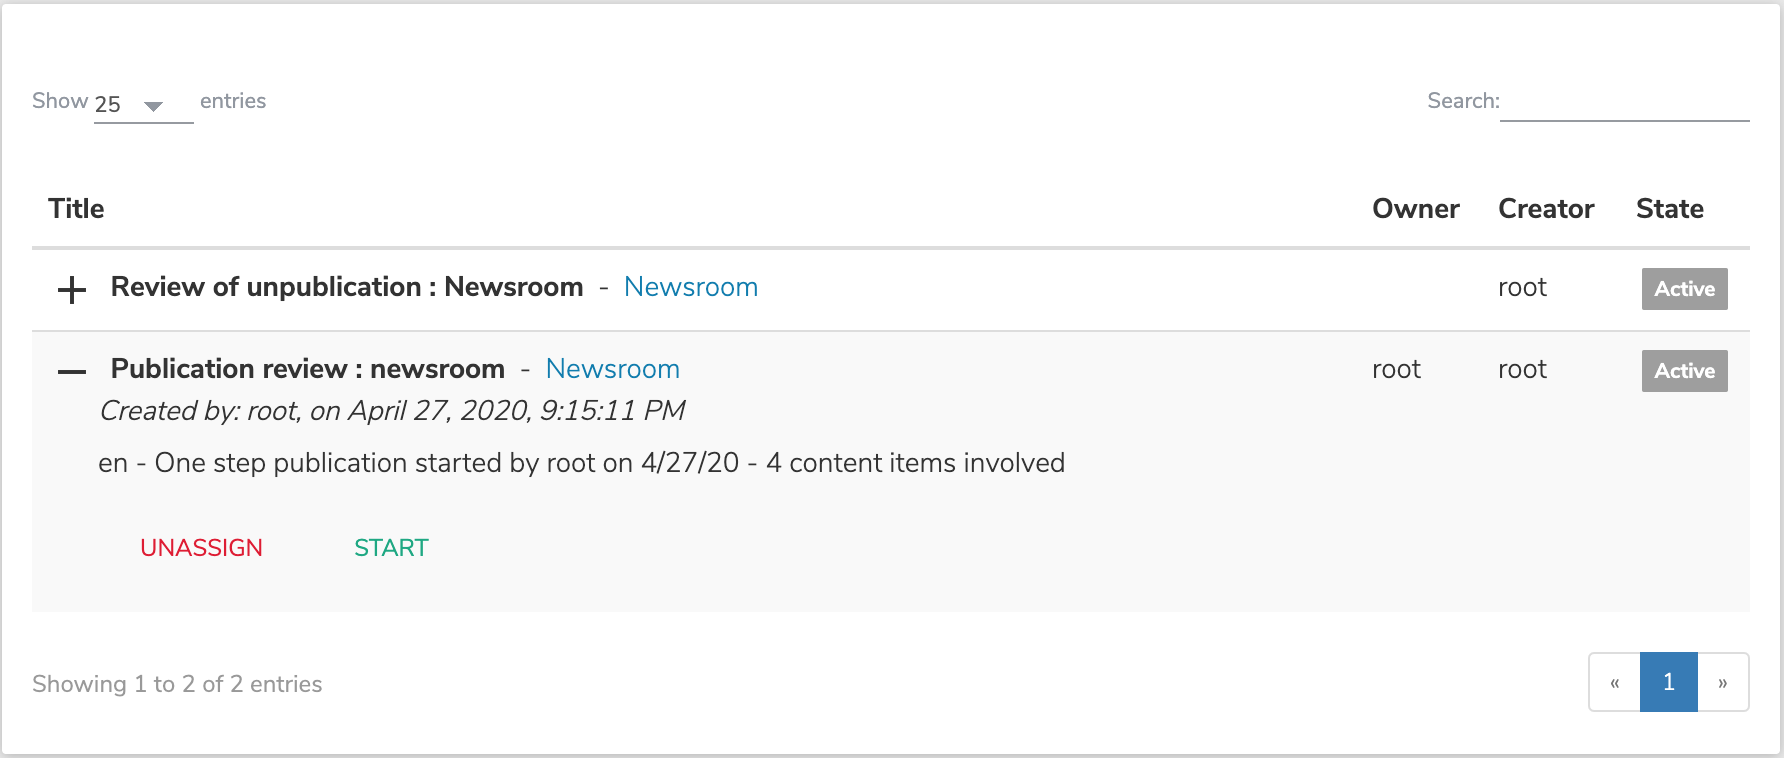
To claim and start a task:
- Click the plus icon + beside to a task to see details about the task. To claim a task, click Assign to me. The tasks will disappear from others users dashboards. You can unclaim a task at any time by clicking Unassign
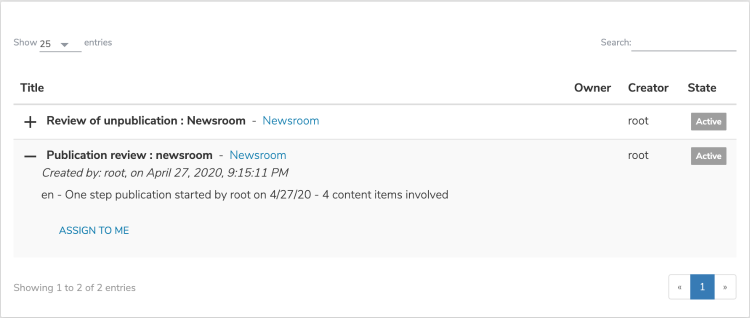
- To start working on the task, click Start.

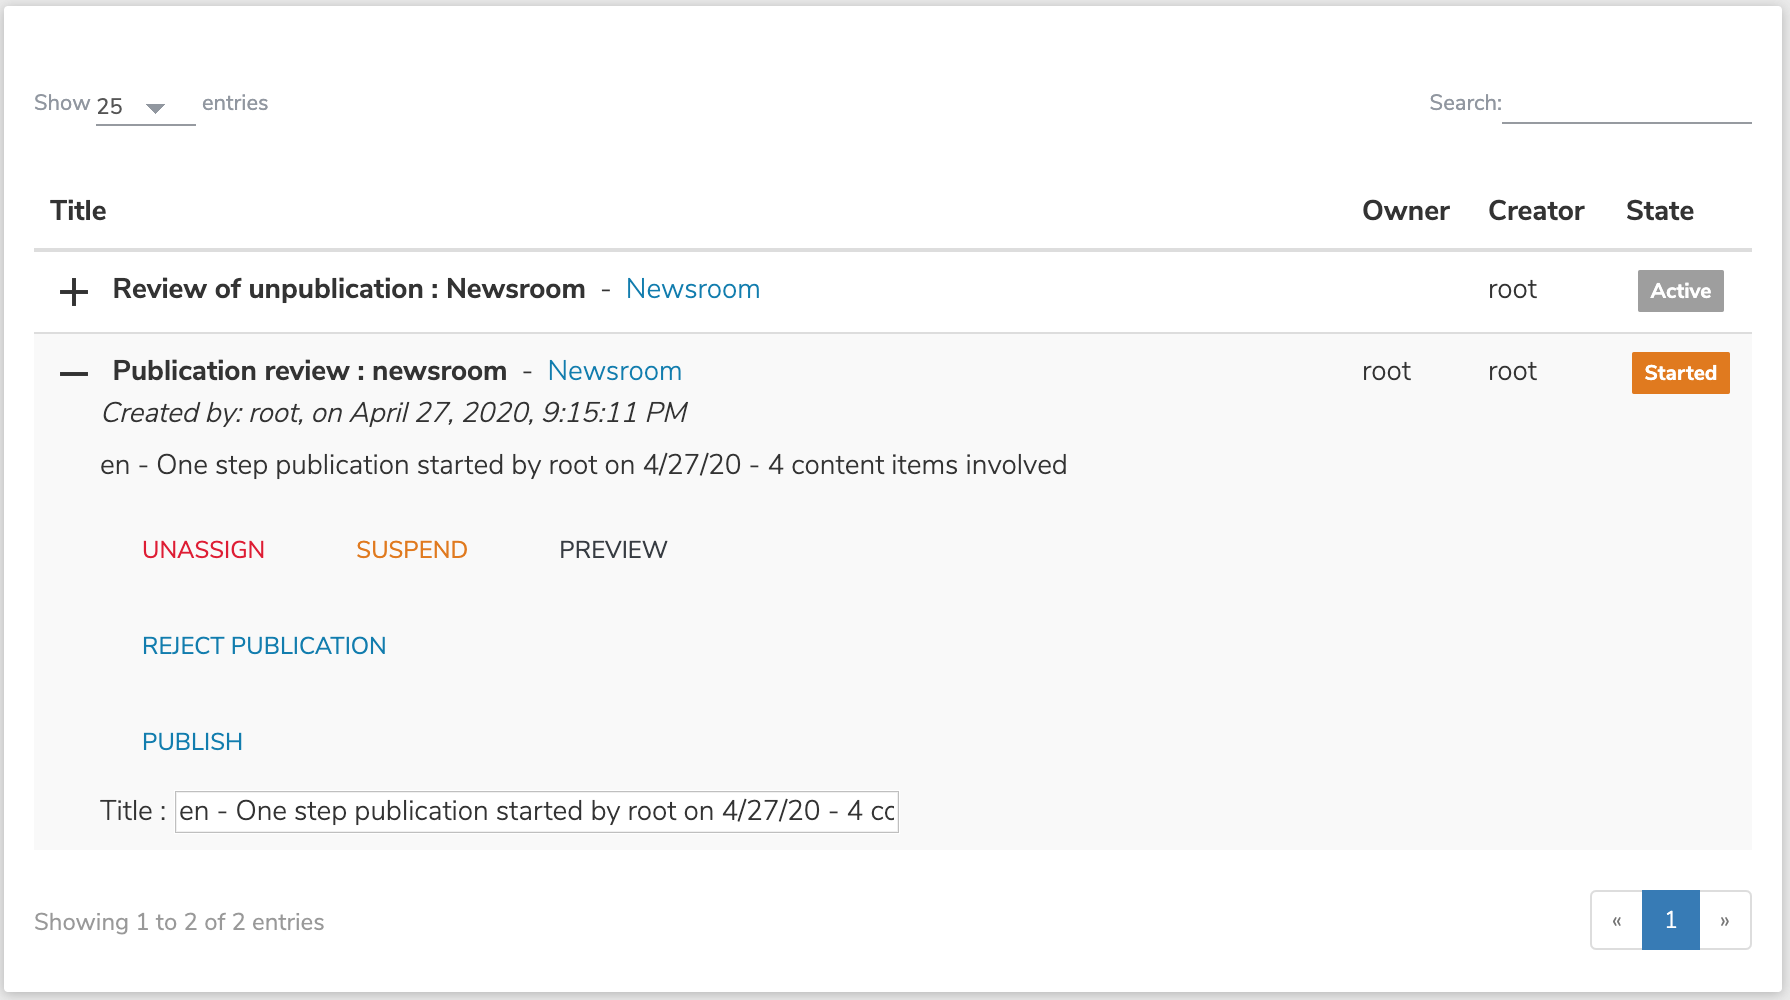
When you start a task, the task options that you see vary depending on the workflow step, options defined in the workflow process. and your platform settings. In the example below, the review tasks is simply associated with two possible choices “accept publication” (the page will then be published) or “reject” (the person who started the workflow will be notified that you have refused the publication)
- Complete the task using options available to you. For example, click Publish to publish content assigned for you to review.

Once a task has been processed, the list is updated and the task is removed from the list.