Managing your environment
Jahia Cloud Environment Manager is the administrative application that you use to create, manage, configure, and monitor your Jahia Cloud environments. An environment is a group of instances configured in a cluster for a specific client, such as Jahia or jExperience. The following image shows the Jahia Cloud Environment Manager home page.

The left panel displays a list of your cloud environments, and provides access to the Jahia Customer Support portal and Jahia Cloud documentation. At the top right, you can open the Jahia site for the selected environment, open Support Tools, and access Datadog. Support Tools is an interface that you use to run commands on your server, such as activating maintenance mode, getting information about the system, displaying thread dumps, and viewing your cache and cluster statistics. For more information, see Monitoring your server for performance. You use Datadog to monitor your cloud environments. Datadog is a Jahia partner that provides platform monitoring and optimization capabilities.
You can use the four tabs at the top of the main pane to navigate pages in Jahia Cloud Environment Manager.
- General
View information about the selected environment, and upgrade, clone, start, stop, and delete an environment, and perform other actions such as swapping a domain or enabling auto scaling. - Configuration
Modify and create properties to customize your environment. For example, you can modify session time-out settings or switch a cluster to maintenance mode. - Nodes
Open, restart and view logs for nodes in your environment. - Backups
Schedule backups for an environment and restore environments if necesssary.
To rename an environment, click the edit button  beside the name for the selected environment, provide a new name and click the save button
  .
.
Logging in to Jahia Cloud Environment Manager
You can get the URL for your Jahia Cloud Environment Manager from your support team.
To log in to Jahia Cloud Environment Manager:
- Enter the URL to your cloud environment in your browser.
- On the Jahia page, enter your credentials and click Login.
If you are a new visitor, the page prompts you to create a new cloud environment. Otherwise, the Jahia Cloud Environment Manager home page displays.
Creating an environment
Environment creation is automated and takes only a couple of minutes. You can deploy the following environments:
- Jahia
- Jahia and jExperience
You can deploy any Jahia module on these environments.
To create an environment:
- Log in to Jahia Cloud and do one of the following:
- If you have not created a cloud environment, click Create my first environment.

- If you are creating an additional cloud environment, in the left panel, click Create new environment.

- If you have not created a cloud environment, click Create my first environment.
- In the Create a new environment page, select Choose for the version of Jahia that you want to create.

- In the Configure your environment page, in General, specify an environment name and subdomain and platform type.
- Environment name
The environment is visible to you when you administer your Jahia Cloud environments and does not display to end visitors of your sites. The name can contain any kind of characters and must be at least six characters long. - Region
Select a region in which to deploy your environment. Select the closest geographic region. - Environment subdomain
An environment key that is used only for internal purpose. This parameter makes your environment available through <subdomain>.cloud.jahia.com and does not display to your site visitors. You cannot change the subdomain name after defining it. - Is this a production platform?
Whether this is a development platform or production platform. Production platforms are very similar to development platforms on Jahia. Both can scale at will, run your websites and deploy your modules. Additionally, production platforms are monitored using Datadog and have the automatic backup and restore service enabled. You cannot convert a development platform into a production platform, but you can copy it into a new production platform and then discard it.

- Environment name
- Under Security, specify Jahia and Tools passwords.
- Jahia root password
The root password for Jahia. You can change this password later in Jahia. This is a sensitive password and should not be shared. The password must be at least six characters long. - Tools password
The password required to access the Tools section in Jahia. The password must be at least six characters long.

- Jahia root password
- Under Nodes, specify the number of Jahia browsing nodes. Browsing nodes are the servers that respond to user page and API requests. The number of nodes that you should deploy depends on your overall traffic and how well your code is optimized. You can easily resize environments after they have been created.

- Click Create environment.
A screen displays progress as your environment is created. Creating a new environment takes between 5 and 10 minutes, depending on the complexity and size of the platform.
Next, you can manage your environment and log in to your Jahia site.
Starting and stopping an environment
You can start and stop an environment when you want to make it unavailable to users. After stopping an environment, you can no longer perform most operations on the environment, such as upgrading or backups.
To start or stop an environment:
- In the left panel, select the environment that you want to start or stop.
- In Environment information, click Stop or Start. For example, the following image shows an environment that is running.
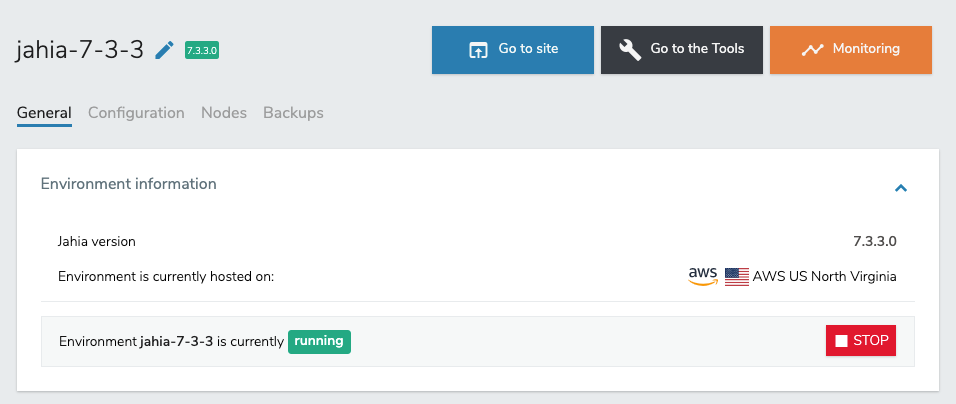
After stopping the environment, the status updates in the left panel and in Environment information.

About upgrading an environment
When you upgrade a cloud environment, you follow the standard upgrade path and can only upgrade to the next immediate version. The version that is available for you to upgrade to displays in General>Advanced options>Environment upgrade, as shown in the following example.

For each software upgrade that contains significant changes (indicated by the first two digits in Jahia version numbers), we release code migration guides to make the code upgrade process as easy as possible. If in doubt, don't hesitate to reach out to your support team for guidance.
The upgrade process differs for development and production environments.
About upgrading a development environment
When you upgrade a development environment that is not in production, the upgrade service upgrades environments without generating any downtime for the end visitor. The service also changes the content-contribution mode to read-only mode for a few minutes. For a development environment, the upgrade service:
- Stops all environment nodes
- Upgrades the Jahia processing node
- Upgrades all Jahia browsing nodes
- Updates the environment metadata to reflect changes such as new configuration entries
To upgrade a development environment, see Upgrading an environment.
About upgrading a production environment
As a best practice, before upgrading your production environment Jahia recommends that you:
- Create a backup of your environment
- Perform the upgrade on copies of your production environment to ensure that your environment and custom modules run as expected
To perform a zero-downtime environment upgrade in production:
- Create a backup of your development environment. For more information, see Cloning an environment.
- Change your production platform to read-only mode. For more information, see Making an environment read only.
- Duplicate your production environment. For more information, see Cloning an environment.
Note: The duplicated environment will already be in read/write mode. - Upgrade your duplicate environment. For more information, see Upgrading an environment.
- Validate that the platform works as expected and check the Datadog dashboards.
- Switch the production traffic to the duplicated environment. For more information, see Swapping an environment domain.
- Delete the old production environment. For more information, see Deleting an environment.
Making an environment read only
Before upgrading your environment, you may need to make the environment read only. In read only mode, users can access the Jahia site and cannot make changes. You can make changes in Jahia Cloud Environment Manager or in Support Tools. Note that the Cloud Environment Manager option is only available for DX version 7.3.0.2 and higher.
To make an environment read only:
- To modify the mode in Jahia Cloud Environment Manager:
- In the Configuration tab, in the Filter field, type
read onlyand press Enter. - Select the checkbox beside Read Only Mode and type
truein property value field. - Click Save configuration.
- Restart your application nodes.
- In the Configuration tab, in the Filter field, type
- To modify the mode in Support Tools:
- At the top of Jahia Cloud Environment Manager, click Go to the Tools.
- In the login dialog, enter
managerfor your user name and provide the Tools password that you specified when you created your environment. - In Support Tools>System and Maintenance, click System maintenance.
- In the System maintenance page, under Read-only Mode, click enable read-only mode.
Cloning an environment
Clone an environment if you need to make a copy of your environment, for example for testing or branching purposes.
To clone an environment:
- In the left panel, select an environment.
- In General>Advanced options>Clone Environment, enter a name for the cloned environment in the Type clone's name field.

- Click Clone the environment.
A message page indicates that the environment is being cloned. When complete, a message indicates that your cloned environment is now available. - Click the close button to close the message page.
Your cloned environment now displays in your list of environments.

Binding a domain to your environment
You can specify the external domains that are associated with an environment so that all the traffic towards the domain gets redirected to the right environment. Jahia has multi-site capabilities, and hundreds of domains can be bound to the same environment or the same site. This specifies the domain address that users can use to access your site.
To bind an external domain to your environment:
- In the left panel, select an environment.
- In General>Advanced options>Domain binding, enter a domain and click Bind domain.

- Click OK in the confirmation message that indicates that binding was successful.
The name of the external domain now displays at the bottom of the Domain binding section. You can also click the trash can icon to delete the domain.

Swapping an environment domain
Swap domains when you need to redirect users to another environment. For example, temporarily redirect users to another environment when you upgrade your production environment. The best practice is to clone your production environment before proceeding with an upgrade, and redirect the traffic to the clone before proceeding with the operation.
To swap an environment domain:
- In the left panel, select an environment.
- In General>Advanced options>Swap environment domains, click Choose your environment and select the environment to redirect to.

- After selecting an environment, click Swap domain.

- Click OK in the dialog that indicates that the swap was successful.
Upgrading an environment
Before upgrading, ensure that you have created a backup of your environment or that your site does not currently have site visitors.
To upgrade an environment:
- In General>Advanced options>Environment upgrade, click Upgrade the platform.

- A confirmation dialog asks you to verify that you have created a backup of the environment that you will upgrade. Click OK. The progress of the upgrade displays.

- When the upgrade completes, click OK in the confirmation dialog.
Your environment has been upgraded and the new version is available to your site users.
Enabling auto scaling
Auto scaling increases the number of servers assigned to your environment when your site experiences a spike in traffic. Servers are added when traffic increases above the threshold of more than 80% for five minutes. When traffic returns to its normal activity level, the additional servers are removed.
Auto scaling ensures that your site visitors are unaffected by sudden changes in overall traffic to your site.
To enable auto scaling:
- In the left panel, select an environment.
- In General>Advanced options>Auto scaling, select Auto scaling CPU enabled.

The number of servers assigned to your environment are now automatically adjusted based on capacity.
Deleting an environment
You can delete environments that you no longer require.
To delete an environment:
- In the left panel, select an environment.
- In General>Danger Zone>Delete environment, enter
delete environmentin the Type confirmation phrase box.

- Then, click Delete environment.

- Click OK in the dialog that indicates that environment was deleted.
The environment is deleted from the system.
About dynamic load balancers
Load balancers enable you to restart any node on a cluster without generating downtime and to deploy configurations to a cluster one server after another. Load balancers are automatically installed for each new environment. These load balancers are composed on nginx servers and a layer of automation ensures that Jahia Cloud does not redirect traffic to a server that is unavailable.
If no nodes are available to answer visitors page and API requests, a Jahia page indicates that the requested website is in maintenance.
About code deployment
Jahia comes with great built-in code deployment capabilities and allows for cluster module deployment from APIs or file upload. To learn more, see Jahia module deployment explained.
There is no restriction whatsoever on the type of modules, and built-in and custom integrations that you can deploy on Jahia Cloud.