ReactJS and Jahia: an example with TypeScript and a Pokedex
Question
Goal
The goal of this training is to have a Pokedex available in jContent thanks to ReactJS and the new capabilities of Jahia User Interface.

Solution
Prerequisites
-
IntelliJ IDEA (or another IDE compatible with ReactJS)
-
Install NodeJS: https://nodejs.org/en/download/
-
Install Typescript: https://www.typescriptlang.org/download
-
Install Jahia 8.2.1.0
-
Install the module pokedex: https://github.com/Jahia/pokedex
-
Import the website pokedex: pokedex_export_2022-11-23-20-17.zip
For each part of this training, there will be the related branch in the Github repository.
Development
Getting started
ReactJS is a Javascript framework to help building user interfaces.
In our case, we will be using the syntax ECMAScript 6 (ES6) and, to have a code more strict and easy to read, we will be using Typescript.
The file package.json
This file allows configuring the dependencies for the Node package manager (and other things).
Add the file package.json at the root of the module.
The file tsconfig.json
This file allows configuring Typescript.
Add the file tsconfig.json to the root of your module.
Open the file and you should have something like that: 
As you can see, we're setting the value react for the property jsx. Consequently, our React files will have an extension .tsx.
The part 
defines where the ReactJS files will be. If this folder doesn't exist, create it.
Webpack
webpack is a static module bundler for modern JavaScript applications. When webpack processes your application, it internally builds a dependency graph from one or more entry points and then combines every module your project needs into one or more bundles, which are static assets to serve your content from.
Add the files ./webpack.config.js and ./webpack.shared.js.
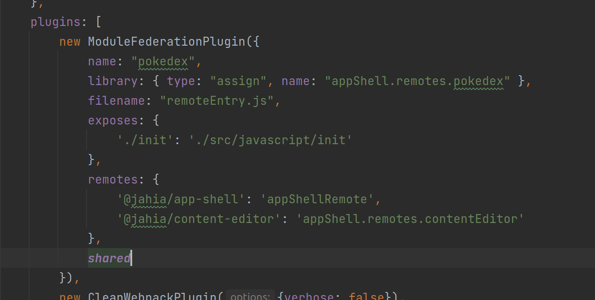
webpack.config.js
Some important properties:
-
output.filename: file that will be generated,

-
ModuleFederationPlugin:
webpack.shared.js
Additional configuration used in the previous file.
Installing the dependencies
Execute the command following in the root of the module:
npm install
Build, deploy and test your module
As usual, build and install the module.
Then you can create a website and add this module as dependency. As a result, you should have that: 
During the development, I advise using Chrome. Do not forget to activate the developer tools and to check the cache is deactivated: 
Hooks
A hook is a special function that lets you "hook into" various React features.
State hook
This hook allows setting a state on a variable: A state is the data a stateful program is managing. info. In JavaScript, a variable is a memory for storing data. And the variable's value is the state. In other words, a variable is like a diary, while a state is the data logged into that diary
React Hooks for Beginners – Learn to Use the useState Hook in 10 Minutes
Now, add the files:
-
./src/javascript/models/pokemons.ts: class representing a Pokemon
-
./src/javascript/models/mock-pokemons.ts: data representing a list of Pokemons
Then modify the file App.tsx so the number of Pokemons is displayed (correction there)
Effect hook
The Effect Hook lets you perform side effects in function components: useEffect is a tool that lets us interact with the outside world but not affect the rendering or performance of the component that it's in.
The React useEffect Hook for Absolute Beginners
Now, use this hook to initialize the value of the constant pokemons (correction there).
Virtual DOM
When returning the "HTML" code to render, it has to be included between one root tag.
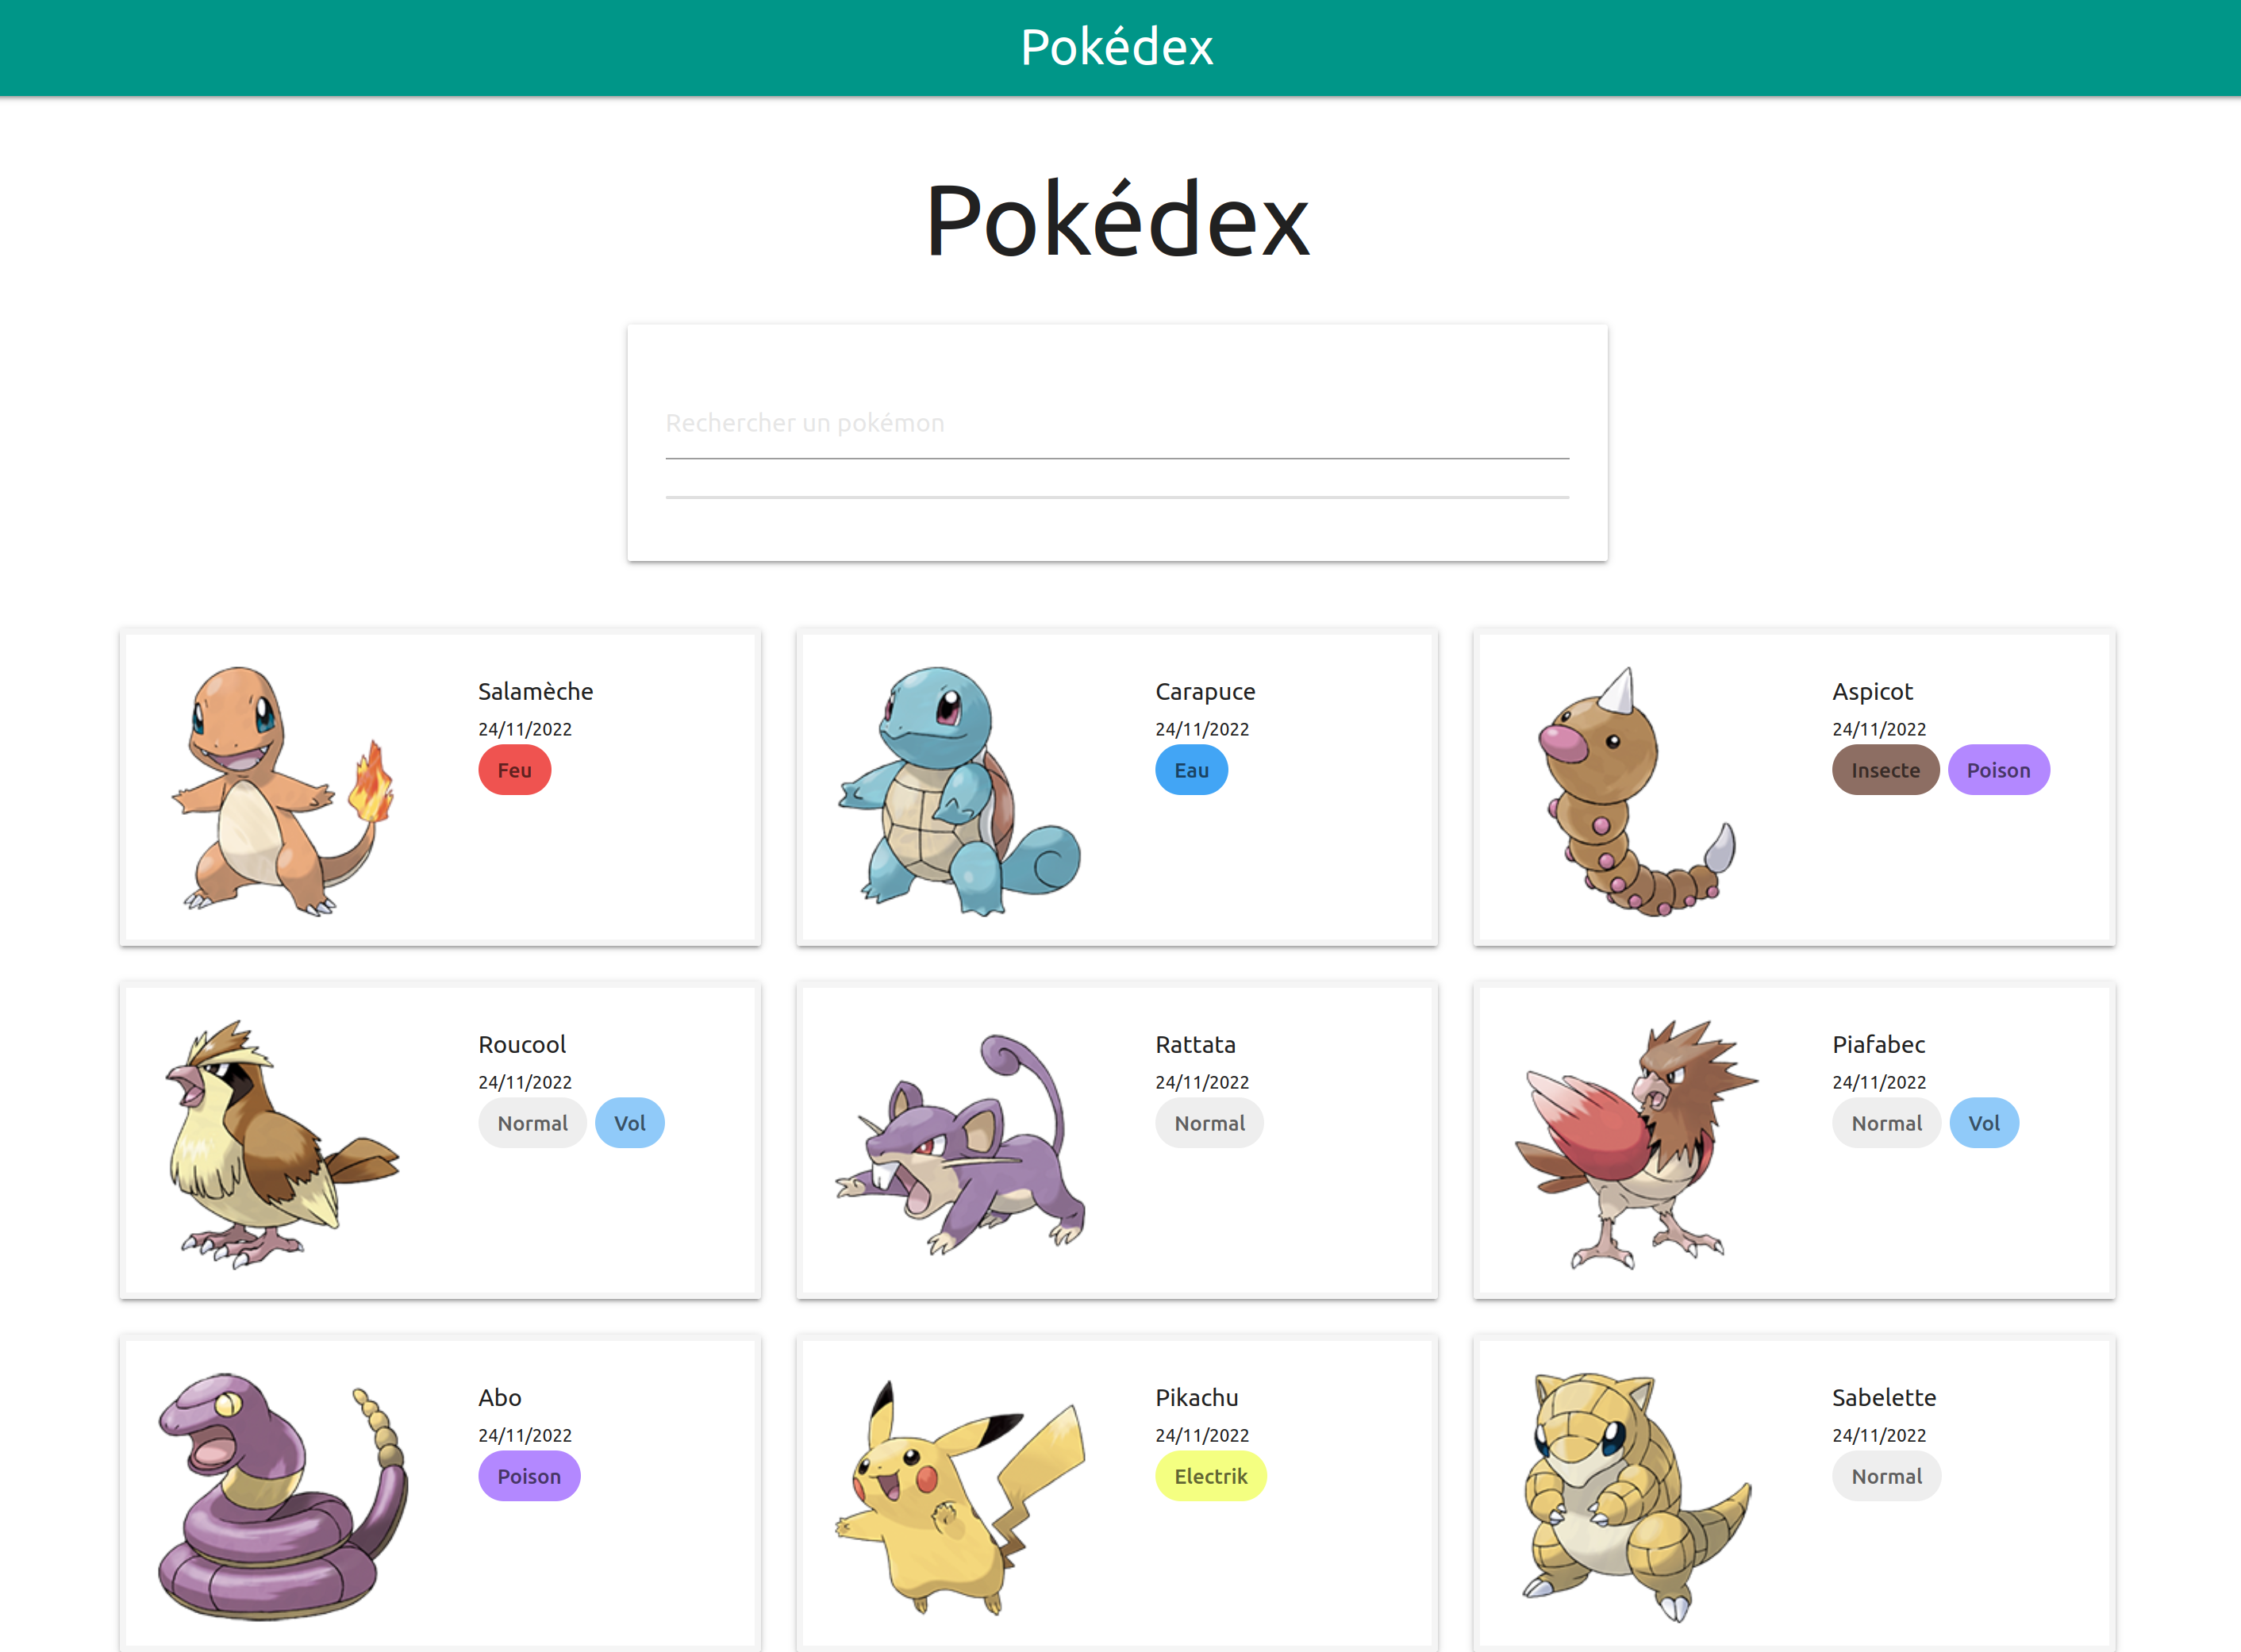
Modify the previous code to display the list of Pokemons with their information (correction there).
If you don't have a scrollbar, try to put a style on the root tag.
The Props
Props stands for properties and its usage is optional. It's being used as arguments for React components.
We're going to create now components to have a model like that: 
Correction can be found there.
CSS: usage of Materialize
Our current Pokedex is not very nice to look at: 
Let's try to have something more modern:
-
Download the CSS Materialize from there and put in ./src/javascript
-
Unfortunately, this library seems to be in conflict with Jahia UI so here is a library with the necessary elements from Materialize
-
Import this CSS in the pokemon-card.tsx
You should now have something like that: 
Correction can be found there.
Interactivity
Now, let's add a green border on the pokemon-card, then, when it's done, let's modify this color when the mouse is over the component then green when it's not.
Correction can be found there.
Computed properties
Now, let's display the type(s) for each Pokemon.
Then, to add some difficulty, let's give a specific color for each type (cf this code to get a color from a type).
Here is the result: 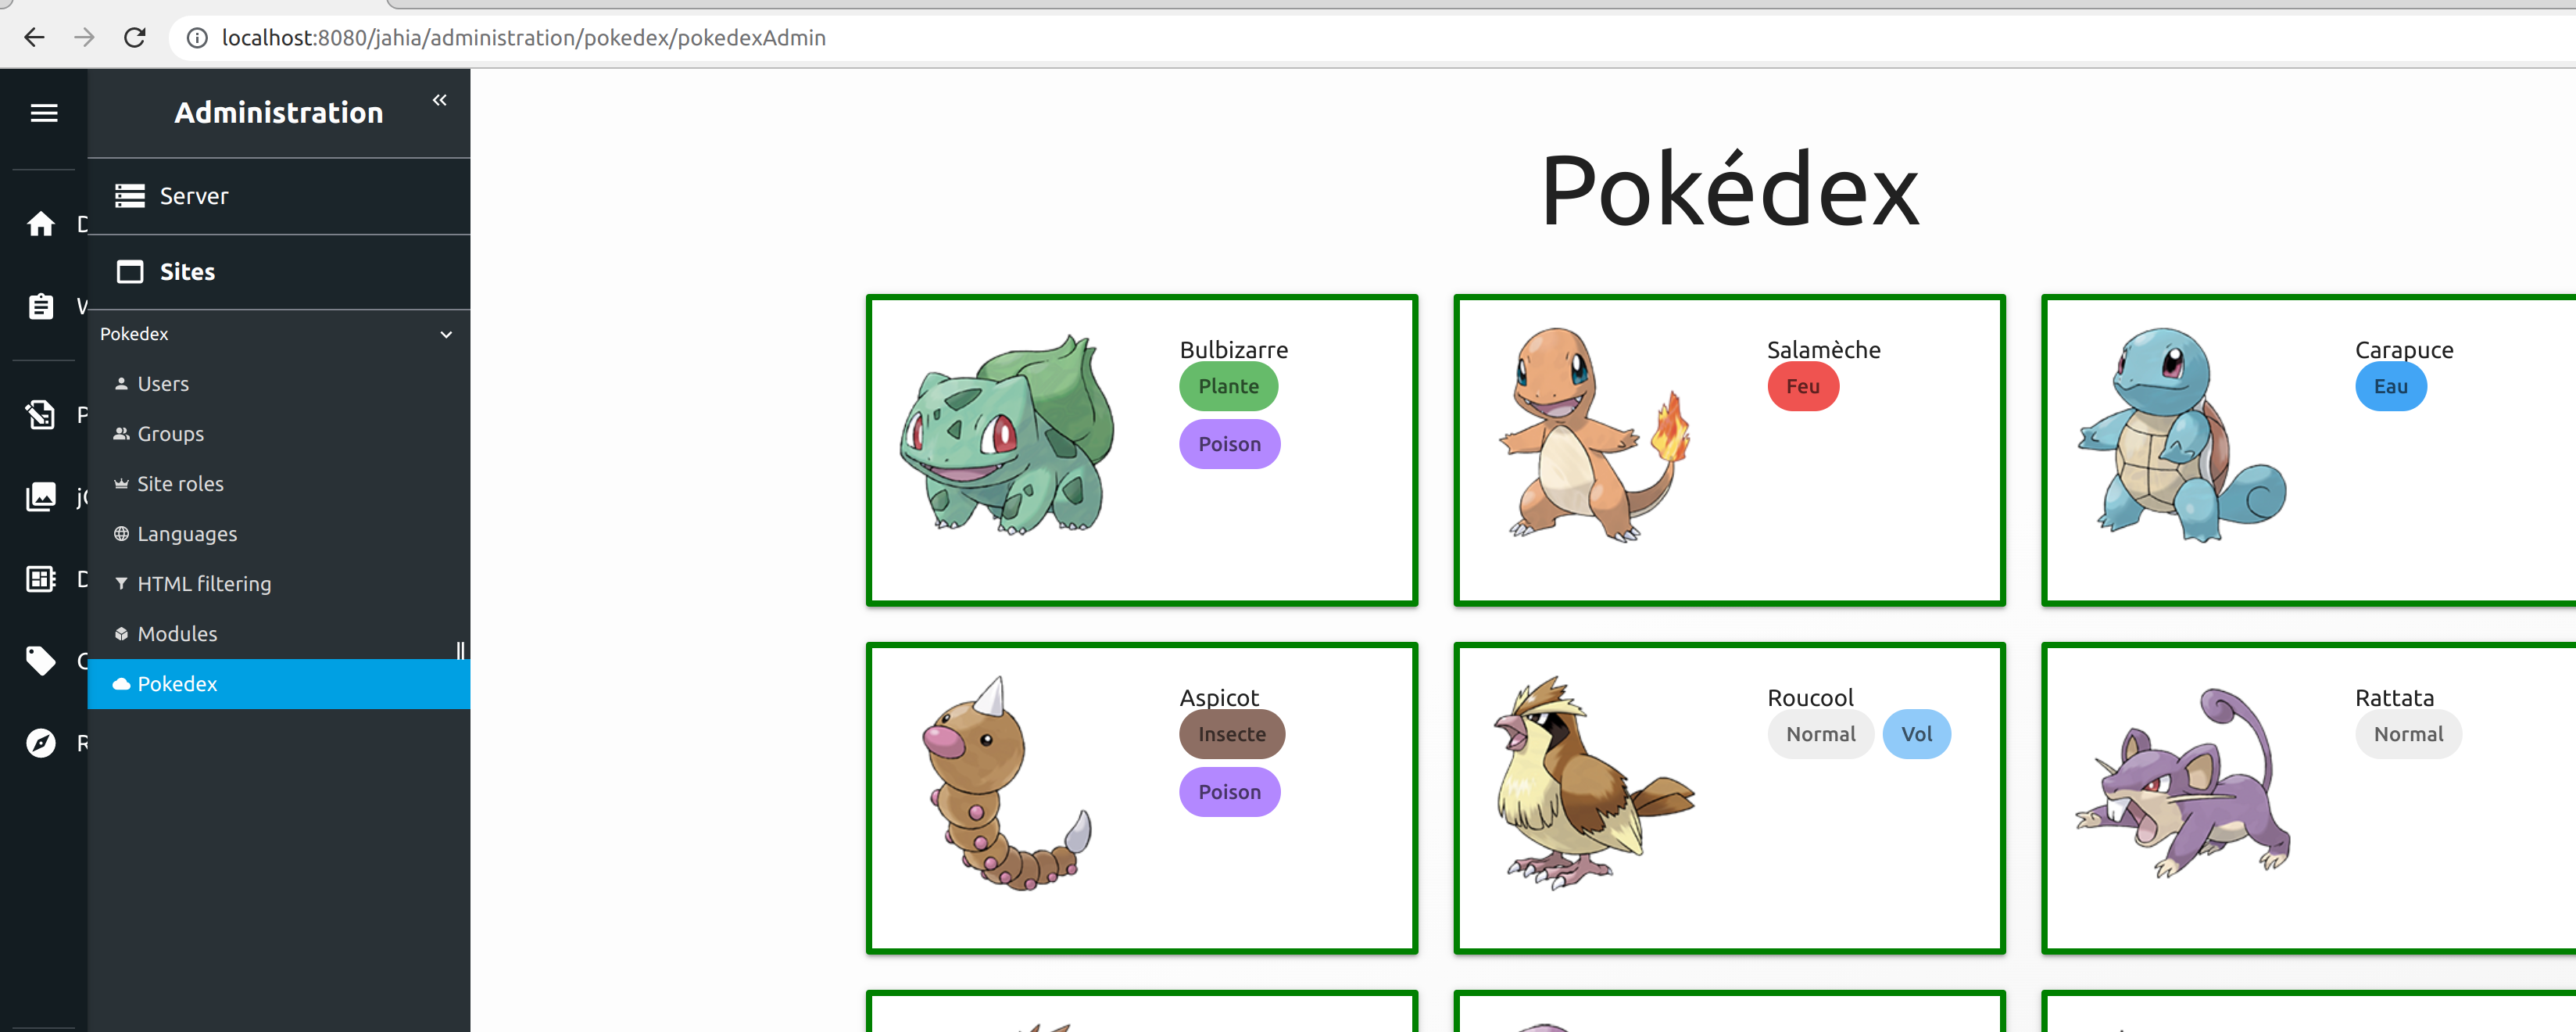
Correction can be found there.
Personalized hooks
A personalized hook is a function, starting by the term use, that can call other hooks.
It can be used to factorize some behavior.
Building Your Own Hooks – React
In our case, we are going to gather the following code into a personalized hook named usePokemons: 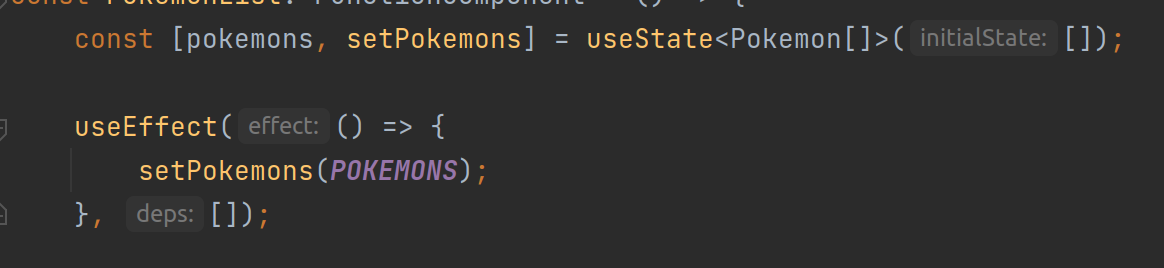
The Routes
The new Jahia UI allows the addition of our Pokedex in different places (cf this documentation).
To get a dynamic list of these different places, you can execute the following code in the Javascript console:
window.jahia.uiExtender.registry.registryDon't hesitate to study the content of this object, especially the properties set for the Pokedex but also the ones set for other menus (for example, the property requiredPermission).
For the moment, it's being added to the site settings thanks to the following code: 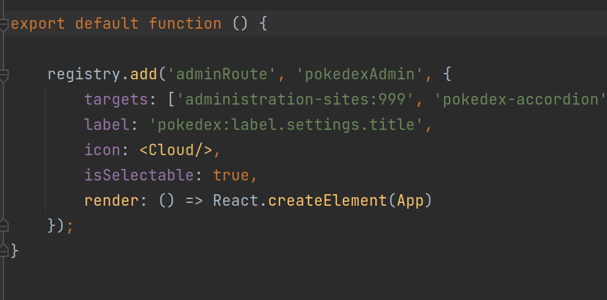
Now, the goal is to add it in:
-
the server settings
-
the global interface (like jContent, Page composer, etc)
-
the user dashboard
Correction can be found there.
Execute GraphQL requests
Until now, we were using a static JSON to retrieve a list of Pokemons but, of course, we can retrieve the Pokemons thanks to Jahia.
The goal of this current chapter is to execute GraphQL queries against Jahia to populate the Pokemons list:
-
Thanks to the GraphQL Playground (JAHIA_URL/modules/graphql-dxm-provider/tools/graphql-playground.jsp), create a query to retrieve the nodes under /sites/pokedex/contents/pokemons. The following documentations are useful:
-
Then, declare this query as a constant, in the file ./src/javascript/graphql/queries.ts, by using gql from the library graphql-tag
-
Then, modify the file ./src/javascript/hooks/pokemon.hook.ts to use the hook useQuery from the library react-apollo to execute the GraphQL query and retrieve the Pokemons, instead of using a static JSON.
Correction can be found there.
Navigation
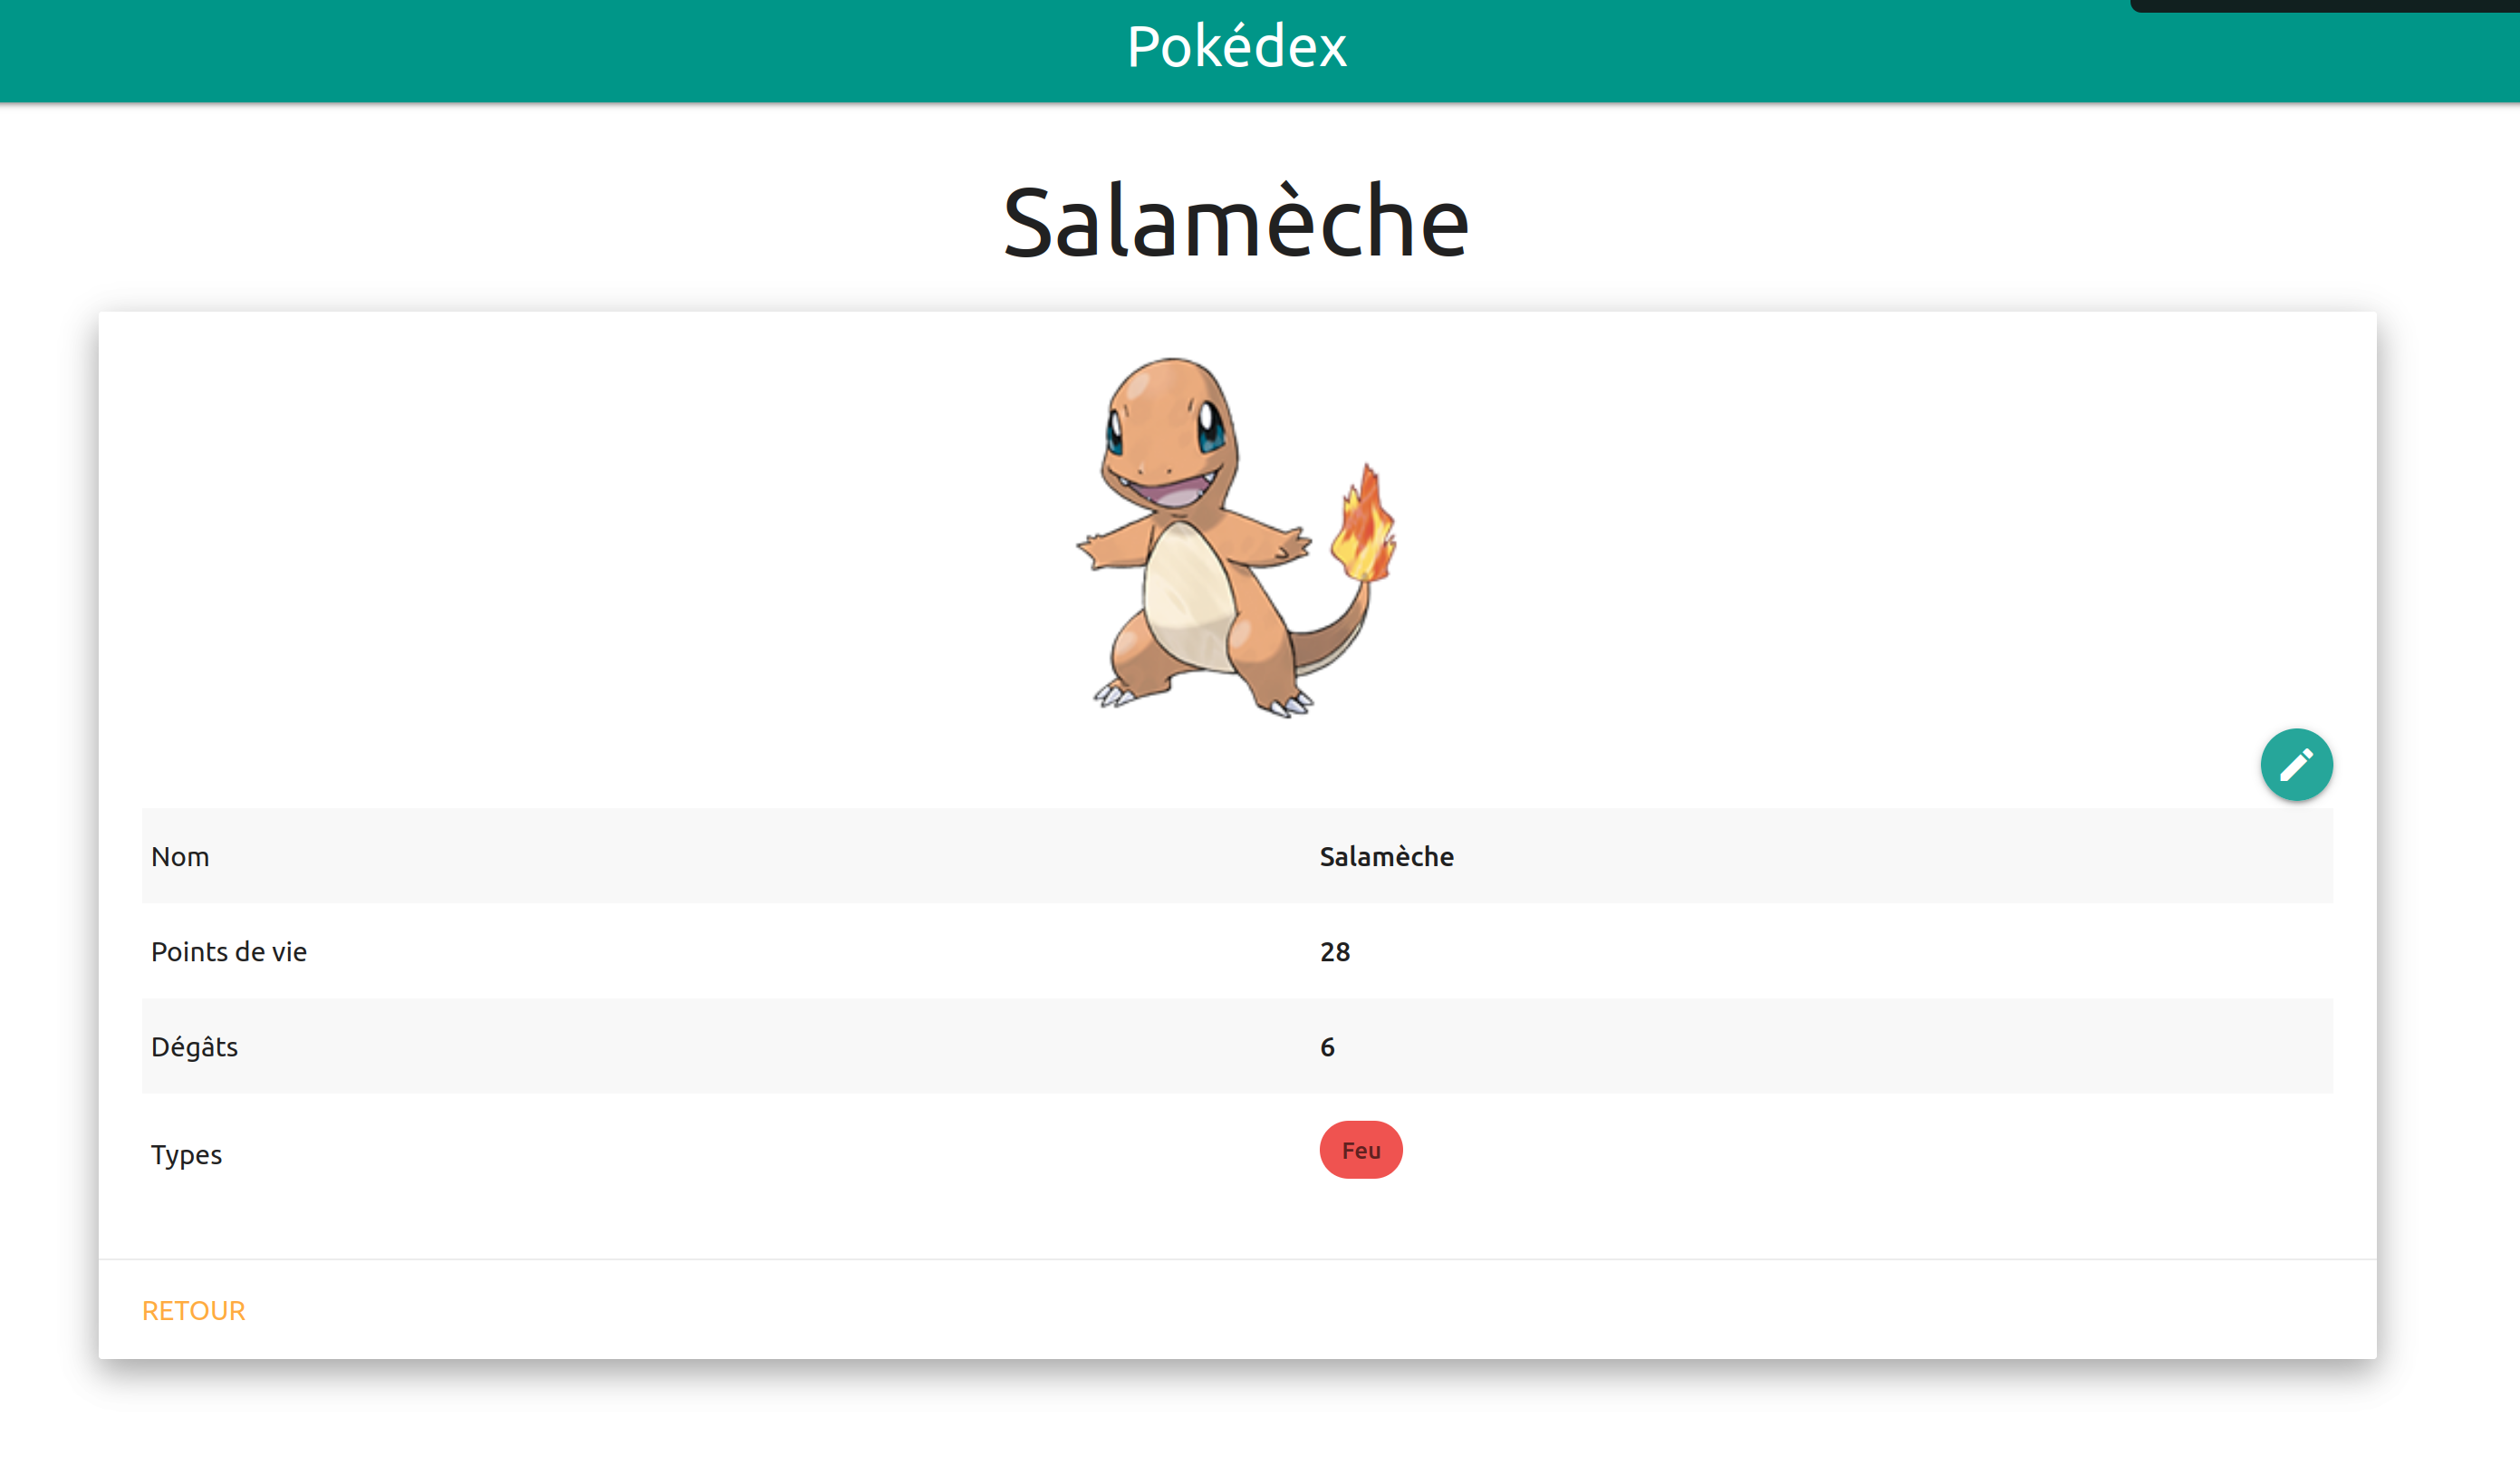
Now that we're able to display a list of the Pokemons stored in Jahia, we're going to display the detail of a specific one with a single click but first, please have a look this example: https://reactgo.com/react-router-usehistory-hook/
Then:
-
Create a component that will take the Pokemon id as a parameter and will display its details (file ./src/javascript/pages/pokemon-details.tsx). You can take as an example what has been done with the Content Editor.
-
Declare the new route to this page (file ./src/javascript/register.tsx)
-
Modify the pokemon-card so, on click on a Pokemon and thanks to the usage of the hook useHistory, we display its details (file ./src/javascript/pokemons/pokemon-card.tsx)
The Forms
The idea is now to do a custom form so we can have a full CRUD system without having to use jContent/Content Editor
So:
-
Let's add some GraphQL queries to update/add/delete a Pokemon (file ./src/javascript/graphql/queries.ts). Don't hesitate to use the GraphQL playground in the Jahia tools to test your queries.
-
Create a form (file ./src/javascript/components/pokemon-form.tsx)
-
Define the pages to edit and add a Pokemon:
-
Don't forget to declare the routes to these two pages (file ./src/javascript/register.tsx)
-
and to allow the addition in the Pokemon list: ./src/javascript/pages/pokemon-list.tsx