Profile Data & Analytics
Profile Data & Analytics
Jahia combines Content, Data and Applications to drive Digital Experience; this enables Content Marketers to make proactive decisions about content and gain insight from those decisions based on analysis of the data generated by visitor browsing habits, interactions, and goal tracking.
At the heart of jExperience is the Customer Data Platform (CDP) jCustomer(powered by Apache Unomi. jCustomer is the engine that drives the jExperience marketing suite, tracking information about visitors from browsing sessions and content interactions which combine to form a customer profile that can be applied across your entire digital experience. Data from interactions can can be viewed in the context of platform goals and campaigns, as well as used to trigger actions, segment your audience and inform the personalisation strategy of your wider web experience.
In this tutorial, you’ll learn about the data capture and analytics capabilities of jExperience and jCustomer. You’ll learn about built-in analytics, creating logic to track goals and campaigns as well as how to use multivariate analysis and segmentation based on profile data.
Before you begin
Whether you are in our free cloud trial, or working in a system you have deployed, there are a few things you’ll need to get started:
- Access to a deployed Jahia system, in your own environment or on our Cloud trial system
- User id and password with permissions to edit content and personalization.
- At least one template set and some images, we provide these with our demo installer as well as in our free cloud trial environment.
- Complete Adding a new page and Personalizing experiences tutorials or have at least two pages, a "home" page and a second page that you can use to set interests, define goals, segments, rules and more.
Ready to begin?
What you will learn
- How to apply scores to your content, which can be used to personalize & segment, as well as how to view these scores on the profile level.
- How to start tracking a goal to help you understand the effectiveness of your personalizations.
- How to segment your users based off of this setup in order to better understand your audience breakdown.
- How to view the profile data of the users interacting with your platform, personalizations & goals.
- How to add a custom property to further expand your understanding of your customers.
- How to use rules to populate your properties.
- How to create consent tracking that can be used to influence the personalized experience across Jahia.
Helpful terms
Here are a few things you should know about before you get started:
- Interest value- a key/value pair you can assign to the content & pages in Jahia. As visitors view content, with identical tags, the values of the interest for them increases in the visitor profile. For example: Cats: 5, Dogs 10 on a scale of 100.
- Goal - a specific event which can be tracked and measured by Jahia e.g. a form completion.
- Segment - a set of users grouped based on conditions defined by you.
- Property - one of the fields tracked by Jahia for every profile e.g. first name, last name, etc.
- Rules - conditional logic which can be defined on Jahia to perform actions. For example:If X, then Y.
- Consent - a permission granted by the visitor to control what is or is not shown to or tracked about a visit in Jahia.
Getting started with jExperience setup
jExperience exists to help you learn more about your visitors, their interests, their behaviors and ultimately the return on investment (ROI) of the content you provide. jExperience includes an optionally deployed Customer Data Platform, jCustomer powered by Apache Unomi and provides you with a range of configurable elements, from goals, campaigns and segments to rules that can trigger internal and external processes, as simple as sending an email and as complex as you can build. The first step is making the most of jExperience is to begin tagging your content with interests and setting goals to help as you build up segments and rules.
Lets begin!
Adding an Interest Value
Interests are By creating interest tags with assigned values (scoring weights) on pages and content, visitors who view the content will begin to accumulate interest values in their profiles.
When using interests it is recommended to have a scoring strategy and scale for the values used. For this tutorial we will use a scale of 100 in increments of 10 with 10 being a low weight and 90 being a high weight.
Add interests to a page
- Navigate to the page composer and select a page you want to attach your interest values to. Right click and choose to edit the page.
- Scroll to ADD INTEREST VALUES and click the toggle button to enable interests.
- Click ADD
- You can now assign interest values to your page (this process works exactly the same way for content too). Interest values are in the format of tag:score e.g. page:10. Add two interest values now of score 10.

- Click Save and exit the editor.
We’re going to be using these interest values later in the tutorial. For now let’s imagine that, having set up our personalization & values on this page, you now wish to track how successful your personalization is in getting your users to navigate to your site homepage. Your next step would be to set up a Goal.
Setup & Track a Goal
Navigate to the Site Dashboard by clicking the jExperience button in the navigator.
Create a goal
The Site Dashboard provides a visualisation of the sessions on your current site, contrasting “all” visits against “new” ones. The timeline for this graphic can be set by clicking the standard week/month/3 months/6 months/1 year buttons - alternatively, you can set a custom time period by clicking the ‘custom’ button and inputting your desired date range.

The main body of the Dashboard embeds visualisations for site specific goals - these are metrics that track conversions across the various different ‘goal’ types that can be defined.
In this tutorial, we want to create a goal to help understand whether the personalization created on your new page is effective in driving traffic to the homepage.
- Click the + icon in the upper right corner to begin the goal creation process.

- Name your Goal

The goal types listed come from the integration of jExperience in Jahia and will occur by default based on visitor interactions with your Jahia based sites and applications. You must have content to create a goal. - Select the Funnel Goal type. Note that new fields will appear in the Goal interface.

- Use the page picker to set the start page and end page of your funnel. Use the page you just added interests to as the start page and set another page such as Home as the target page.
- In this tutorial we will use My First Page as the start page and HOME as the target page.
- Click Save changes. You will see a new tile appear on your Dashboard page.
The new Dashboard tile shows the number of engaged vs converted profiles in the context of the defined goal, but since you have just created this goal, it has no data.
Test your goal
To improve your experience, you will need a few visitors.The goal you have set up is a funnel goal, so all you have to do to complete it is land on the page you identified as the start page and then go to the page you identified as the target page.
- Return to page composer and publish your start page if necessary.
- Navigate to your START page using the Preview>Live options at the top of the screen. Note...data is not collected in preview mode, you must use Live.

- From the live view of your START page, navigate to the start page, if you cannot see your new page it will be available from the drop down arrow at the right.

- Click to navigate to the HOME page, or whichever page you have selected as your target.
- Switch to a new browser or incognito mode, View the START page again in LIVE and DO NOT navigate to home.
Return to jExperience to see your data.You now have at least 2 for in, and 1 for out indicating conversion, that means you had two visitors and one of them met your goal criteria.

Explore goal reports
The goal report provides additional insight into what is happening with your goal over time as well as since it began running. The goal report is also where you go to edit your goal criteria, perform maintenance etc.
- To explore the report, click the ‘View Report’ link in the bottom right corner of the tile. At the top of the report is the activity over time for the goal

- Next you will see the metadata about your goal, name, type, description and specific settings.

- An aggregate view of your visitors, success and conversion rate appear in tiles

- Quantitative and Performance analysis follows, with options to filter and sort using the properties defined as part of your jExperience Properties.

Hit the back button to exit out of the Goal Report.
Segment your Audience
Now you have defined some interests and a goal, it's time to start using the data to segment the audience. Segmentation is how you divide your visitors into groups based on common attributes and is useful operationally for personalization and improving interactions as well as strategically as you analyze behavior of your visitors and performance of your content.
To get started, navigate to the Profiling tools menu item, expand the menu and click on Dynamic Segments. This dashboard provides an overview of all the segments currently defined on your Jahia instance. There are two default segments defined for you - contacts & leads.

To build a dynamic segment it is important to understand the information you have available.
Using visitor information to define segments
In the segment builder we have a few different conditions available to create the logic which will drive membership:
- Behavioural - this can be a time based event, a profile interest (an interest value score), whether the user is engaged in a campaign, has completed a goal or viewed a certain number of pages on your site.
- Profiling - this is a conditional based off of membership another profiling tool such as a core plan or static list, as well as other segments.
- Visitor Property - this is a conditional revolving pattern matching any of the properties Jahia tracks against each profile (including custom ones you define).
Create a segment
You can define as many conditions as you want using And/Or connectors. You can also define whether the segment is active using the enabled checkbox as well as shared i.e. available across all projects or just the one you’re building the segment in.
- Click the + in the upper right corner to create a segment
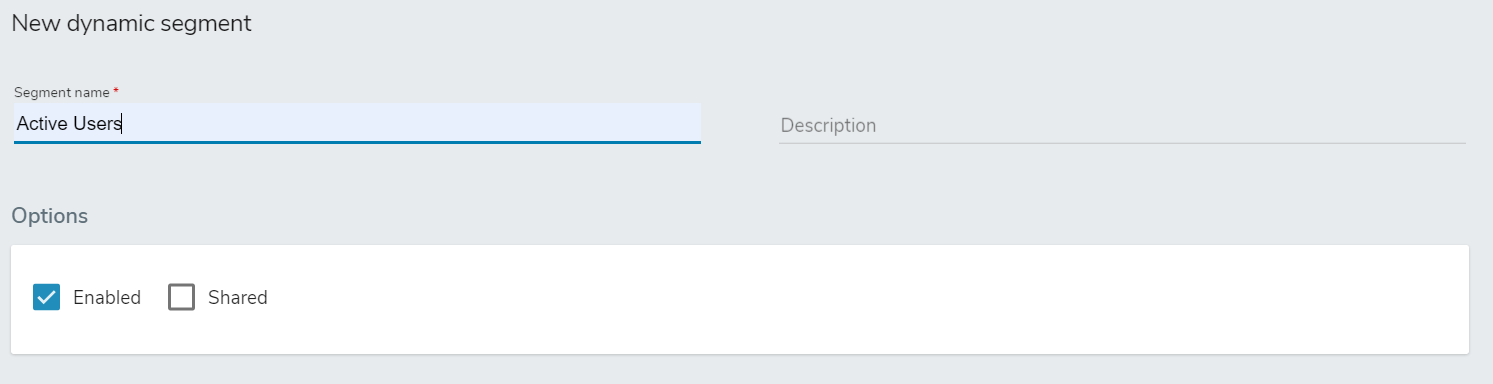
- Name your segment e.g. Active Users
- Add a description (optional)
- In the options section keep the Enabled option checked. This option is available to allow you to deactivate segments without deleting them.
- Next you will use the interest information you set up in the first step of this tutorial.

- Click the Behavioral button to set the first condition. Select Profile interest from the options available.

- Type in the name of the interest you used in step 1 and the value 9.

- Click the AND button to add more logic. Set the second condition as a behavioral> goal match to the goal you defined in Step 2.

- Click save changes once you’re done
You can edit your segments further with the pencil icon and see which users are segment members using the person icon.

View your Profile Data
It’s now time to see how your setup looks from the perspective of a user profile. The jExperience menu is split into two parts, Projects, where you have worked on the previous steps, and Global. Jahia allows you to create multiple site and application projects within the same environment, therefore the user interface groups functionality into things that apply to specific projects and things that apply to the whole system. As you have seen, interests, goals and segmentation are set up specific to a project. The Profile however is global, allowing you to track interactions across all projects.
Before you begin
From the jExperience menu, click Global. If you do not see this menu item, contact your Jahia administrator to have access granted.

Hint: Click Page Composer on the left navigation bar, browse page tree to your page and look for the published badge in the top right corner

The Profiles interface
From the jExperience>Global menu navigate to Audience>Profiles. The All visitor profiles pane provides an overview of all visitors, you can search for a specific visitor, sort by ID and last visit, and edit the profile or see which static lists it is part of.

Click the Pencil icon for a profile to open up that visitor’s profile.
Profile Properties
The Visitor profile pane gives you an overview of all the property values you have available for a specific visitor. Properties are organized as cards, you can expand and collapse to see the properties that are part of each card grouping. Some properties are cards are created for you by default, you can add custom cards and properties.

In the upper right corner is a profile identifier for visitors who have a login to your site/application you will also see the user account properties and the first and last visit dates. Click the ellipsis to see the consents granted by that visitor.
The Visitor profile interface provides you with Analytics and Profiling information. Let's examine Analytics next.
Profile Analytics
The analytics tab provides insight into the profile engagement across your digital experiences. You can view these metrics for all the sites running on your platform or just the current site. Built in analytics allow you to view your visitor’s activity over multiple time frames. You can expand or collapse sections showing Pages viewed by tags, Campaign tracking, Goals and Visitor sessions.
Based on your activity in this tutorial, you should see at least one goal conversion and one or more visitor sessions (a session represents a period of activity).

Let's switch across to the Profiling section by clicking it at the top of the page.
Profile Profiling
The profiling tab provides an understanding of how the visitor’s behavior has been profiled based on the interests, scores, dynamic segments and lists you have defined. The Interests tab breaks down the different Interest Values assigned to the given user profile - you should see the values you created at the beginning of the tutorial.
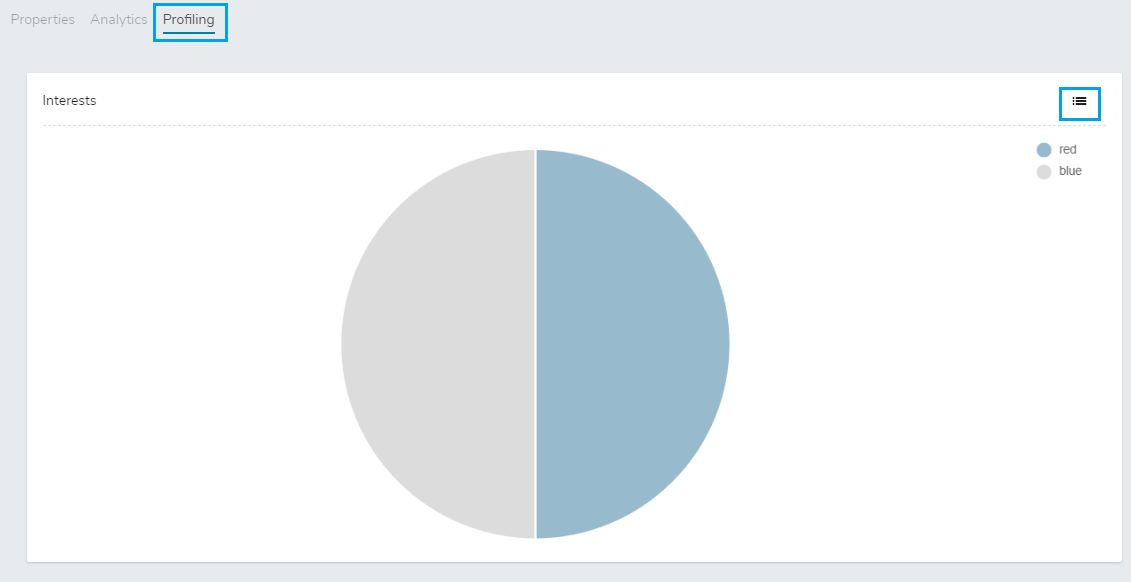
The default view provides you with a simple chart for interests, this can be changed to list view.

The Scores tab lists any Scoring Plan a user is a member of as well as their score within the context of the plan, the Dynamic Segments tab lists any segments the user is a member of and the Static Lists tab shows membership of any lists.
Add a custom property to the profile
By default Jahia provides a preconfigured list of properties, grouped into cards, for the profile definition. To change or add properties navigate to jExperience>Global>Settings>Profile Properties Manager.

From the Properties Manager home page, you can see every Card (the user defined groupings for each property) as well as the Properties contained within each Card. To edit or delete an existing property/card, click the Pencil or Trash icon. Use the + symbol to add a property.
Create a new property card
Let’s start by creating a new property card with a new property
- Click Create new card
- Type in a name, “My Custom Properties”.
- Click Ok
- Scroll to the bottom of the Profile Properties Manager to see your new card.

Create a new property
Let’s create a custom property called User Type. Mandatory fields for a property are property Id and property name. The data type for your property can be text, boolean, date, email or number, and you can specify if you would like the property to be multi-value (useful for form selections that allow multiple responses etc).
- Click the + in the upper right corner of your new card.
- Set your property id to userType
- Name your property userType
- Set it’s type to text
- Click show options, this opens up a variety of options for the property you are defining. This can be whether its read only ( i.e. static), whether its hidden within the wider profile page of the user, whether it is a long text, a personal identifier (important for GDPR), whether the content of the property can be mapped via the Forms tool within Jahia, whether the property is displayed in the summary of every profile and finally, whether it can be filled via autocomplete.
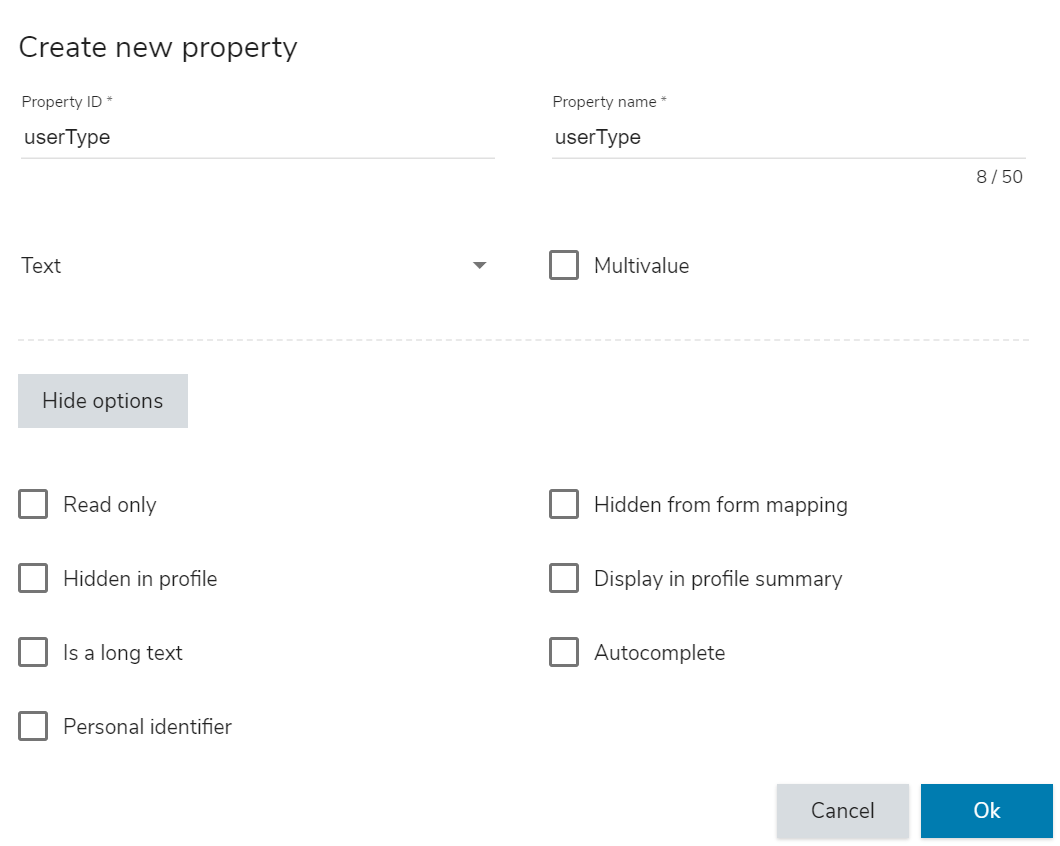
- Leave all option values blank and click ok.

Now that you have a custom property, let’s create a rule to populate it.
Create a Rule to Populate your New Property
Navigate to jExperience>Global>Integrations>Rules. The rules dashboard may be empty on your system, but not for long!

About Rules
Rules are used to define which actions, including property updates are associated with specific events in your system. Rules have three types of information required.
1.When they are triggered. You can use them to react to a goal fulfilled, a login, a consent change and more. For a list of event types you can use visit Creating rules on events in the Academy.
2. Who the rule applies to. A rule may apply to any visitor, or only to a specific segment.
3. What happens. You can set a profile or session property, send an email or add a visitor profile to a list. With Jahia StackConnect you have options to execute a variety of third party processes, see Jahia StackConnect for more information.
Create a rule
Let’s create a rule to fill in the custom property you created:
- Click Create a new rule
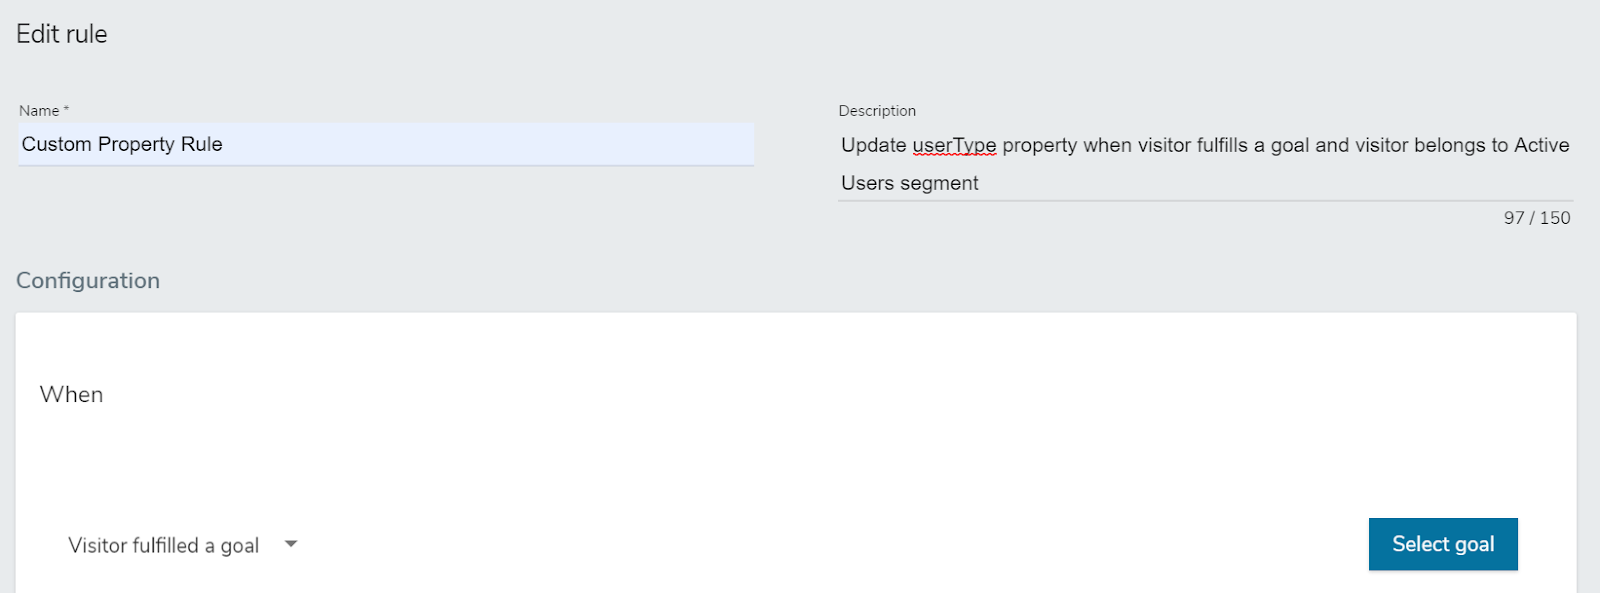
- Name your rule e.g. Custom Property Rule
- In the When section, choose Visitor fulfilled a goal. Select the goal you created.
- In the Who section, choose Apply to a specific segment, select the segment you created.

- In the What section
- Check the Set profile/session property box
- Choose the custom property you created
- Type in the text value “Active User”

- In the Status section, set the rule to active
- In the options section, for the Priority, type “1”
- Click Save rule

Test your rule
To test your rule, you will need to fulfill the goal event again so that your rule can trigger. Repeat the steps from Test your goal before returning to jExperience>Global>Audience>Profiles to see if your custom property is updated.
- Choose the most recent visitor profile, click edit to expand.
- Scroll down to see your custom property card, the custom property should be set as Active User.
