Template Sets
Website Templating
Jahia enables the ability to design templates for generating custom web pages.
Templates allow developers to benefit from the reuse of static web assets and their elements.
What is a Template Set?
It is a set of pre-designed web page skeletons.
These sets are used by the render service to dynamically generate web pages. When creating a page in edit mode, the content editor selects a template from the Template Set list, which sets the page layout. The content editor has the option to change this template later, which updates the layout of the page accordingly.
A template usually contains embeded elements common to most pages of the website: header, footer, main menu, etc.
The following two webpage examples will be referenced in the following sections below:


Rows and Columns
Templates are constructed from a grid layout which defines a page structure using rows and columns. Note the outlines of the example pages:


Areas
In Jahia, the webpage rows and columns are grouped into "Areas". Below are the Areas for the example pages:

Creating an Area
On a template, activate a templating area and add content of type “area”.

Content contribution options in the edit window:
- Sub content view: This field sets an override view for the contributed content in that area
- Select allowed content types in that list: This field specifies the type of content that can be contributed in that area
- Define the maximum number of items allowed in the list: Specifya maximum for content items that can be contributed in that area

HTML Document Structure
When put together, a representation of the page templates can be created:

Content contribution and editing is reserved for Template Areas.
The HTML code outside of these areas is shared across all pages of the website.
Creating a new Template Set
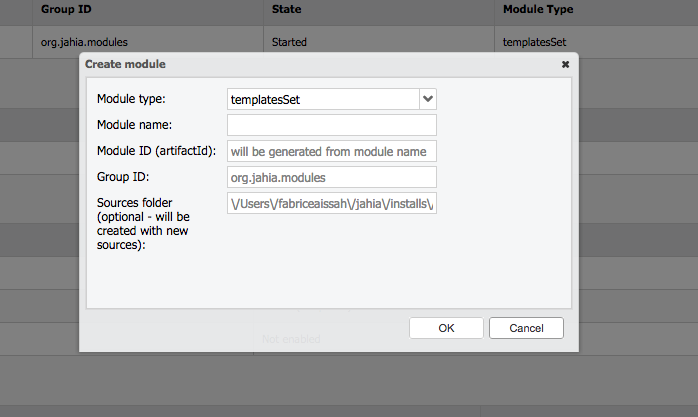
In Jahia Studio, a Template Set it created by clicking the "New Module" option in the "New" Menu:

A pop-up window will appear prompting for the following information:
- Module type: Select "templatesSet" in the dropdown menu
- Module name: Create a name for the Template Set
- Module ID: The artifact ID for the Maven project – Jahia generates this by default
- Group ID: Crtate a new ID for the Maven package. (Note: modules provided by Jahia belong to
org.jahia.modules) - Sources folder: The Jahia instance source file path. By default, a local instance runs in
/digital-factory-data/sourcesfrom the installation path.
This creates a new Jahia module called “templatesSet” and embeds automatically generated resources required for templating in Jahia:
- A JSP template view

- A set of templates

- A content folder structure

Extending a Template Set with a Module
Existing template sets can be extended with additional modules:
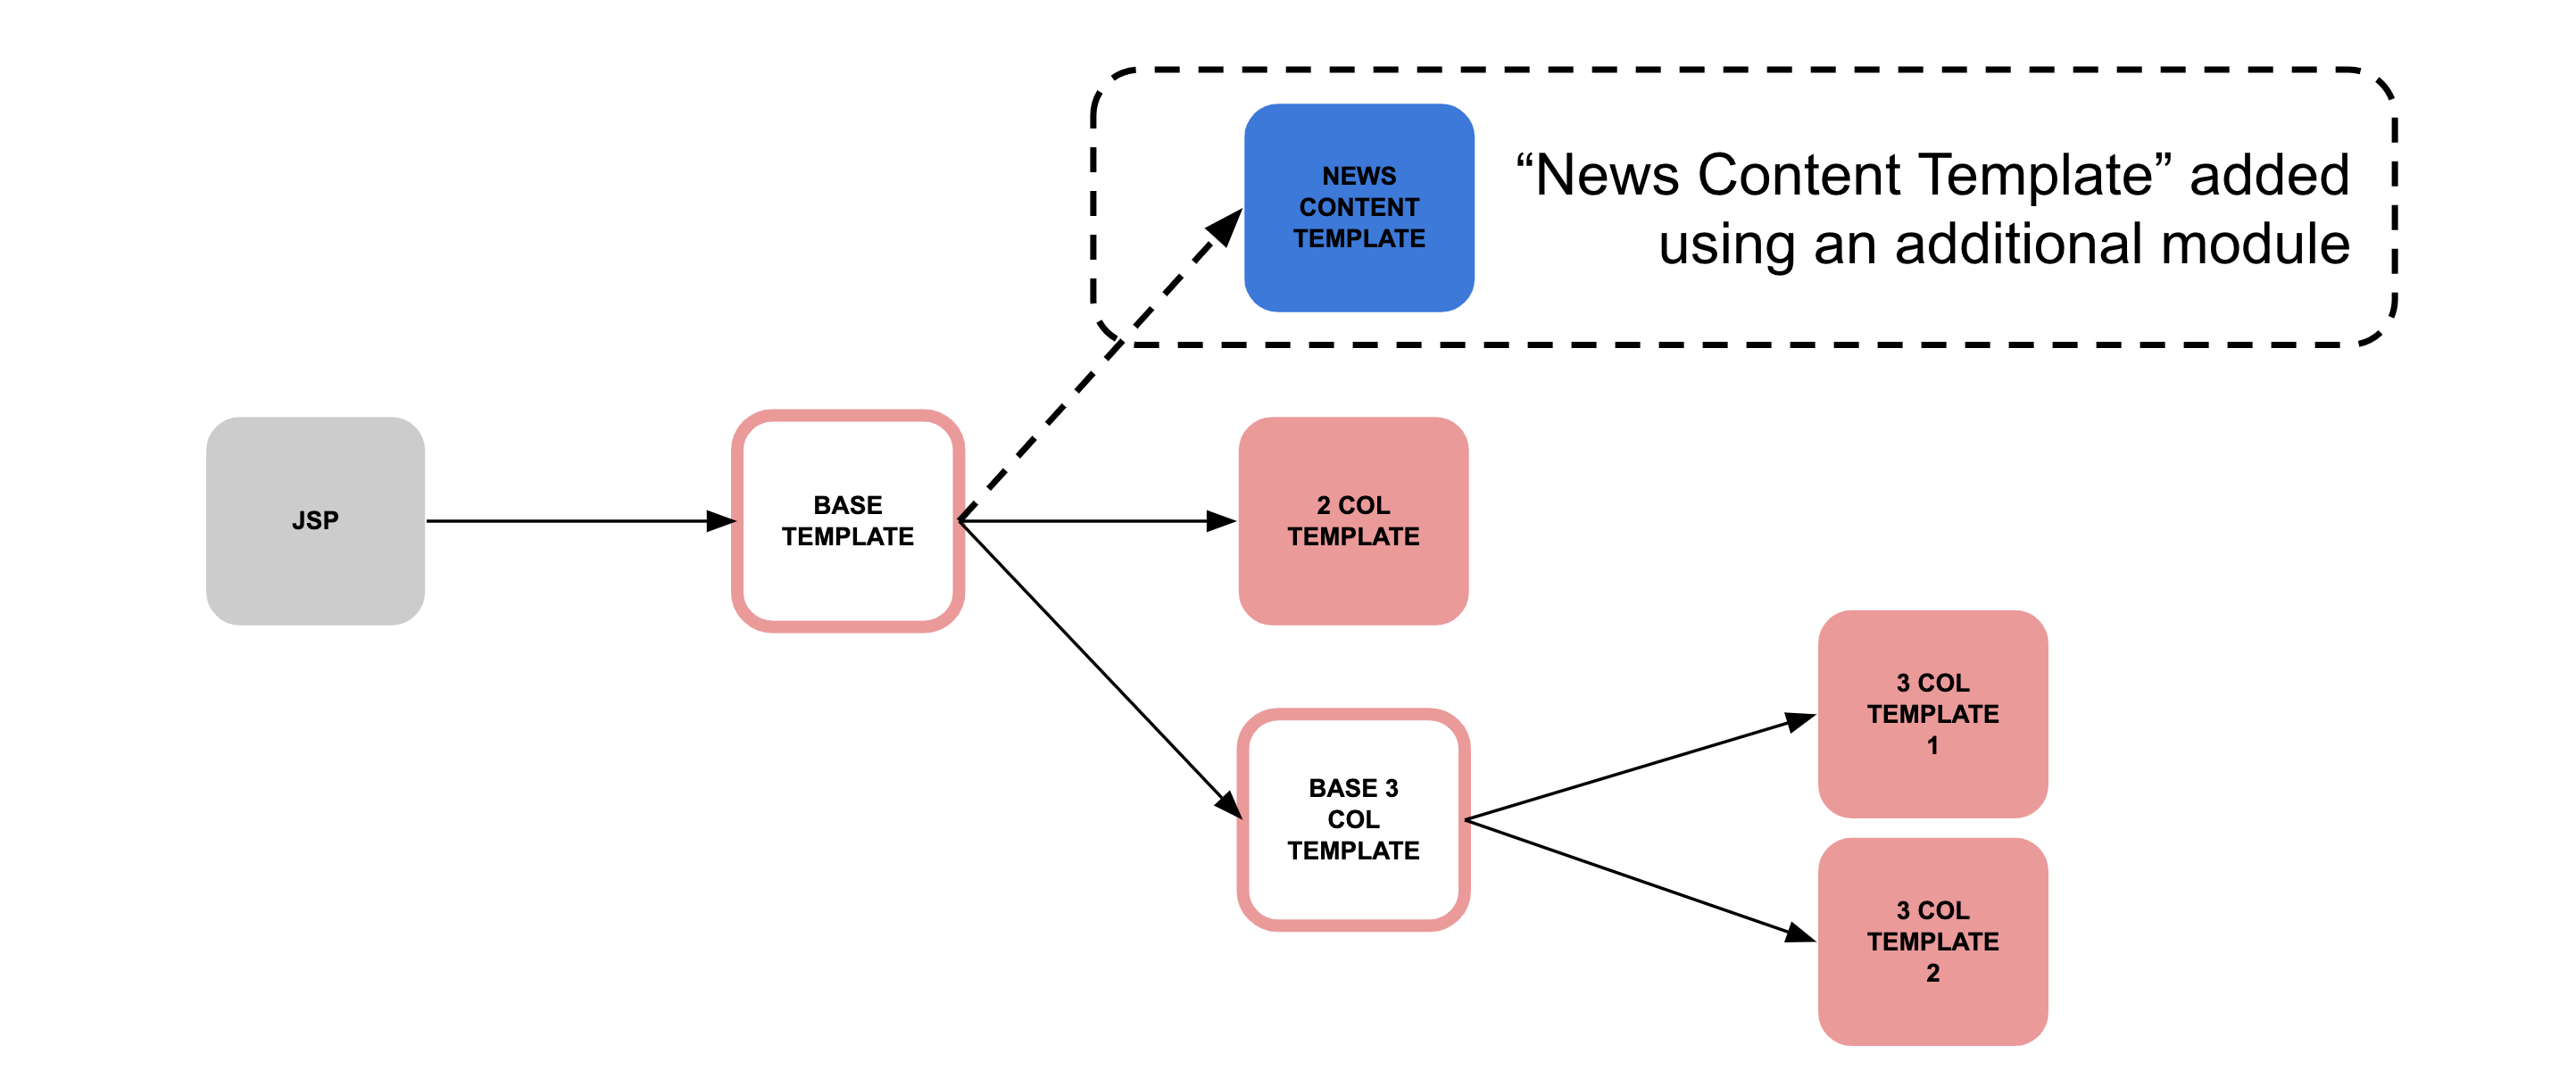

This is done by specifiying which template set to extend and the extension location in the template tree.
Editing the template folder of a module:

The Templates folder editing window opens and prompts for the following properties:
- The Templates deployment root path
- Optional Template Set to use as context for rendering the new extension

Repository XML File
After a module is compiled, changes that are not code-related are found in /src/main/import/repository.xml.
Those modifications include template, content and dependencies between modules.

Version Control
Since most of the changes made in the Studio are stored in repository.xml, it is important to verify the changes prior to committing them.
Such verification is done by going throughrepository.xml and validating the modified/created XML tags that correspond to changes made in Jahia Studio.
When retrieving the updates in repository.xml from version control, the module source code must be compiled and deployed to propagate the changes in Jahia Studio.
Merging
Jahia handles repository merging and conflict resolution with the file repository.xml.generated , which is generated automatically for merging changes to repository.xml. This user should not manually alter this file.
Merging process:
- A template set is updated in Studio (I.e. a new template page is added)
- The updated template set is compiled in the Studio
- Jahia automatically exports the template modifications in an abstract XML file
- The XML is compared with
repository.xml.generated - A patch is generated from this comparison
- The patch is applied to
repository.xml