Authoring content in Content Editor
Content Editor is an application that you use to create content and publish it to your sites. The type of content that you can add to a page depends on its content type. Jahia includes default content types and developers can create custom content types for your organization.
The following example from the sample Digitall site shows how you can edit a Company content type. You edit the company properties in the left of the editor and preview content on the right. The preview updates each time that you save.

Creating content in Content Editor
You open Content Editor from Page Composer or jContent to create new content for your sites. The example below shows how to create rich text content.
To create content:
- Do either of the following:
- In Page Composer, click Any Content in an area on the page.
- In jContent>Content Folders, click New Content in the top toolbar.

- In the Select Content Type dialog, select a content type and click Create. For example, Content:Basic>Rich text and click Create.

- In the Create Rich text page, provide content and click Save.
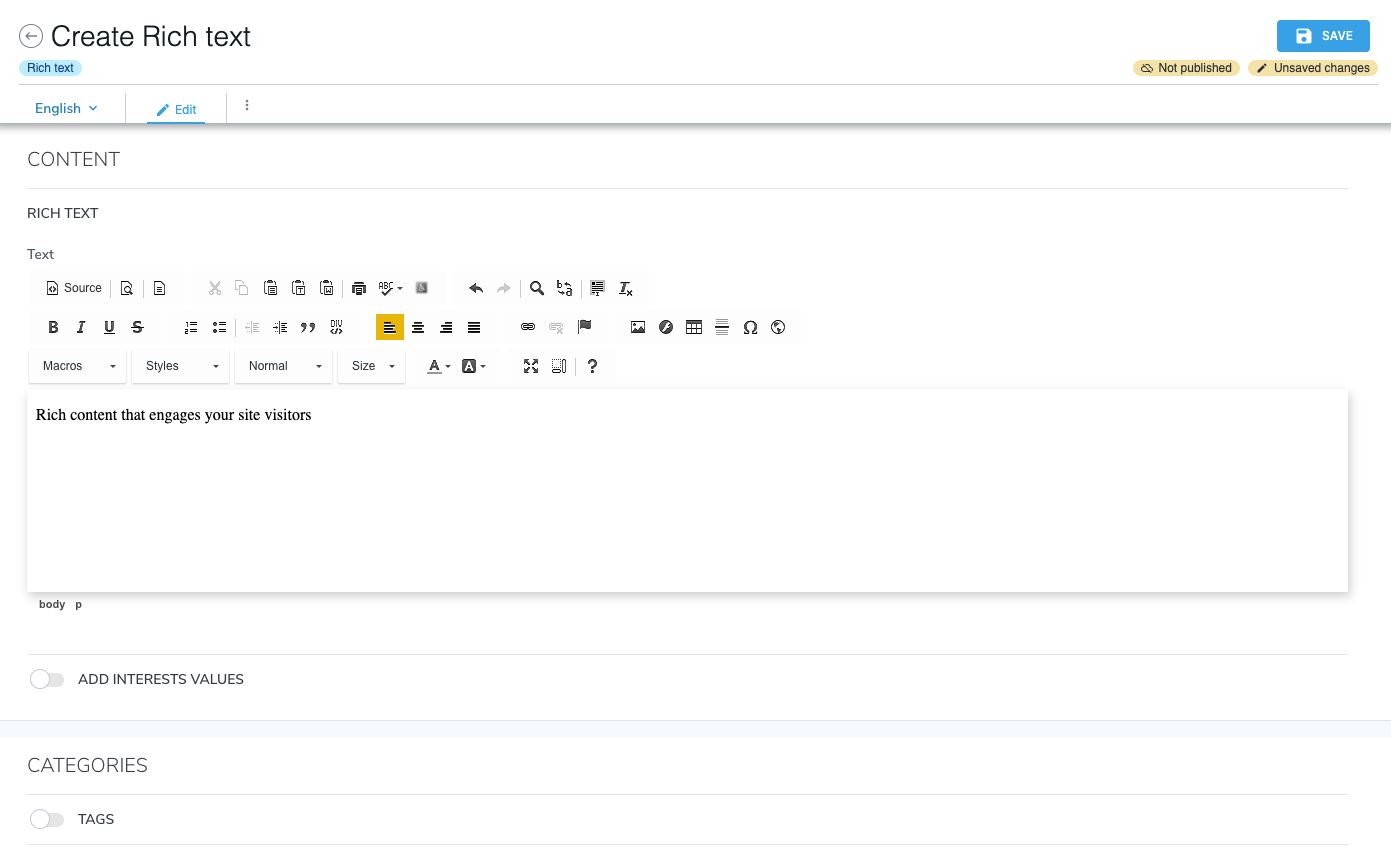
The content object is created and content previews in the Preview tab.

When you save, your content updates the content in the Preview tab.
Editing content in Content Editor
You can edit content in Content Editor by opening it from Page Composer or jContent.
To edit content in Content Editor:
- In jContent, select your content in the navigation menu.
- In the main window, right-click on the content that you want to edit and select Edit.

- In Content Editor, edit your content and specify settings as needed.
- Click Save to save your content. Your content refreshes in the Preview pane.
Now you can return to jContent or publish your changes.
Publishing content
When content is complete, you can publish it to make it available to your visitors. You can request a publication to start a publication workflow, or publish your content immediately, depending on your permissions and role. When you start a workflow, the content is sent to other users for review.
To publish content in Content Editor:
- Navigate to your content and open it for editing in Content Editor.
- Ensure that all changes are saved. To avoid any confusion about what will be published, the Publish button is disabled until you save your changes.
- Depending on your permissions, you'll be able to start a publishing workflow by requesting publication or publish directly.
- To start a publishing workflow, click the Request publication button. The Publication dashboard opens. For more information on requesting publication through a publication workflow, see Publication dashboard.
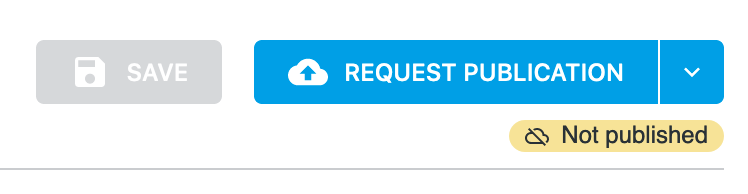
- To publish content immediately, at the top right of the page click Publish Now. Once you clicked on Publish now, you can leave the page.

- To start a publishing workflow, click the Request publication button. The Publication dashboard opens. For more information on requesting publication through a publication workflow, see Publication dashboard.
- A message indicates that publication is in progress. A message then displays at the bottom left of the page indicating that publication is in a queue.

After your content is published, it is available to site visitors if it is used in a page or application on your site.
Unpublishing content in Content Editor
If necessary, you can unpublish content to make it unavailable on your live sites or applications.
To unpublish content in Content Editor:
- Navigate to your content and open it for editing.
- At the top right of the page in Content Editor, click the down arrow button and then select Unpublish.

A message displays at the bottom left of the page indicating that the content is unpublished.

The content is no longer live in your sites and applications.
Classifying your content
Classifying content has many benefits. For more information including how you should classify your content, see Classifying content in Jahia. The following sections show how to use tags and categories.
Classifying content with tags
Tags are the easiest way to classify content.
To add tags:
- Open your content for editing in Content Editor.
- In Categories, click on the toggle next to Tags.

- Start typing the tag you want to add to your content.

- Select a matching tag by clicking on it or pressing Enter. In the example here "digitall" is the matching tag. The tag has been selected for your content.

- If the existing tags don't match how you want to classify your content, you can select press Enter to create a new tag.
- Click Save.
Classifying content with categories
Categories are another way to classify your content. Categories can be created and edited from the Category Manager and require specific permissions.
To select categories for your content:
- Open your content for editing in Content Editor.
- In Categories, click on the toggle next to Categorized.

- You can then start typing in the input to search for the category you want to select, or you can click on the input to expand the category list.

- Click Save.
Editing rich text with CKEditor
You edit rich text in CKEditor inside Content Editor. CKEditor can be heavily customized by the developers you working with. There are simple and complex configurations available, custom plugins, and they can be set depending on the content type or the template used by your site.
Selecting images, pages and content references with pickers
When you're editing a content property that is meant to reference an image, a file, a page, or other content, you'll see a reference field just like the example below.

Depending on the reference type, a different picker will open. Here are the different types of pickers that you might use when editing references:
- Image picker
Used to select images - File picker
Used to select any kind of files (including images) - Editorial link picker
Used to select pages or contents that can be rendered as full page - Editorial picker
Used to select any content - Folder picker
Used to select folders that contain files - Content Folder picker
Used to select folders that contain content - Category picker
Used to select categories - Site picker
Used to select sites - User picker
Used to select users - User group picker
Used to select user groups
Searching in the picker
When using a picker, you can use the search input to find the item you need. The search will be performed on all content properties, including title, description, keywords, tags and system name. The search highlighted:
- In yellow, is the word you're searching for
- In orange, is the location you're searching in. The search will apply to subpages and subfolders.
- In green, is the number of search results. If there are more than 20 items, you can simply scroll down and the picker will load the next results

Copying values from another language
You can copy content properties values from one language to another by using Copy from languages. This feature can help you to reuse existing values or kickstart your translation. For example, a translator can copy new English content to the Spanish version of content and then translate the values.
To copy from languages:
- Open content for editing in Content Editor and click Copy from languages. The Copy from dialog opens.

- In the Copy From dialog, select the language that you want to copy from.
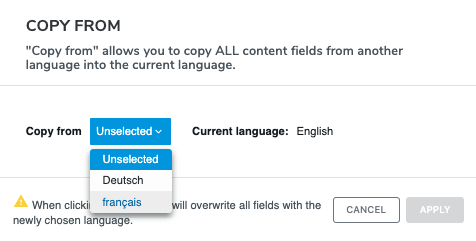
- Click Apply. When you click apply, all the values from the other language are copied to your current selected language. All existing values in your current language are overwritten.
You should now see all the values copied from the other language. - The Unsaved changes badge appears in the top toolbar. If you made a mistake, you can click on the back button in Content Editor header and select Discard changes. Otherwise, save your changes.
Marking content as work in progress
You can mark content as Work in progress (WIP) in Content Editor to prevent the publication of content. This avoids the unexpected publication of new or modified content. For more information on how work in progress affects publication, see Understanding work in progress content. Contact your administrator if you want to automatically mark new content as work in progress.
Any editor or contributor can edit content previously saved as WIP. To prevent others from editing a content, you must lock the content. There are a few subtleties depending if the site is available in one or several languages.
To mark content as work in progress:
- Open content for editing in Content Editor and click the Mark as Work in progress button. The Work in progress (WIP) dialog opens.

- In the Work in progress (WIP) dialog, select Work in progress. Click Done.

In the top toolbar, the Unsaved changes badge in the toolbar indicates that changes are not yet applied. The WIP badge indicates which languages work in progress applies to.

- In Content Editor, click Save in the top toolbar to apply changes.
Content marked as work in progress displays differently in Page Composer and jContent.
- Page Composer
A Work in Progress message displays and content is grayed out, as shown in the following example.

- jContent
A wrench icon displays beside content, as shown in the following example.

Changing the order of content
You can order list items in content either manually or automatically. When content is available for ordering, it displays in the Content Lists and Ordering section. With automatic ordering you specify sorting conditions, for example, order by last modified date in ascending order to show most recent content first.
The Content Lists and Ordering section is only available when editing a list or an area.
Manually changing the order of content
You can manually move content up or down the list by dragging-and-dropping one of the content items.

Automatically changing the order of content
You can use automatic ordering when you’re managing a list of content items or content with subcontent. Automatic ordering enables you to select criteria to sort the content items in the list. With automatic ordering, you don’t have to manually reorder your content and sorting is always up to date.
To add automatic list ordering to your content, the developers you’re working with need to explicitly declare it when defining the content type and add the jmix:automaticallyOrderableList mixin. Developers can refer to the page More on content types to get the details about content types definitions.
By default, the selected criteria used to sort the subcontent is Last modification date and descending . This means that the sub content items are sorted by last modified content first. Depending on the property type, the sort direction is the following:
| Type | Ascending | Descending |
|---|---|---|
| String | A > Z | Z > A |
| Number | 1 > 99999.. | 99999.. > 1 |
| Date | 01/01/2010 > 01/01/2020 | 01/01/2020 > 01/01/2010 |
To enable automatic ordering:
- Open content for editing in Content Editor.
- Navigate to the Content list and ordering section and enable Automatic ordering.

- Use the Order by dropdown to select different sorting criteria. In Order direction, select the sort direction, either ascending or descending.
- To add additional sorting criteria, click Add and then specify the sort criteria and direction. You can add two additional sort criteria. If two content items have the same title, content that has been last modified displays first.
- Click Save.
Changing the maximum number of items in a content list
When a developer creates a page template, they can specify the maximum number of items that you can add to a content list. You can override the maximum setting if you have the Set content limits on areas permission. By default, the editor-in-chief and site admin roles have this permission. The permission is defined in Administration>Roles and permissions under Permissions on current node>Other permissions.
Use this feature to reduce the number of buttons available for creating content in your pages and to make it easier for authors to drag-and-drop content to the correct location.
Also note that:
- The Any content button does not display in Page Composer when the maximum number of items has been added to a content list. When you remove items, the Any content button displays again.
- The maximum setting does not apply to jContent. You can still create as many items as you want in a content list in jContent, regardless of the maximum setting.
To change the maximum number of items in a content list:
- In Page Composer, navigate to a page with a content list, as shown in the following example. Open the content list for editing.

- In Content Editor, under Content List & Ordering enable Number of Items and specify a number in Maximum number of items allowed in the list. Click Save.

In the example, the maximum number is set to 2. Only the first two content items displays when you open the page in Preview mode.

Note that this setting only affects how the content list displays. The additional content items are not deleted. If you increase the limit, content that was previously hidden will display again.
