Managing form submissions in JCR
You can view and manage the forms that users submit in a JCR dashboard, data table, or metadata table. You can use this information to discover how your form is used and to improve your forms.
The JCR dashboard provides a timeline view of form submissions and a visual overview of submission data. The data table contains records of submissions in a table format that you can view, filter, and export. You perform data analysis in the dashboard and datatable.
The metadata table provides a static list of records that you can use to validate that submissions have been recorded.
Viewing submissions in a JCR dashboard
The JCR dashboard provides you with a quick overview of submission data for a form. The dashboard contains reports that show submissions by date and by source submission page. Reports also shows which form fields contain empty values and which options users selected for checkboxes and other inputs.
The total number of submissions, average number of submissions per day, and total number of submissions in the last day display at the top of the dashboard. You can click Average per day to display the average submissions per week, month, and year, and click Last day to display total submissions in the last 7, 14, and 21 days.
The JCR dashboard shows the following reports:
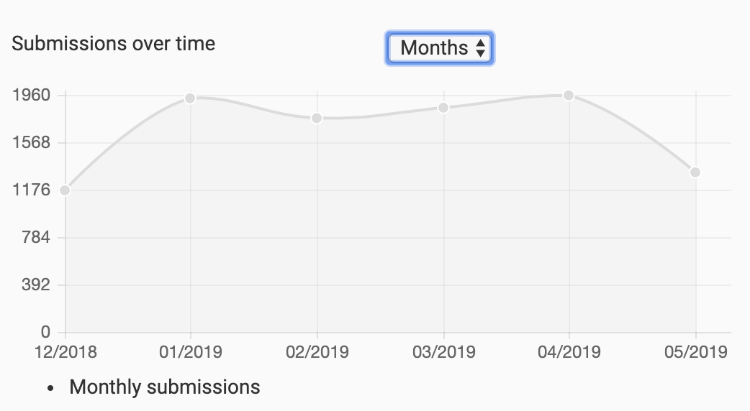
- Submissions over time
Shows the total number of submissions by day, week, month, or year. To change the date range, select a date type at the top right of the chart. Submissions display on the y-axis and the date displays on the x-axis.
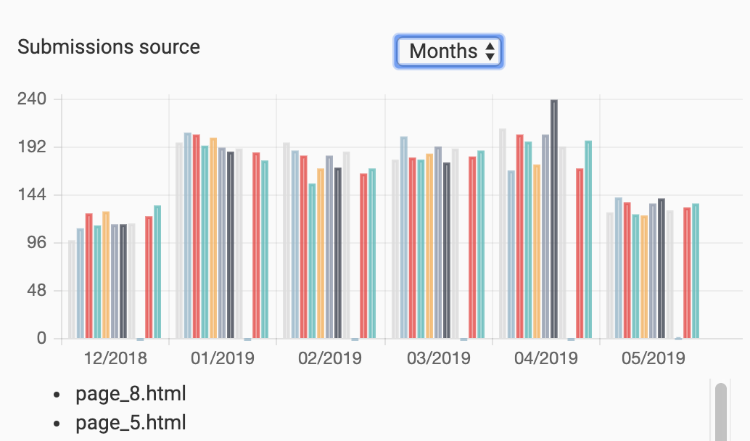
- Submissions source
Shows the site pages that forms were submitted from. To change the date range, select a date type at the top right of the chart. Submissions display on the y-axis and page names display on the x-axis.
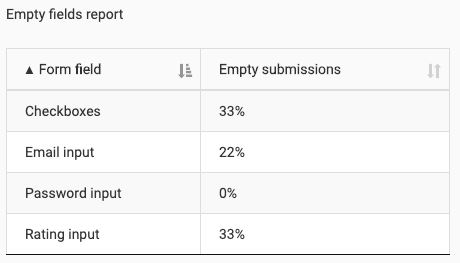
- Empty fields report
Shows the percentage of empty values for each field in the form. For example, a value of 100% indicates that no user entered a value for that field and 0% indicates that all users entered a value.
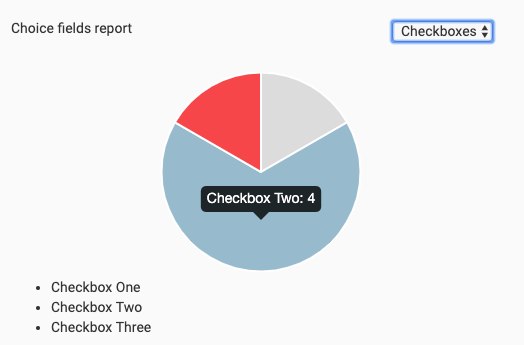
- Choice fields report
Shows what users selected in field inputs such as checkbox and radio button elements. For example, the following image shows the percentage of selections for a checkbox input field. Make a selection at the top of the chart to display data for another form field.
To view form submissions in a JCR dashboard:
- In Jahia, navigate to Site Settings>Forms>View form results. The Form results page displays.
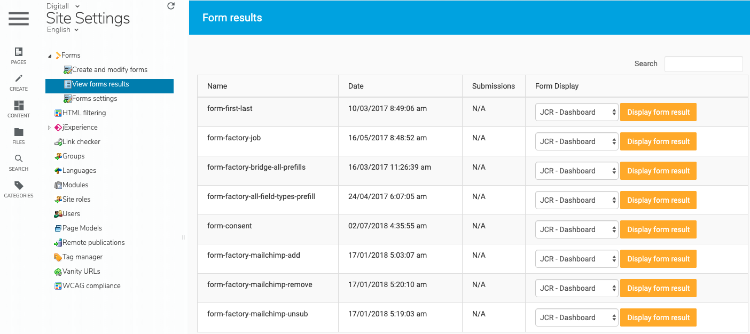
- In the Form Display column, select JCR - Dashboard. Click Display form result.
Form reports display in the dashboard. - To filter the dashboard results by date, specify a date range using the start and end date calendars under Select a date for your results. Then, click Filter.
Viewing submissions in a JCR datatable
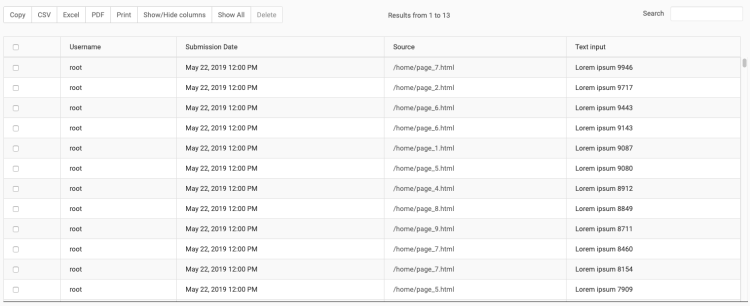
The JCR datatable shows form submission data in a table. You can change what columns shows in the table, copy content, and export data. The following image shows a sample datatable.
To view form submissions in a JCR datatable:
- In Jahia, navigate to Site Settings>Forms>View form results. The Form results page displays.

- In the Form Display column, select JCR - Datatable. Click Display form result.
Form results display in the table. - To copy table rows to the clipboard. Click Copy. You can copy a maximum of 500 rows.
- To export data, click CSV, Excel, or PDF.
- To print table data, click Print. Then specify print settings and print from your browser.
- To show or hide columns in the table, click Show/Hide columns and select or clear selections. To show all columns again, click Show All.
Viewing submissions in a JCR metadata table
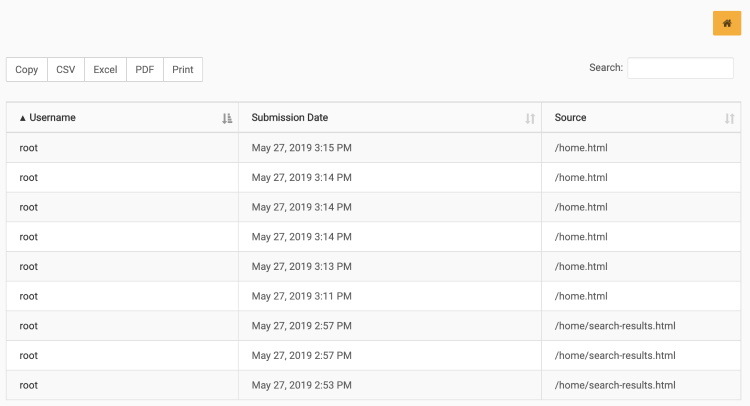
The JCR metadata table shows submission metadata in a table. You can copy data to the clipboard and export table data.
To view form submissions in a JCR metadata table:
- In Jahia, navigate to Site Settings>Forms>View form results. The Form results page displays.

- In the Form Display column, select JCR - Metadata table. Click Display form result.
Form results display in a table. - To copy table rows to the clipboard. Click Copy.
- To export data, click CSV, Excel, or PDF.
- To print table data, click Print. Then specify print settings and print from your browser.