Using image checkbox inputs
This page introduces checkbox images and shows you how to set up your own image checkbox input.
Adding input to your form
To add image checkbox to your form, in the Forms Builder, open the side panel by clicking Add element. Then select Image checkbox.
Using the bootstrap grid system
Image checkboxes display using bootstrap grid system. You specify the size of device (large, medium, small) and the number of columns you want to display in a row on the device. Once device size gets smaller than the specified target size bootstrap will display all images in one column. Finding a target size can be a little tricky and will depend on the number of checkboxes you have and their sizes. One thing you should do is hide the site settings panel so that your inputs are displayed in full width.
You should note that “Bootstrap col number” doesn’t specify the number of columns but the number in the bootstrap’s col class (i. e. col-md-4). To get the actual number of columns you need to divide twelve by the col number. For example for col number 4 you would get 12 / 4 = 3 columns.
Using key-value pairs
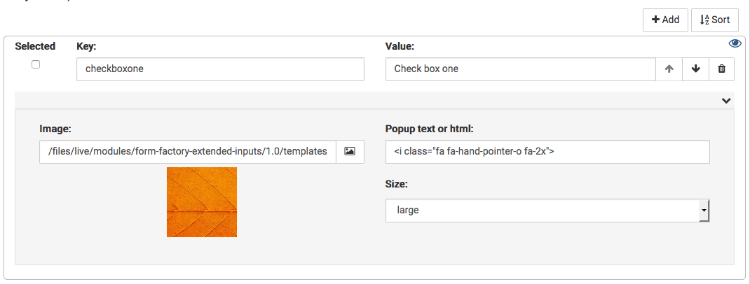
The key-value pair is similar to key-value pairs used in regular checkbox inputs but offers you additional functionality. You should specify a key and a value the value will be displayed in results just like it is with a regular checkbox input.
To see additional functionality click on the chevron on the right side of the key-value pair.
You can specify image url by typing or picking one from your site, you can provide popup text or html and modify checkbox size.
If you want to pick image from your site’s folder click on the image icon next to the image url to see image picker. Navigate your site’s folder structure to locate desired image and then click on that image.
To close the panel with additional functionality click on the chevron area again.
You are now ready to use image checkbox input.


