Managing modules
Module administration
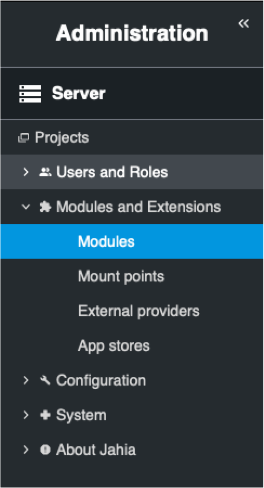
You manage modules from Administration>Server>Modules & Extentions>Modules.
Module installation
A module can be installed on a Jahia instance
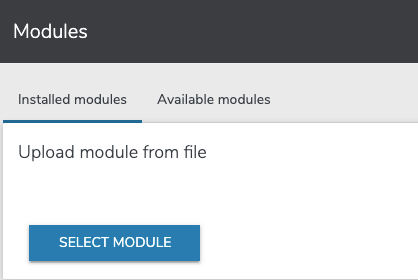
- by uploading manually a package (a jar file containing several jars, each one being a module) in the Modules administration page
- by uploading manually a jar file (an OSGi bundle for a unique module) in the Modules administration page
These two operations can be done from the Installed modules tab of the Module Management screen:
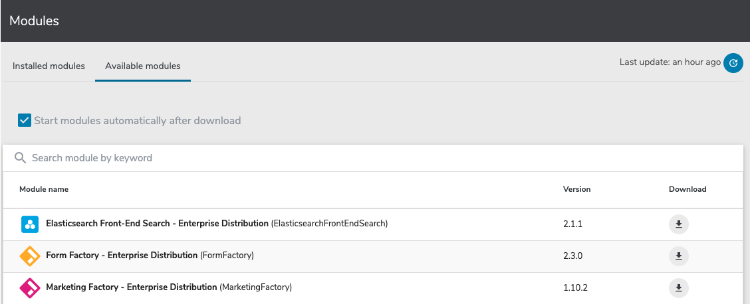
- by using the Modules Management GUi and installing in one click a module from the App Store
This can be done from the “Available modules” tab of the Module Management screen:
Automatic start at deployment time
It is possible to choose whether or not a module should be automatically started when uploaded or (downloaded and installed from the store) by selecting or not the checkbox “ Start automatically after upload” (module upload) or “Start modules automatically after download” (download and install from the store):
These checkboxes are selected by default in a development server, and unselected in a production server. However, these default behaviors can be modified by adding the property jahia.modules.fileinstall.bundles.new.start in the jahia.properties file and setting its value to true or false.
Note that an uploaded/downloaded module from the store will not be automatically started if a newer version of this module is already active.
For example, we consider that the version 2.0.2 of the module article is already started. Then we upload the version 2.0.1 of this module, with the “start automatically” checkbox selected. The started version remains the 2.0.2 as it’s more recent than the 2.0.1. This is done in order to prevent the automatic start of an old module by mistake. You can then manually start the version 2.0.1 if needed.
Uploading a new version of a module
Several versions of a module can be installed at the same time. It is possible to choose which version should be started. Only one version at a time can be started. When switching from one version to another, all sites using that module will be impacted at the same time.
On development environments, it may be useful to keep several versions deployed to be able to easily switch between them.You need to be aware of the following behaviors when several versions are deployed at the same time:
- Node types definitions always come from the latest version of the module
- All installed versions export classes, with different versions. If another module use classes, it will by default use the latest version.
- JSPs, Actions, RenderFilters, OSGi services, and other spring services will be taken from the active version of the module
Learn more about these limitations
To switch from one version to another, simply click on the start button of the desired version, this will automatically stop the current activated version.
Basic information about modules
In the modules administration page, modules are presented in a list of 7 columns, displaying basic information
- Module name
Name of the module - Module ID
Unique ID that defines the module, only one module by ID can be installed on a server at a time. - Group ID
Group id that defines the module, the couple group id/module id must be unique. - Details
Accesses a page that displays more detailed information about the module. - Versions
Shows the installed versions of the module, and possible actions on them. For each version, it also shows the OSGi status of the module (installed/resolved/started) - Status
- active if the module is started
- inactive if the module is stopped
- Used in site
- In use: the module is activated on one or several sites
- In use (indirectly): the module is a dependency of a module activated on a site
- In use (templates): a site uses the module as template
In Development Mode, a column named “source” appears and shows a button to download sources or to open the module in the studio when sources are already available locally. In the case that a module is not used in any site, there’s also the button “Duplicate module” which allows the developer to create a copy of an existing module.
Using the “Search” input field, you will be able to quickly filter the modules, using their name, module and group IDs, status, etc.
Modules detailed information
You can access the module detail screen by clicking on the module line of the Installed modules tab.
The " details screen " of a module contains various sections:
Nodetypes
List all the Nodetypes declared by the module and specify if the nodetype is also a component (usable as a drag and drop object in the edition interfaces).
The installed node types are always coming from the latest version of the module that has ever been deployed. Whenever a new version of the module is deployed, its definitions are immediately installed into the repository. Starting or stopping the module does not have any impact on the definitions, and it is not possible to go back to an earlier version of the definitions. Note that even undeploying the module won't remove the definitions.
Dependencies
List all other modules the current module is relying-on. If dependencies are missing, the module cannot be started.
Versions
List the versions of the module installed available on the server. Only one version can be started at a time. From this feature, like on the modules list, you can switch from versions, only one version of a module can be started at a time. You can undeploy the version of a module, but only when the module is stopped.
The wiring button lists the other modules providing resources to this version of the module, as well as the other modules which are using the resources of this version of the module.
In this case, the module calendar is using resources from the version 7.3.0 of the “Default Jahia Template” module, and provide resources to the versions 1.0.4 and 2.0.2 of the modules “Jahia Base Demo Components” and “Jahia Base Demo Templates”.
In some cases it can happen that the module is using the resources provided by a wrong version of another module (a module which is not started for instance), then clicking on the “Refresh” button will fix this issue, and then the module will use the latest version of the module providing the resources.
Usage in sites
Enabling a module on a site
Enabling a module on a site makes its components, views and templates available on the site.
Disabling a module from a site
Simple disabling
Disabling a module from a site impeach the usage of components (content objects) declared by the module by editors. The content already created with that module remains present but cannot be copied nor edited. Templates defined in the module are not available anymore. Jahia won’t be able to generate pages relying on those templates and that will lead to 404 errors.
Disabling a module and purge content
When disabling a module from a site, administrators can choose to purge all content related to this module in the site (content created using the definitions declared by this module). Be aware that this operation cannot be reversed, if you are sure that the content should not appear anymore, you can do the purge, if you just want editors to stop creating new content using one of the content-types defined by the module, do not purge and just disable the module.
Modules status
Inactive
The module is installed on the server (version 2.0.2 in the above example) but not currently started.
That means that Components, Views, templates, Rules, Workflows, Actions declared in the module are not usable at the moment. However, definitions are deployed, and exported classes are available for other modules.
The module can be started by clicking on the green button.
The module can also be undeployed (removed from the server). When a module is started it cannot be undeployed, administrators have to stop it first. You may also have to disable your modules from a site before being able to undeploy it.
Inactive with missing dependency
The module cannot be started until the dependency is resolved. The missing dependency can easily be identified as it is listed after "Depends on".
Active
When a module is started the stop button appears next to the active version. This does not mean that the module is activated /in use on a particular site.
The module can be stopped. If the module is a dependency of other module(s), they will be stopped too. All the views and templates defined by the module won’t be available anymore. Exported classes and node type definitions will always be available for other modules.
Error states
The system can encounter different errors when trying to deploy or start a new module.
Definitions errors
If the CND files cannot be parsed, the module won’t be started, and the definition error will be displayed in the administration. The module will be able to start once a module providing the missing definition is uploaded.
Spring context error
A module can be in the “resolved” OSGi state even if its spring context cannot be started. In that case, the information “Spring not started” is displayed next to the module version. More details (full stacktrace) will be visible in the log file.
In production mode, the module won’t be started if the Spring context cannot be loaded. In development, the module will be started and partly available (as shown below) – only spring context won’t be loaded.
Module not imported
In cluster, if the module is deployed on one node but has not been deployed on processing server yet, an error showing " Module not imported " will be displayed.
Rules errors
If the business rule (Drools) files cannot be parsed/compiled, the module will be marked as failed to start and the self-speaking error will be shown in module management screen.
Disable start/stop/deploy/undeploy operations
Available with Jahia 8.1.3
You can disable the start/stop/deploy/undeploy module operations in this page, for instance to prevent a module to be stopped, or another to be deployed from this interface. You can use version ranges, per module, to configure the list of disabled operations.
The documentation of this feature is available directly in Github
Display messages at the top of the screen
Available with Jahia 8.1.3
It is possible to display info or warning messages at the top of the module administration page, using a yml or configuration file. The goal is to be able to provide custom information to the administrators of your platform regarding modules, e.g. to provide reminders of upcoming module maintenance operations.
You can deploy several yml/cfg files in order to display several messages.
This is a simple feature, which does not support multilingualism.
Using a yml file
Create and deploy a org.jahia.modules.modulemanager.message-default.yml file in the karaf/etc folder of the processing node (you can replace default with what you want in the filename). This file can provide following configurations:
message:
     info: "Always validate new module versions on preproduction first!"
     warning: "Reminder: The upgrade operation of the event module is planned for 09/12/23"
Using a cfg file
Create and deploy a org.jahia.modules.modulemanager.message-default.cfg file in the karaf/etc folder of the processing node (you can replace default with what you want in the filename). This file can provide following configurations:
message.info=Always validate new module versions on preproduction first!
message.warning=Reminder: The upgrade operation of the event module is planned for 09/12/23


