Content and Media Manager (CMM) is a module that extends the functionality of Jahia. It provides a single interface for editors to create and organize content and files. You access and manage content in folders using the following functionality: preview, search, workflow and publication interfaces, administration panels, access to custom screens and features, and more.
In Content and Media Manager, you can:
Access content that you create in the pages of a site
Access content from the /contents folder
Access files from the /files folder
Use the content and files in Jahia sites and with external applications
Leverage Jahia’s content type and multilingual capabilities
Content and Media Manager separates the storage of content and files. Content refers to the text and references to images and documents that you add to pages in Jahia. Files are the digital assets, such as images and external documents, that you reference from content pages.
Content and Media Manager replaces Content Manager and Document Manager by providing a unified interface with enhanced functionality.
Not finding what you are looking for? Please consult the FAQs or let us know using the feedback form at the bottom of the page.
Opening Content and Media Manager
You open Content and Media Manager from the Jahia menu.
To open Content and Media Manager:
In Edit mode, click the Jahia logo in the upper-left corner to open the Jahia menu, and then click Content and Media Manager.
Note: Content and Media Manager is optimized for the Anthracite theme.
Content and Media Manager opens.
You can also open the Content and Media pages from the navigation pane.
Browsing folders, pages and files
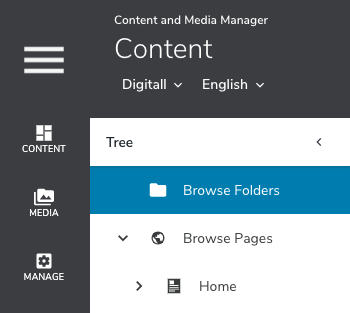
In Content and Media Manager, content and files are separated into the Content and Media pages. Content is the text and information that you add to pages in Jahia and files are the assets that you reference from the content. You can browse folders, pages and files from the tree in the left pane.
To browse folders, pages and files:
In Content and Media Manager, click on Content or Media in the navigation pane.
To expand the tree in the left pane, double-click a folder or page. You can also expand the tree by clicking on the right arrow icon beside a folder or page.
To use breadcrumbs to browse between folders, pages and files at the same level in the tree:
Hover your cursor over a folder, page or file on the breadcrumb to display folders, pages and files at the same level in the folder hierarchy.
Click on a folder, page or file to navigate to that location in the tree.
Creating content and folders
You can create new content and folders from the Content page in Content and Media Manager.
To create new content or folders:
In Content and Media Manager, click Content in the left navigation pane.
To create a new folder, click the + Create button and select New content folder. The following characters are not allowed in the content folder name: \/:*?"<>| Note: You can also click the More options button beside an existing folder to open the context menu.
To create new content, click the + Create button and select a content type. Note: The items in the context menu differ depending on the number of content types specified for your system:
If less than 5 content types are specified, then the content types display in the context menu.
If more than 5 content types are specified, then you can select New content to display content types in the dialog that opens.
Provide information about the content on the page. For more information on using the New Content page, see Edit mode.
Click Save. Note: You can also click Save and Add New to save your content and then create content of the same type in another New Content page.
Providing alternative names for a content folder
You can provide an alternative name, and translations for this alternative name, for a content folder. This alternative name is used in Content and Media Manager, and can contain any character.
Note: This does not apply to folders containing files in the Media section.
To add an alternative name to a content folder:
In Content and Media Manager, click Content in the left navigation pane.
Open the context menu for the folder and select Edit.
Use the Title field to enter the alternative name. You can switch the language to enter translations. Note: The System name is the same in all the language and cannot contain the forbidden characters \/:*?"<>|.
Restricting content types for a folder
You can restrict the types of content that users can create in a specific folder. This enables you have specialized folders to manage where content is created and stored. For example, you may only want users to be able to create news items in a news folder.
Note: Folder restrictions only apply to new content that users create in the folder.
To restrict content types in a folder:
In Content and Media Manager, click Content in the navigation pane.
Open the context menu for the folder and select Edit.
On the Edit Content page, select Contribute mode settings in the left pane.
Enable Contribute mode settings.
Move the content types that you want to allow in the folder from the left column to the right column.
Click Save.
Previewing content
Previewing content makes it easier for you to identify the different content items inside a folder or in search results. Preview also enables you to quickly see a visual representation of content in both its staging and live versions.
To preview content:
In Content and Media Manager, click Content in the navigation pane.
Navigate to the folder that contains content that you want to preview.
Hover your cursor over an item in the list and click on the preview button .
The Preview pane displays the staging version of the content item.
Click Live to preview to the published version of the content.
To close the preview pane, click the right arrow at the top of the pane.
Opening content for editing
You can open content in the Edit Content page by:
Hovering your cursor over a content item in the list and clicking on the edit button.
Right-clicking on a content item and then selecting Edit.
Clicking on the Edit button at the bottom of the content preview pane.
Deleting content
You can delete content that you no longer require. You can delete individual content items and delete entire folders. Before you delete content, you must first mark it for deletion. If the content has never been published, you can delete the content permanently from the system. Otherwise, you must publish the deletion to delete the content.
Important: When you delete content, it is permanently deleted and cannot be recovered. If you simply want content to no be longer visible online, then consider unpublishing the content instead of deleting it.
Unpublished content is still editable in its staging version. Remember to unpublish the content in the desired language if your content exists in several languages. You can also unpublish a content item so that it is no longer visible online for a selected language.
Important: Deleting content in one language also deletes the content in any other languages in which it exists.
Marking content for deletion
Before deleting content, you must first mark it for deletion.
To mark content for deletion:
In Content and Media Manager, click Content in the left pane.
Navigate to the folder that contains content that you want to delete.
Open the context menu of the content or folder and select Delete.
A confirmation window displays if the content is in use in a site or referenced by other content.
Click Yes in the Delete Selection dialog.
A lock icon displays beside the content item in the list.
Deleting an unpublished content item or folder
Before deleting content, you must first mark the content for deletion.
To delete an unpublished content item or folder:
Ensure that you have marked the content item for deletion.
Open the context menu of the content item or folder and select Delete (permanently).
This menu entry is also available in the More options button in the preview pane.
Click Yes in the Delete Selection dialog.
Note: A content item marked for deletion which has never been published will also be permanently deleted if it is part of a publication process. For example, content marked for deletion is deleted if its parent folder is published.
Deleting published content
Content that you mark for deletion is permanently deleted when you publish it. Therefore, you must start the publication of a content item marked for deletion to permanently delete its live version.
Note: Content is considered to be published if it has been published and unpublished in the past.
To delete published content:
Ensure that you have marked the content item for deletion.
Open the context menu of the item or folder and select Publish deletion.
The Publication dashboard page displays. Note: You can also access Publish deletion when you preview an item.
To verify the contents of the publication and to avoid publishing undesired modifications, click Publication infos and review your changes.
Depending on your role, you can either:
Publish the content yourself by clicking Publish.
Request publication by clicking Request publication to start a publication workflow. For information on completing the publication workflow, see Validating a publication request.
Important: When you or another user publishes the content, it is permanently deleted from the system.
Uploading files
You can upload files from the Media section. For example, you can upload images, videos and documents.
To upload a file:
In Content and Media Manager, click Media in the navigation pane.
Navigate to the folder that you want to upload a file to.
Drag-and-drop the file from your computer to the folder content area. When you drop the file, the upload starts automatically.
Alternatively you can click the + Create button or open the context menu of the parent folder:
Navigate to the file on your computer and then upload the file in your browser.
Select Upload file(s).
If you upload a file in a folder that already contains a file with the same name, then a file conflict occurs. To resolve the conflict, you can rename the file that you want to upload, overwrite the file on Content and Media Manager, or cancel the upload.
To rename the file that you want to upload, click Rename and enter a new file name in the dialog.
To replace the version of the file on Content and Media Manager, click Replace.
To cancel the file upload, click Don’t upload.
Manipulating images
You can rotate, resize, and crop images in the Media section.
To edit an image:
In Content and Media Manager, click Media in the navigation pane.
Navigate to the folder that contains the image you want to edit.
Click on Open in image editor from the context menu of the image. The image editor opens.
Select the operation you want to perform:
Rotate
Click the Rotate left or Rotate right icon the rotate the image.
Resize
Type the desired width or height. By default, the width and height ratio is locked. To edit the width or height independently, click the ratio icon to unlock the width and height relationship.
Crop
Use the crop tool in the preview to select the area of the image you want to crop. You can also adjust its size, by manually editing the width and height. The ratio can also be locked and unlocked.
Note that you cannot combine different operations before saving. Once you have started editing an image, you need to either Undo changes or Save your changes before performing another operation. When using the Save as option, a copy of the image is created, and this copy is automatically opened in the image editor.
Exporting content
You can export content from the Content section. For example, you can export lists, rich texts and news entries.
To export content:
In Content and Media Manager, click Content in the navigation pane.
Navigate to the page or content folder where you want to export content from.
Right-click and select Export from the context menu.
In the Export options dialog, select either Staging content only or Staging and live content.
If you chose Staging content only, you can select to Export to an XML file to export as an XML file rather than a ZIP file.
Click Export.
The content exports to your default download location.
Importing content
You can import content from the Content section. For example, you can import lists, rich texts and news entries.
To import content:
In Content and Media Manager, click Content in the navigation pane.
Navigate to the content folder where you want to import content to.
Right-click on Import content from the context menu or the Create menu.
Navigate to the XML on your ZIP file on your machine and then import the file in your browser. Alternatively, you can drag-and-drop the XML or ZIP file from your machine to the content folder area. When you drop the file, the import starts automatically.
If you import a file in another format, an error message displays. You can either close the message or click Don't import.
Note: You can import multiple files at once, either by selecting them in your browser or dragging-and-dropping them to the content folder area.
About publishing content and files
You first create content and files in a staging version and then publish them to make them live and visible in the different websites or applications in which they are used.
You publish in Content and Media Manager in the same way as you do in Jahia. For more information about publishing, see Publication in the Jahia section of the Academy.
Publishing content
You can publish content yourself if you have the appropriate permissions. You can also request publication to start a publication workflow.
To publish content:
In Content and Media Manager, click Content in the navigation pane.
Navigate to the folder that contains the content that you want to publish.
Open the context menu by either:
Hovering over the content or file and clicking the More options button.
Previewing the content or file by clicking Publish in the preview pane.
In the context menu, click on Publish - current language or Publish in all languages.
In the Publication dashboard page, verify the content you are about to publish.
Depending on your role, you can either:
Publish the content yourself by clicking Publish.
Request publication by clicking Request publication to start a publication workflow. For information on completing the publication workflow, see Validating a publication request.
Publishing a folder
You can publish a folder yourself if you have the appropriate permissions. You can also request publication to start a publication workflow.
To publish a folder:
In Content and Media Manager, click Media in the navigation pane.
Navigate to the folder that contains the folder that you want to publish.
Open the context menu by either:
Hovering over the content or file and clicking the More options button.
Previewing the content or file by clicking Publish in the preview pane.
In the context menu, click on Publish in current language or Publish in all languages
In the Publication dashboard page, verify the content you are about to publish
Depending on your role, you can either:
Publish the folder yourself by clicking on Publish.
Request publication by clicking on Request publication to start a publication workflow. For more information on completing the publication workflow, see Validating a publication request.
Unpublishing folders, content and files
To unpublish folders, content and files:
In Content and Media Manager, click Content or Media in the navigation pane.
Navigate to the folder that contains the folders, content and files that you want to unpublish.
Open the context menu by either:
Hovering over the content or file and clicking the More options button.
Previewing the content or file by clicking Unpublish in the preview pane.
In the context menu, click on Unpublish - current language.
Depending on your role, you can either:
Unpublish the content yourself by clicking Unpublish.
Request unpublication by clicking Request unpublication to start a workflow. For more information on completing the unpublication workflow, see Validating a publication request.
A publication workflow process starts when you or another user makes a publication or unpublication request. The number of pending publication requests displays beside the Workflow button at the bottom of the navigation pane. Clicking the Workflow button opens the Workflow Dashboard. For more information on the dashboard, see Workflow dashboard.
Note: The publication process that you follow depends on how it is configured for your organization.
To validate a publication request:
Click Workflow at the bottom of the navigation pane. Note: You must have the appropriate permissions to view the Workflow button.
Double-click on the publication request or click the right arrow beside the request.
Click Publication Review.
On the Workflow page, review content details and click Publish or Reject publication.
Close the Workflow Dashboard.
Searching folder and pages
By default, you can search on the current folder or page. This enables you to limit search results to the current folder and its subfolders or to the current page and its subpages. When search results display, you can also search globally on the entire site.
To search content in Content and Media Manager:
Browse to the folder or page in which you want to perform the search.
Optionally, in drop-down in the search bar, select a content type to restrict results to that type.
To restrict results to a content type, select a content type from the drop-down in the search bar.
Type search criteria in the search bar.
Search results display automatically.
If you cannot find the item you were looking for, you can click Search everywhere to perform a global search. You also use the back button in your browser to return to the previous search results.
Locating a search result
To navigate to the parent folder or page of a search result:
Perform a search
Open the context menu of the desired search result
Click Locate. You are now redirected to the folder or page containing the searched item.
Saving a search query
If you often access the same content, you can save a search query and run it again to access the content. While Content and Media Manager does not support saving search queries, you can bookmark the query in your browser.
To save a search query:
Perform the desired search.
Create a bookmark in your browser with the current page or URL.
As the query is part of the URL, you can also easily share the query with other contributors.