Managing your projects
This topic shows you how to manage content and configurations across multiple environments, including development, integration, preproduction, and production.
For information on how content authors can export and import pages and content in Page Composer, see Managing pages in Page Composer and Managing content in Page Composer.
About projects
You can create multiple projects, or virtual sites, within a single Jahia server. Note that we use site and project interchangeably although they have slightly different meanings. A site has its own set of pages, content, files, and more. A project is a global term, as you can use Jahia to create and manage content used in applications, which are not technically sites as they do not contain pages.

Each site or project can have its own:
- Domain
You can choose to manage one site on www.domain-a.com and another site on www.domain-b.com, while still hosting both on the same Jahia server - Site Map
Along with its own structure - Groups
For example, you can have two separate Authors groups with different members for site A and B - Settings
(See features described in section two)
However, each site shares the following with the other sites:
- Database and API
This makes it possible to access content objects available in other virtual sites. This means that identical content can be easily reused across multiple sites (for example, news items that are the same for several departments with separate sites), although security issues may arise with shared platforms (for example, the sites of two separate companies are hosted on the same server). - Sets of templates
For the sites that share the same set of templates. - Modules
- Category tree
- Users
LDAP or Jahia users. It is not possible for two separate users, for example John, to have the same ID between two sites. LDAP groups, like LDAP users, are also common to all sites.
Creating a new virtual site is useful when you need to manage multiple projects, for example, a public website, one or more extranets, and several department intranets. Virtual sites allow for better role assignment and can use different views (sitemap, themes, and search results) or URLs and domains for different sites, while keeping the ability to share content, users or mash-ups.
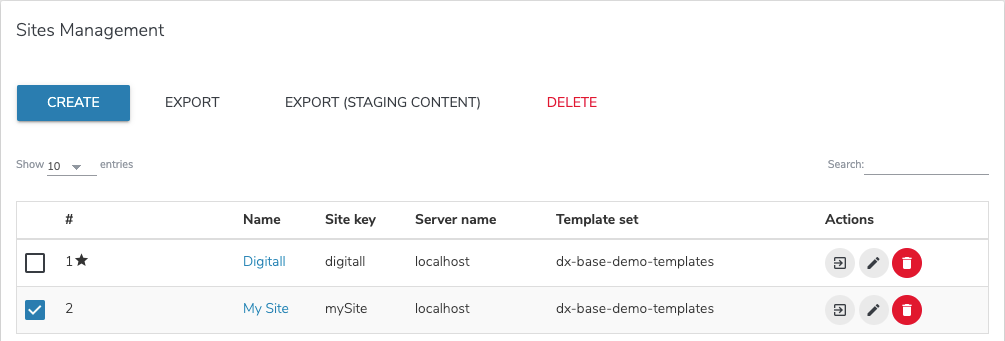
You can access the list of all existing projects from Administration>Server>Projects. The default project has a star next to it. Action icons to edit, delete, or export a site are available for each site.

Leveraging live vs edit workspaces
When you create and edit content, Jahia guarantees the integrity the editorial content in the staging and default workspaces and the isolation of published content in the live workspace. This is accomplished in the same environment because of the strictly compartmentalized system of the two workspaces. This architecture allows you to create and edit content on the production environment without the risk of making draft content available on the live site.
Content is created and edited directly on the production environment then made available on other environments as needed. The process for propagating content between environments is described later in this topic.
Creating a new project
You can create a new project from scratch and then later populate it with content.
To create a new project:
- Navigate to Administration>Server>Projects and click Create. In the Create your Project page, enter information in the following fields.
- Name
Used in various parts of Jahia to designate the site. This value can be changed later on. - Site key
Name of the root node of the site. This name will appear in the default URLs, since all pages and site contents will be stored under it. We recommend that you enter a short and descriptive title. You will not be able to change this value later on, so make sure to choose it wisely. - Server name
Name of the default domain where this site is located. If the site is a test or development site that will not go directly into production, then leave localhost in the field. This value can be properly configured on the production server later on. If in doubt, always leave the localhost value and ask an administrator or a hosting specialist. - Additional server names
Names of additional domains from which this site can be accessed. You separate multiple server names with commas, for instance: en.myservername.com, fr.myservername.com . This value can be changed later on. - Description
Used to add details about the site. This value can be changed later on. - Set as the default project
If this check box is selected and the platform hosts several sites, visitors will be redirected to this site when they access the server without indicating the desired site. This value can be changed later on. - Create an administrator for the new project
This option creates a user account with all permissions on the current site. This option is relevant if the site is going to have a specific webmaster. If the webmaster uses therootaccount or if a dedicated user account already exists (in Jahia or an enterprise directory), then it is not necessary to create a new account.
- Name
- Select the site’s template and default language and then click Next.
- Please choose a template set
Select a template set from the drop-down menu. If the template set has a preview image, it displays below the menu to show to a sample of how the page renders.

- Choose modules to be deployed
By default, all projects benefit from the components and features that are part of the core software (default module). Modules listed here are deployed on the Jahia platform (the WAR files has been deployed) that can be optionally activated on the project you are creating. Each module listed here can provide new content types or new features usable by editors.
Note: When you create a new site, a developer or a project lead should give you a list of modules to activate. If not, modules may be deployed later through the Studio (development or staging platforms) or through the Manage Modules panel in Administration>Server if it is a Production platform (when Production Mode is activated Studio is not available). - Select the project default language
Contains languages and their local variants. With a multilingual site, select the language that is the most important to you. Visitors will be redirected to this language if they try accessing the site without specifying a language.

- Please choose a template set
- The confirmation screen shows a summary of project values for you to perform a last check before creating the project. If necessary, click Previous to return the page that has information that you want to correct. Otherwise, click Save.
A loading icon displays while the server is creating the site.
For direct access to the newly-created site, select Go to Page Composer or click the Edit button on the same row. You are redirected to the first page of the site. This page is more or less empty depending on the selected template set, but it is ready for you to add content to it.
Importing projects
Importing a project from a .zip file
Importing a project from the Site Management page
You import a .zip file from a previous export to your local hard drive from the Site Management page.
To import the file from the Site Management page:
- Navigate to Administration>Server>Projects.
- In Import archive, click Please select the file to import.
- Navigate to your .zip file and open it.
- Click Upload.
- In the Import page, verify project settings and click Import. For example, provide a unique name and site key. Multiple sites will display if your import file contains multiple sites.
Importing a project located in the server file system
Large projects which have previously been exported to the server file system, or zip file located on the Jahia server, can be imported by directly providing the path to the export directory or zip file.
To import a project already located in the server file system:
- Navigate to Administration>Server>Projects.
- In Import archive > Or provide the path of the import directory on the server field, provide the absolute path to the exported site directory or the zip file
- Click Upload
- In the Import page, verify project settings and click Import. For example, provide a unique name and site key. Multiple sites will display if your import file contains multiple sites.
Importing a project by copying it to the digital-factory-data/imports folder
You import a .zip file from a previous export by copying it to the digital-factory-data/imports folder.
Before you import note that:
- The import is validated before it is processed. If an error occurs during the validation, the import is terminated and an email is sent to the notify the server administrator of import failure reasons. Note that the errors are also available in the logs/jahia-errors folder.
- You can skip the validation by adding -novalidation.zip to the end of the import zip file name. Jahia will force the import of the site and bypass any potentially critical errors. For example, if the required template set is missing, the force import procedure will use the first available template set, which means that the site will have a different look and feel and some content might not be visible anymore.
- You can change the frequency at which Jahia watches for import zip files in the digital-factory-data/imports folder by modifying the value of the
jahia.site.import.scanner.intervalproperty in the jahia.properties file. The default value is 30000ms.
Importing a prepackaged project
A prepackaged project is a site that contains ready-made pages and content, for example the Digitall demo site provided by Jahia. Prepackaged projects are useful if you frequently need to import a site or create new sites from an existing one.
The list of prepackaged projects can be populated by copying an export file of the site in the digital-factory-data/prepackagedSites folder, or programmatically using modules (see the Digitall example).
To import a prepackaged project:
- Navigate to Administration>Server>Projects.
- In Import prepackaged project, select a project from the drop-down list. Click Next.
- On the Import page, provide the project’s title, domain name and unique identifier for default URLs. Then, click Import.

The imported site then appears in the list of your projects.
Exporting a project
There are several common reasons to export a project:
- Backup
An exported site can be imported back in the exact same state as it was. However, this solution requires manual intervention by an administrator and in no case should be considered a reliable backup method. - Transfer to another server
Can be used to duplicate a site at specific times to work on another server, run tests, or use as a basis to start new projects. - Transfer from a development server to a production server
It can be convenient to export a project that was completed and prefilled with content in a development environment and then import it on a future production server.
You have the choice to export the staging version (default workspace) or both the staging and published version (live workspace).
Exporting the staging version of a project
To export the staging version of a project:
- Navigate to Administration>Server>Projects.
- Select the checkbox besides the project you want to export.
- Click Export (staging content).

The project exports as a ZIP file.
Exporting the staging and published versions of a project
To export both the staging and published versions of a project:
- Navigate to Administration>Server>Projects.
- Select the checkboxes besides the projects you want to export.
- Click Export.
The project exports as a ZIP file.
The system site can also be exported (but not deleted, renamed or modified). This option is useful if, for instance, shared content has been stored here to make it usable from all sites.
Exporting to server directory
For large projects, we advise to use the Export to server directory feature. To do so:
- Navigate to Administration>Server>Projects.
- Select the checkboxes besides the projects you want to export.
- In the Export to server directory field, enter the name of the folder to be created, which will contain the exported project(s). Starting from Jahia 8.0.3.0, the folder will be created in the path configured with the property jahiaExportsDiskPath, which is by default ${jahia.data.dir}/exports/.
- Next to the Export to server directory field, click Export to export the staging and published versions of the selected project(s), or click Export (Staging content) to only export the staging version of the project(s).
Once the export is finished, the exported project(s) can be found in the Jahia installation folder on the server file system, under the digital-factory-data/exports folder.
Editing project properties
To edit a project’s properties, click on the project name in Administration>Server>Projects. Then, you can edit the following fields:
- Project name
- Server name
- Project description
- Set as the default Project
- Activate or deactivate modules on the site
You can also edit certain properties in Page Composer by right-clicking the top node in your site and selecting Edit.
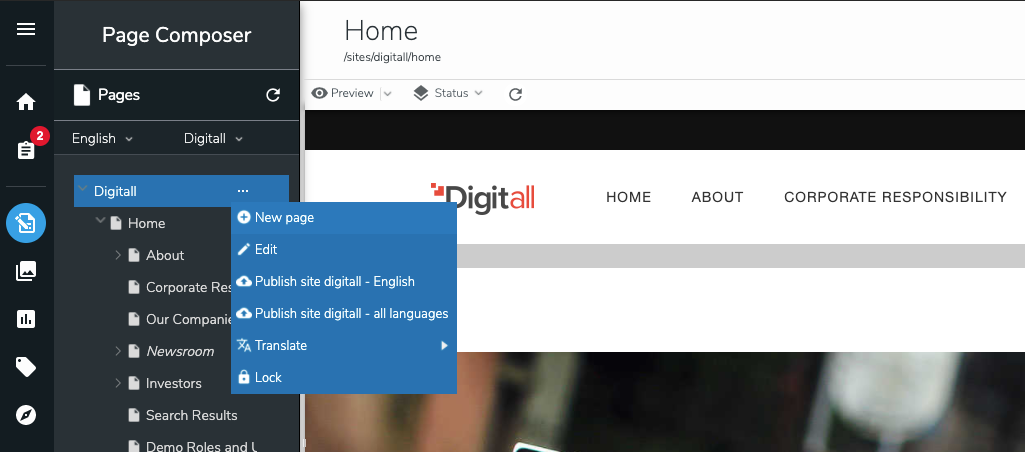
Here you can access additional information and settings. For example, you can set a different title for your site for different languages by specifying them in the Title field (which is different from the Site title field, which is unique for all languages).
Deleting a project
You can delete a single project or multiple projects.
To delete:
- a single project, click on the corresponding Delete
 . Be aware that this action cannot be undone. We highly recommend that you export the site before deleting it.
 - multiple projects, check the corresponding boxes, then click on Delete in the action menu at the top.
Best practices
The environment for content contribution should always be the production environment:
- The automatic merging of content from multiple environments is not possible
- User Generated Content (comments, ratings, etc) can be created directly on the live workspace
This content can then be broadcast over different environments using methods described in this documentation.
Initializing content
You can create content for your production environment in the following different ways:
- Content can be created in a testing environment, exported and then imported into your production environment.
- Content can be directly created in your production environment.
Regardless of the method used, we recommended that you limit content contribution to a single environment.
Automating content synchronization from production environments
Several methods of export and import can be automated to allow synchronization of content from one environment to another.
Automating the replication of content
You can automate content replication. Automation uses the same mechanisms as in the production server backup procedure. The automated import of a site does not overwrite the previous version of the site if the site still exists on this platform. You must remove the previous version first. You can automate this action using a Groovy script.
To automate the replication of content:
- Run the following command to automate how content is exported.
Command wget http://<Serverip>:<port>/cms/export/default/{siteKey}.zip?exportformat=site&live=true&sitebox={siteKey} --http- user=root --http-password={ROOT_PASSWORD} --auth-no-challenge - To automate how content is imported, copy the exported file to the
digital-factory-data/importsfolder on the destination platform.
Choosing a replication schedule
The frequency at which you replicate content depends on the needs of your particular organization. When choosing a replication schedule, consider the following:
- Daily replication can result in increased restrictions or workload for developers and testers. This could result in loss of content used in integration and test environments.
- Replication each week or month can induce too much latency, making it hard for developers to replicate issues found on other environments.
- Ad-hoc replication is a manual action.
A compromise must be found between these different restrictions and risks.