Connecting to GraphQL using Apollo Client
October 8, 2024
Connecting to GraphQL using Apollo Client
To connect to Jahia's GraphQL API, you can add the Apollo GraphQL client library.
To add the Apollo GraphQL client library:
- From the root of the project, execute the following commands on the command line:
yarn add react-apollo yarn add apollo-cache-inmemory yarn add apollo-client yarn add apollo-client-preset yarn add apollo-link-rest yarn add graphql - In App.js file add:
//... import {ApolloProvider} from 'react-apollo'; import {ApolloClient} from 'apollo-client'; import {HttpLink} from 'apollo-link-http'; import {InMemoryCache} from 'apollo-cache-inmemory'; const JWTDXToken = 'JWT_DX_TOKEN'; const httpLink = new HttpLink({ uri: 'http://localhost:8080/modules/graphql', headers: { 'Authorization': `Bearer ${JWTDXToken}` } }); const client = new ApolloClient({ link: httpLink, cache: new InMemoryCache() }); - Then modify the render body to the following:
(<React.Fragment> <ApolloProvider client={client}> <CssBaseline/> <AppBar position="static" color="default"> <Toolbar> <Typography variant="title" color="inherit"> Companies </Typography> </Toolbar> </AppBar> <Grid container> <Grid item xs={12}> <Paper> <CompanyList/> </Paper> </Grid> </Grid> </ApolloProvider> </React.Fragment>); - Next you create a container for the CompanyList component that will fetch company data using GraphQL. Create a ContainerList.container.jsx in src/components/CompanyList and add the following imports:
import React from 'react'; import {Query} from "react-apollo"; import gql from 'graphql-tag'; import CompanyList from './CompanyList'; - You can now declare a query for retrieving all available companies:
const COMPANIES_QUERY = gql` query CompaniesListQuery($language: String) { jcr(workspace:LIVE) { nodesByQuery(query: "SELECT * FROM [jdnt:company] as results WHERE ISDESCENDANTNODE(results, '/sites/digitall/')", queryLanguage:SQL2) { nodes { uuid title: displayName(language : $language) description : property(name : "overview", language : $language) { value } thumbnail : property(name : "thumbnail", language : $language) { url: refNode { path } } } } } } `; - Next you define the functional CompanyListContainer component that uses the previously imported Query component to fetch and render the CompanyList:
const CompanyListContainer = () => { const variables = { language: "en" }; const generateURL = path => { return `http://localhost:8080/files/live${path}?t=thumbnail2`; }; return ( <Query query={COMPANIES_QUERY} variables={variables} fetchPolicy="network-only"> {({loading, data}) => { let companies = []; if (data && data.jcr && data.jcr.nodesByQuery) { //Build the company data as expected by the Company component data.jcr.nodesByQuery.nodes.forEach(node => { companies.push({ id: node.uuid, title: node.title, description: node.description.value, image: generateURL(node.thumbnail.url.path) }) }); } return <CompanyList loading={loading} companies={companies}/> }} </Query> ); }; export default CompanyListContainer; - Update the existing index.js so that CompanyListContainer is the default export. Change:
To:import CompanyList from './CompanyList';import CompanyList from './CompanyList.container'; - Lastly, you update the Company component to make data displays dynamically. Change:
To:<CardContent> <Typography component="h1" variant="display1"> Company Name </Typography> <br/> <Typography component="p"> {description.length > 150 ? `${description.substr(0,100)}...` : description} </Typography> </CardContent>
You now have a base Javascript application that retrieves content from Jahia using GraphQL and that uses React and React Material to display the content.... <CardContent> <Typography variant="title"> {title} </Typography> <br/> <Typography component="div"> <p dangerouslySetInnerHTML={{__html: description.length > 150 ? `${description.substr(0, 100)}...` : description}}/> </Typography> </CardContent> ...
Setting up authorization
By default, Jahia’s REST and GraphQL API are closed even if nodes have public read permissions. The APIs are closed for security reasons. To open up the API and make it usable for your application, you must configure Jahia’s security filter module to allow public access. You can find more information about the security filter module here: https://github.com/Jahia/security-filter
Note: Developer Tools requires the appropriate permissions. For more information on required permissions, see Managing roles and permissions.
To make the data publicly accessible:
- Add the
org.jahia.modules.api.permissions-myapp.cfgJahia configuration file to thedigital-factory-data/karaf/etcfolder with the following contents:
The scope setup here requires creating a JWT token when you integrate authorization in the Apollo Client in the Javascript code. Please be aware that the value ofpermission.myapp.api=graphql permission.myapp.scope=myapp permission.myapp.nodeType=jnt:news,jnt:contentFolder,rep:root permission.myapp.pathPattern=/,/sites/[^/]+/contents/.*,/sites/[^/]+/files/.*permission.myapp.pathPatternhere. It should match the node paths which you are going to access. - You also must create a
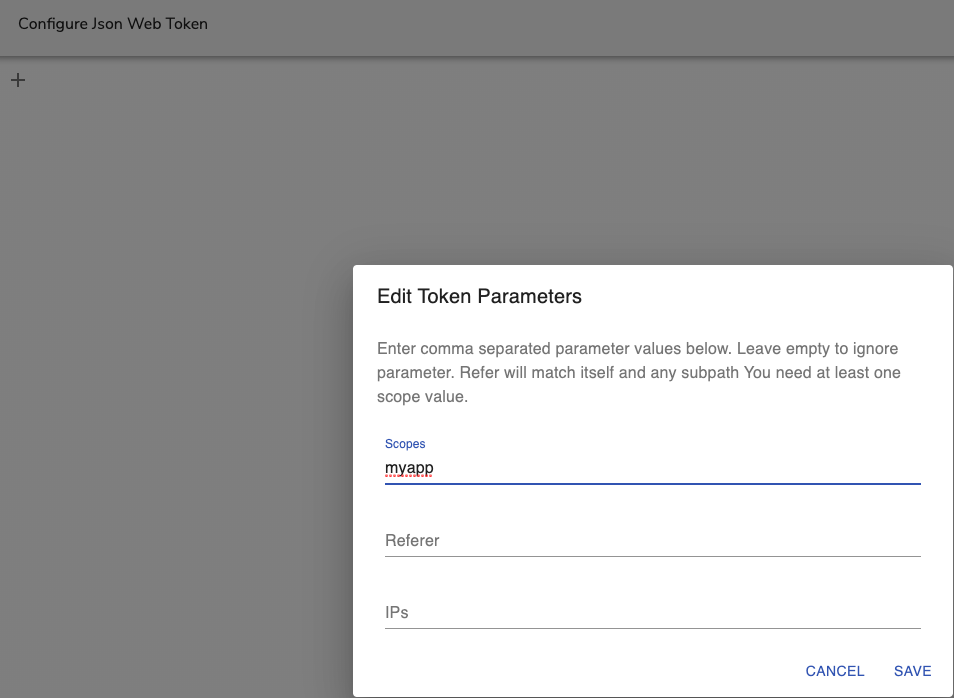
org.jahia.modules.graphql.provider-myapp.cfgfile for the CORS authorization with the following content:http.cors.allow-origin=http://localhost:3000 - In Jahia, navigate to Developer Tools>JWT Configuration and create a new JWT Token. Click the Add token button and specifies
myappin Scopes in the Edit Token Parameters dialog.

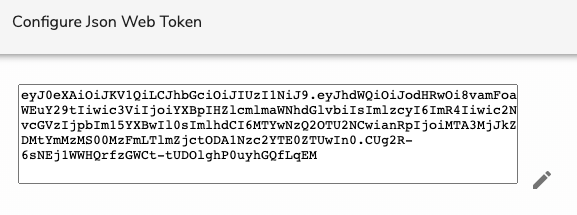
- Click Save and copy the generated token.

- Replace the example JWT_DX_TOKEN value with the copied token.