About content management tools
Presentation
The managers are independent interfaces to ease the management of files and content, they can be compared to the file explorer of your computer. Jahia comes with 4 main managers, but your role(s) may not allow you to see all of them. The managers are accessed from the Jahia menu.

Managers open in a new tab. All of them are described here, but the most common ones are the “Document manager” and the “Content manager”. The 4 main managers are:
Administrators can have access to two additional managers:
Every manager comes with a navigation panel on the left and a search engine. The main panel is used to display the contents of a folder or the search results.
Navigation panel
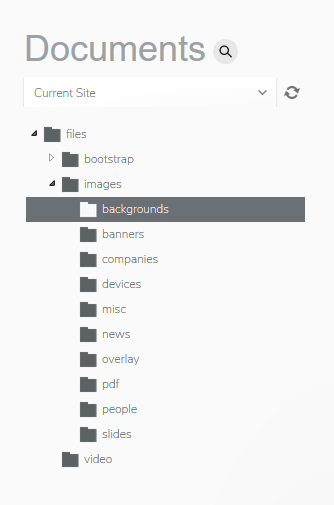
The Navigation panel shows the tree structure of the items displayed in the managers:
- Folders in the document and content manager
- Folders, pages, area and lists in the site manager
- Categories in the category manager
- Portlet folders in the portlet manager
- Everything in the repository explorer
Using the right-click on an element in the navigation panel will show the different actions available for the element. For instance: creating a new sub folder, publishing the folder, etc.
The drop-down list allows you to select the element(s) to display in the navigation panel. Depending on the manager, the following options may be available:
- Current Site: the manager will only display contents / files / elements coming from the site you were editing when you opened the manager
- Sites: the manager will display contents / files / elements from all the sites you have access to
- External Repositories (for document manager only): it is possible that Jahia has access to files stored on other system/servers. Such files can be accessed through this “External repositories” entry
- My workspace (document and content managers only): the manager will only display contents / files / elements coming from your personal folder
- My saved searches: See “Search and saved search” documentation below. Clicking on a saved search in the navigation panel will re-execute the search. The results are displayed in the main panel.
The refresh button is used to refresh both the navigation panel and the main panel.
It is possible to collapse the navigation panel in order to use the full width of your screen to display the contents of a folder.
Search and saved searches
All the managers come with the same search interface, useful to search for contents/files/elements that can be displayed in the manager. To open the search interface, just click on the magnifying glass.
The search field is displayed on top of the main panel. It is possible to narrow the search results, by:
- Selecting the language to use for the search
- Choosing to include or not the search in name and tags (checked by default)
- Filtering by creation, modification or publication date
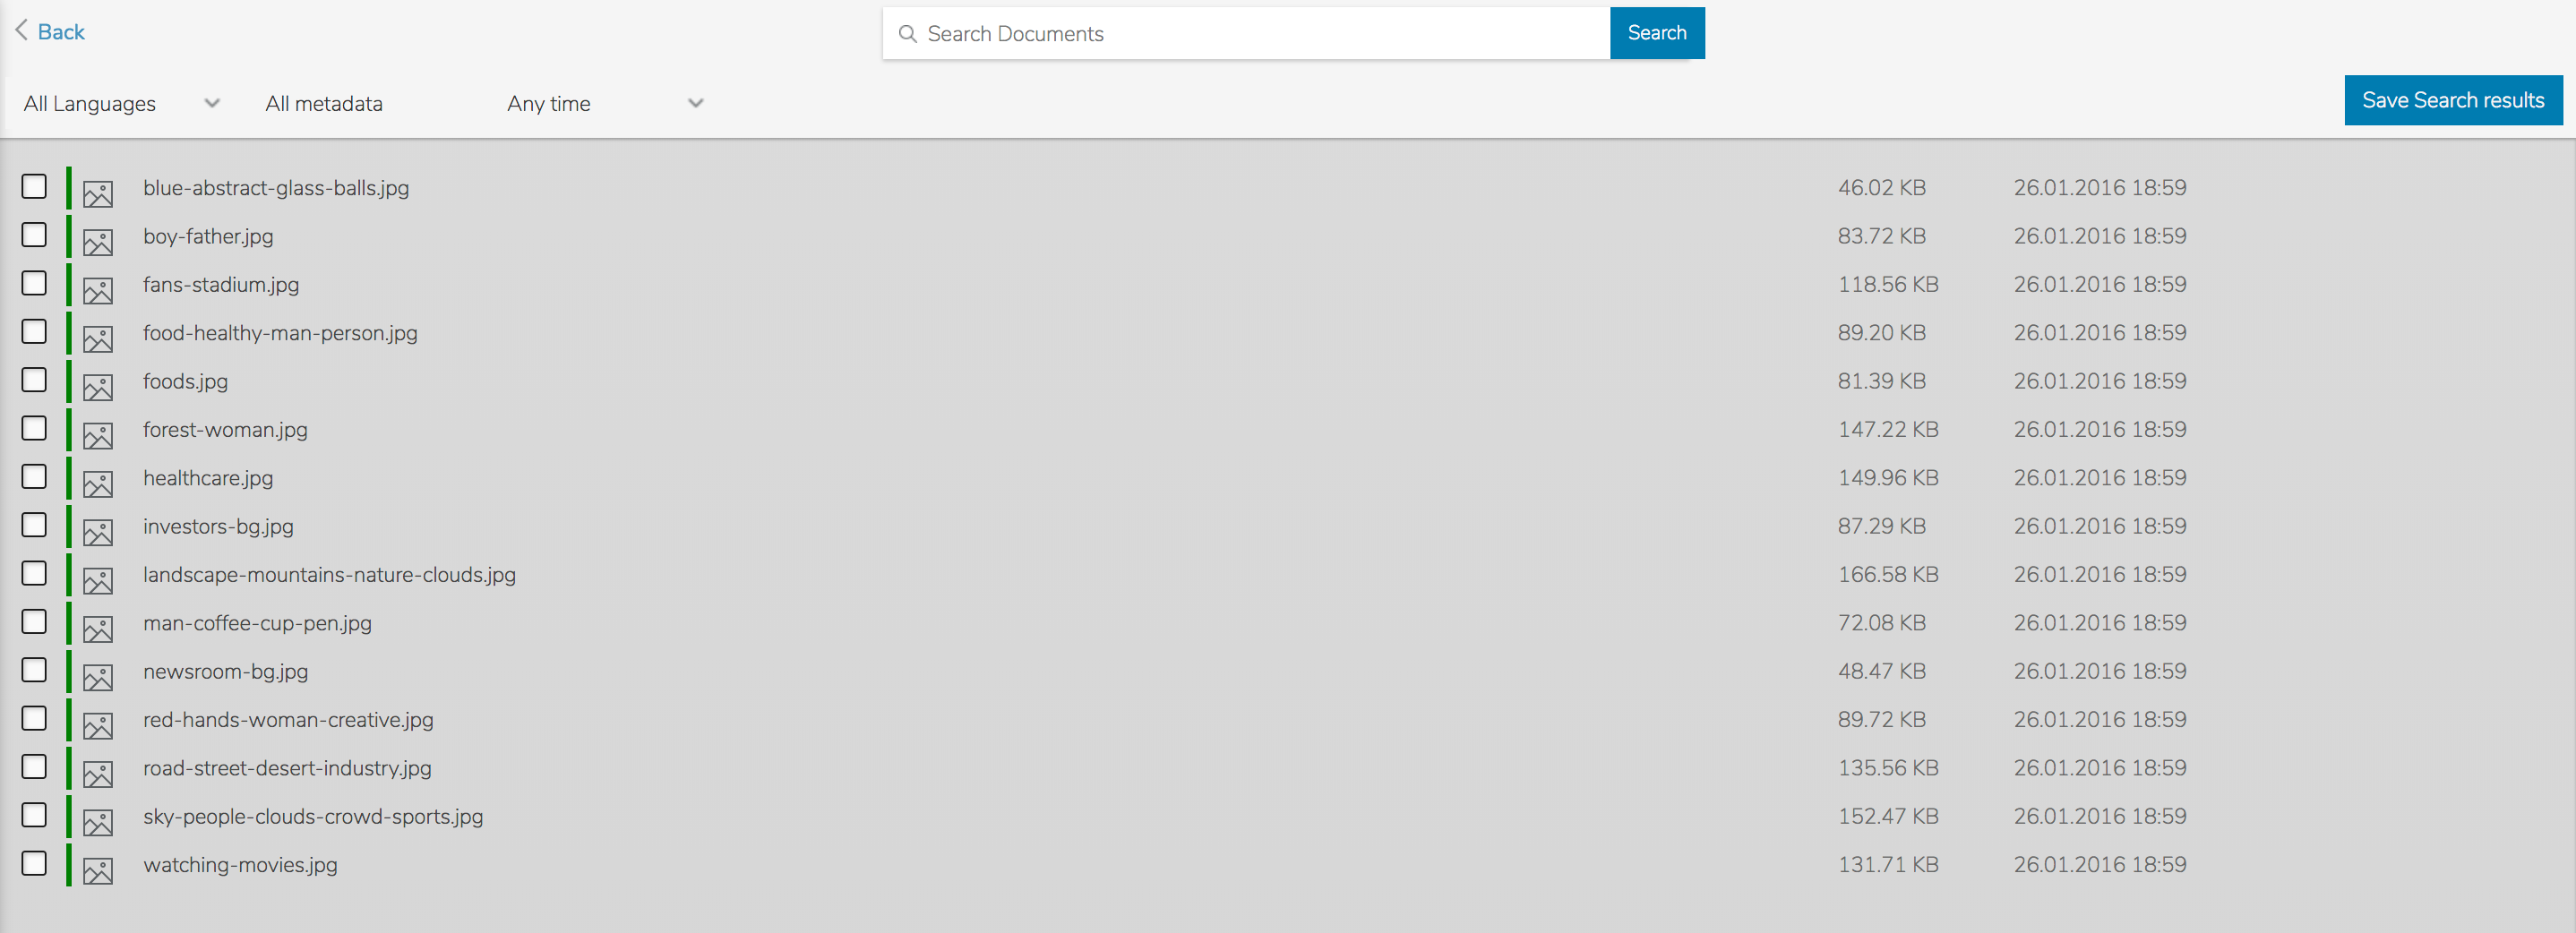
Once a search is performed, it can be saved by clicking on the “Save Search results” button. Then you will be prompted to give a name to your search, pick a meaningful one. This save search will now be displayed under “My Saved searches” in the navigation panel.
Document Manager
Please consult the Manager-Presentation chapter for a description of the navigation panel and search interface.
The document manager is used to manage the files and images you need in your site(s). As mentioned in the “Content type - Files and Images” documentation, the files and images are stored under a “file” folder of your site. The document manager allows you to organize, browse and search files stored in this folder.

Display
Three views are available in the document manager:
- List: items are displayed in a table, the information displayed in the different columns depend on the type of element
- Thumbnail: shows a thumbnail of the items. Hovering on the item will display its name, as well as a preview button, an edit button (to open the edit engine) and a button to show the contextual menu
- Details: shows a thumbnail of the items as well as some extra information. Hovering on the item will display a preview button, an edit button (to open the edit engine) and a button to show the contextual menu
To switch from a view to another, just use the corresponding button in the top right corner:

When the Thumbnail or Details view is selected, a zoom bar appears to let you adjust the size of the thumbnails. It is also possible to filter and sort the files of the selected folder.
Creating a new folder
To create a new folder, you can either:
Right click on a folder (in the navigation panel or in the main panel) and then select “New folder” in the contextual menu
Click on the New Folder button  to create a new folder in the currently selected folder.
Uploading files
To upload files in a a folder, you can either:
Right click on a folder (in the navigation panel or in the main panel) and then select “Upload” in the contextual menu
Click on the Upload button  to upload content in the currently selected folder.
The upload file form is then displayed. The file upload form is described in “Content type - Files and Images”.
Creating a zip folder
You can create a zip file of a folder and its contents using the “Zip” entry of its contextual menu. This is useful to be to download an entire folder.
Editing file properties
In order to edit the properties of a file (metadata, roles, visibility conditions for instance) you need to open the contextual menu of the file and then click on “Edit”. The Edit engine for the file is now opened. Please consult the documentation of the “Edit engine” if needed.
Image editing tools
It is possible to crop/resize/rotate images, by selecting the corresponding entry in the contextual menu of the selected image.
These operations will create new images, meaning that the original images stay unmodified.
Crop

The cropping tool allows you to either:
- Directly crop the image using your mouse
Or
- By selecting a predefined size
The selected area can be moved inside the image to adjust the selection.
In the “New name” field you can enter the name of the new image that will be created. If you chose the same name as the original one, a confirmation is required as it would override the original image.
Resize

To resize an image, you can either select a predefined size, available in a drop-down list, or by manually setting the desired width and/or height. If you don’t want to keep the ratio when editing the image size, simply uncheck the “Keep ratio” checkbox.
In the “Rename” field you can enter the name of the new image that will be created. If you chose the same name as the original one, a confirmation is required as it would override the original image.
Rotate

The “Rotate” form is pretty simple, just type the name of the new file to create and click on the desired button: “Rotate left” or “Rotate right”. If you chose the same name as the original image, a confirmation is required as it would override the original one.
Content Manager
Please consult the Manager-Presentation chapter for a description of the navigation panel and search interface.
The document manager is used to manage “out-of-context” contents of your site(s). As mentioned in the “Content type - Out-of-context contents” documentation, such contents are stored under a “contents” folder of your site. The content manager allows you to browse, organize and search contents stored in this folder.

Creating a new content folder
To create a new content folder, you can either:
- Right click on a folder (in the navigation panel or in the main panel) and then select “New content folder” in the contextual menu
- Click on the
 button: this will create a new content folder in the currently selected folder
Creating new content
To create a new content, you can either:
- Right click on a folder (in the navigation panel or in the main panel) and then select “New content” in the contextual menu
- Click on the
 button: this will create a new content in the currently selected folder
The content type selector is now displayed, allowing you to select the type of content to create:

Once the content type is selected, the corresponding Edit engine is now displayed.
Operations on content and content folders
By opening the contextual menu of a content or content folder, you have access to several options:
Site Manager
The Site Manager shows all sites on which the user has edit rights and ease some operations to manipulate the structure of these sites, as well as the page attributes of your site.
The particularity of the Site Manager is to display not only pages but all content items that compose a site, including items that are not visible in edit mode and are used to structure pages like lists or rows/columns components, or components with no rendering at all.

Category Manager
The category manager allows you to create new categories and organize the existing ones.

Only the users who have both following permissions can have access to the category manager:
- “Access to Category Manager“
- Write permission on an existing category
Categories
Categories are taxonomy terms/concepts to “classify”contents. Categories are assigned to contents using the Category tab in the Edit engine of the content.
Categories are organized in a tree, a category can have sub-categories. The categories are shared by all the sites of the platform, and by default visible by all the contributors. It is possible to hide categories from users or groups, as described in the “How to restrict a category to a group of users” chapter.
Creating a new category
In order to create a category, simply open the contextual menu of an existing category and then “New category” and fill the form in the edit engine.
Editing a category
To edit a category, open its edit engine:
- Via its contextual menu
- By clicking on the displayed when hovering on a category
From the edit engine of a category, you will be able to:
- Rename the category
- Translate its name in a different language
- Setting edit and live roles
- View the contents on which the selected category has been applied through the “Usages” tab
By granting an edit role with write permission to a user (or group) on a category, you allow him to edit the category itself, and to create sub-categories.
By granting a live role with read permission to a user (or group) on a category, you allow this user to see the category in the “Category” tab of the content edit engines.
Restricting a category to a group of users
If you want a category to be only visible by a group of users, you need to edit the category and in the Live roles tab:
- Remove the reader role to “Guest user” and “users”
- Give the reader role to your group, using “Add new groups”
- Save
This way, only the members of your group will be able to use the category when editing their contents.
Portlet Manager
The portlet manager allows an administrator to create and manage portlets, which were previously deployed on the application server.
Repository Explorer
The Repository Explorer is the only manager which provides access to all content stored [all the nodes] within the data repository. This tool is reserved for the root user (main administrator of the platform) since it is possible to edit, delete or move any item, including the nodes essential to the functioning of your sites. This is a powerful tool which should be used with caution by administrators.