Managing site settings
A site administrator can open the site administration panel for a given site from Edit Mode>Site Settings, as shown on the following image.

This section contains all the necessary tools to manage a Jahia virtual site.
If the site administrator also has administrative/edition rights on other Jahia Web projects, they can access these other sites via a drop-down menu and manage them using the same options.
A site administrator can access the server settings using "Administration Mode", but only a few options will be available. The other options are reserved to administrators with higher permissions and they will be grayed out.
Clicking on the "Pages" tab will redirect the site administrator to the current site’s page editor.
An advanced user with some administrative rights can access only the options matching his permissions. The other options will be grayed out.
We will now cover the various options that are available to manage a site.
Managing groups
Groups can be managed in the administration interface, from the "Site Settings" section. Unlike users, which are shared across the platform so as to ensure their uniqueness, each site has its own set of groups, which can be different from the groups of another site.
Creating a group
Click on the "Create new group" button and enter a name for it in the "Group name" field.

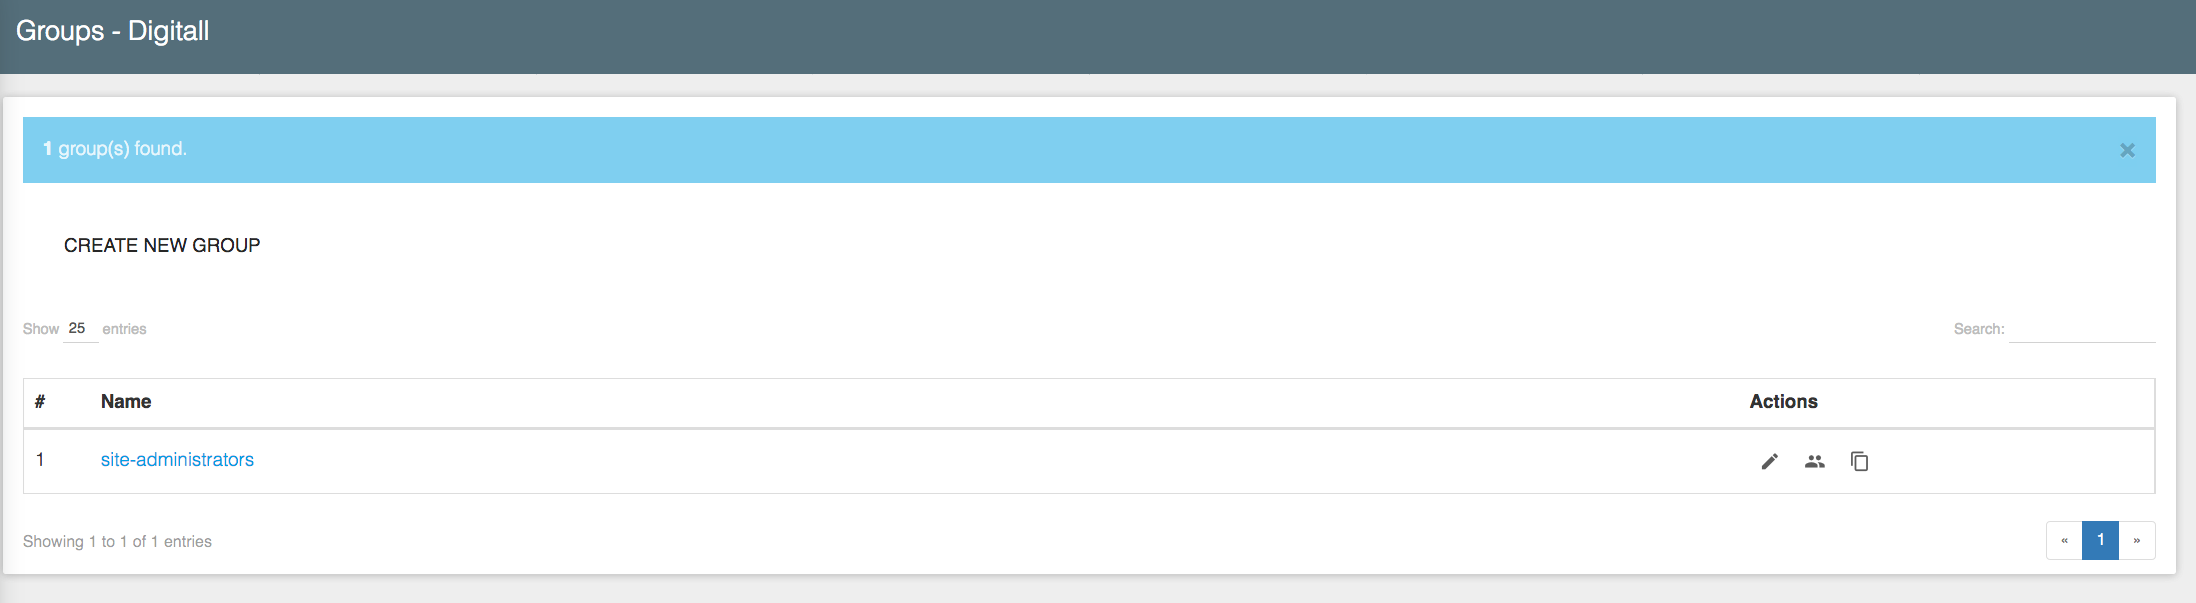
Once the group has been successfully created, the updated list of groups is displayed.
When a group is created, it is initially empty.
Adding and removing members
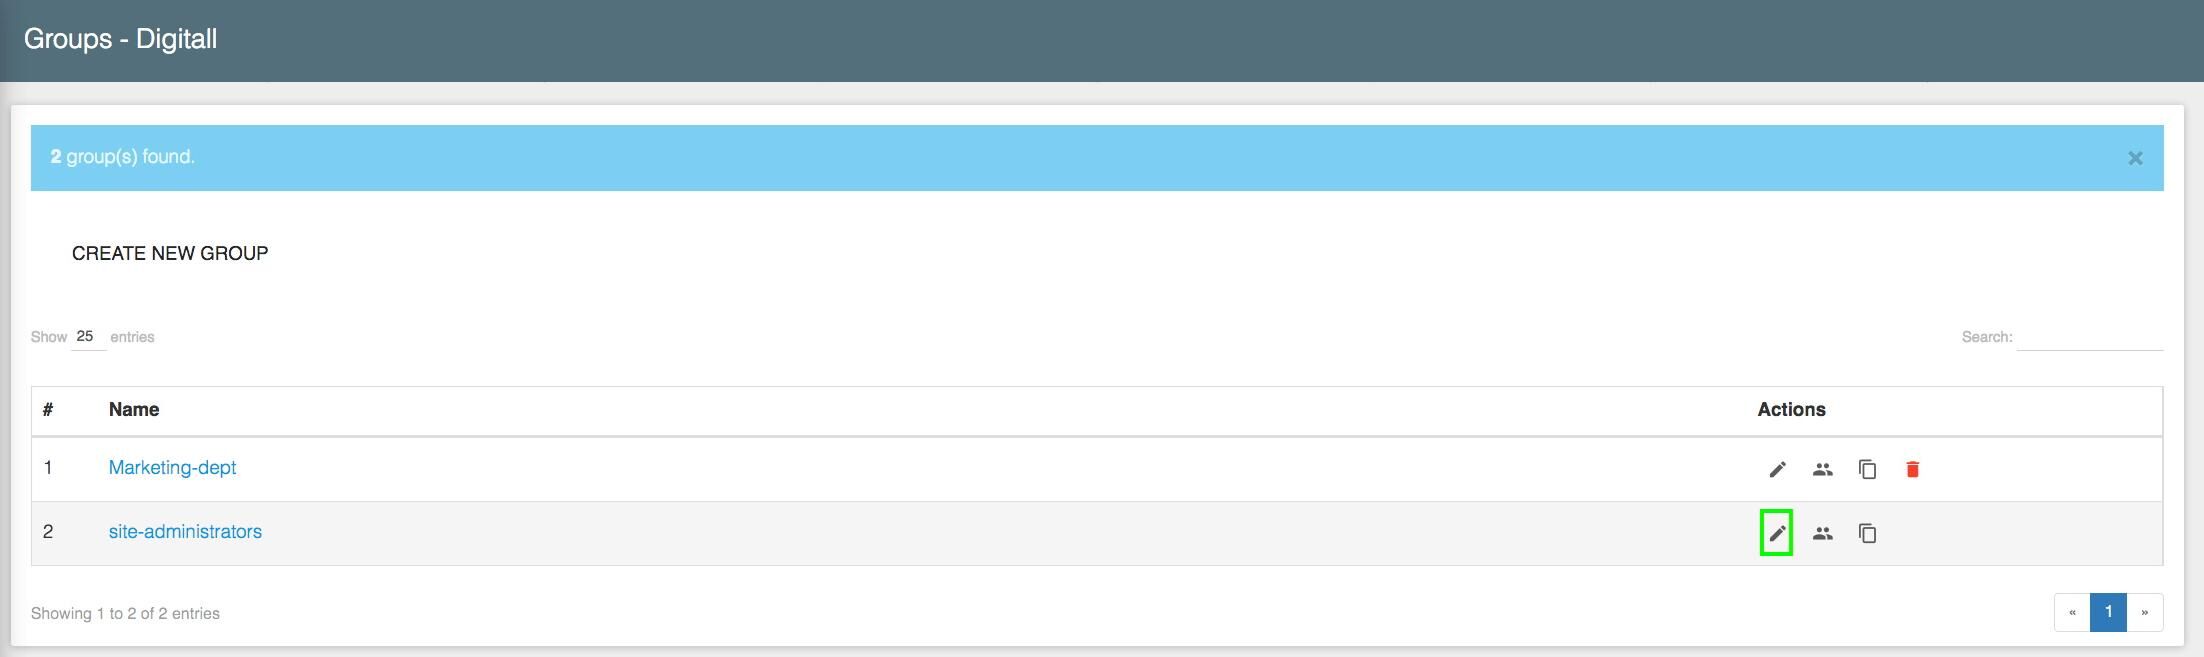
In the list of groups, double-click on the group that you want to edit. Alternatively, you can select this group and click on the "Edit selected group"  icon.
icon.
To add members to the group, click on the name of the group or on the corresponding Edit button, then on the "Edit Membership" button on the next page.
A window is displayed, containing a list of all users on the platform in alphabetical order. If the platform contains a large number of users, you can enter a name or part of a name in the search field at the top of the window.
To add users to the group, select the corresponding users by checking the box next to their name. To remove existing group members, uncheck the box. Save to apply changes.

To add a single user, select it in the list and click on the "Save" button.
To add several users, select them by checking their corresponding checkboxes and click on the "Save" button. When the user selection screen is closed, the updated list of users in the group will be displayed.
You can also add existing groups to another group by selecting the "Groups" button. The list of existing groups will be presented and you can add them or remove them from the current group in a similar way, by clicking/unclicking checkboxes.
To remove a member from a group, select the user in the list and click on the "Remove" button.
To remove several users, click the "Edit membership" button at the top and uncheck the corresponding boxes, then click "Save". A dialog window will ask you for confirmation. You can also use this option to remove a single member.
Please note that this action does not remove the user(s) from the platform, but only from the group.
You can also remove one or more groups from the current group by clicking the "Groups" button, unselect them, and Save.
Removing a group
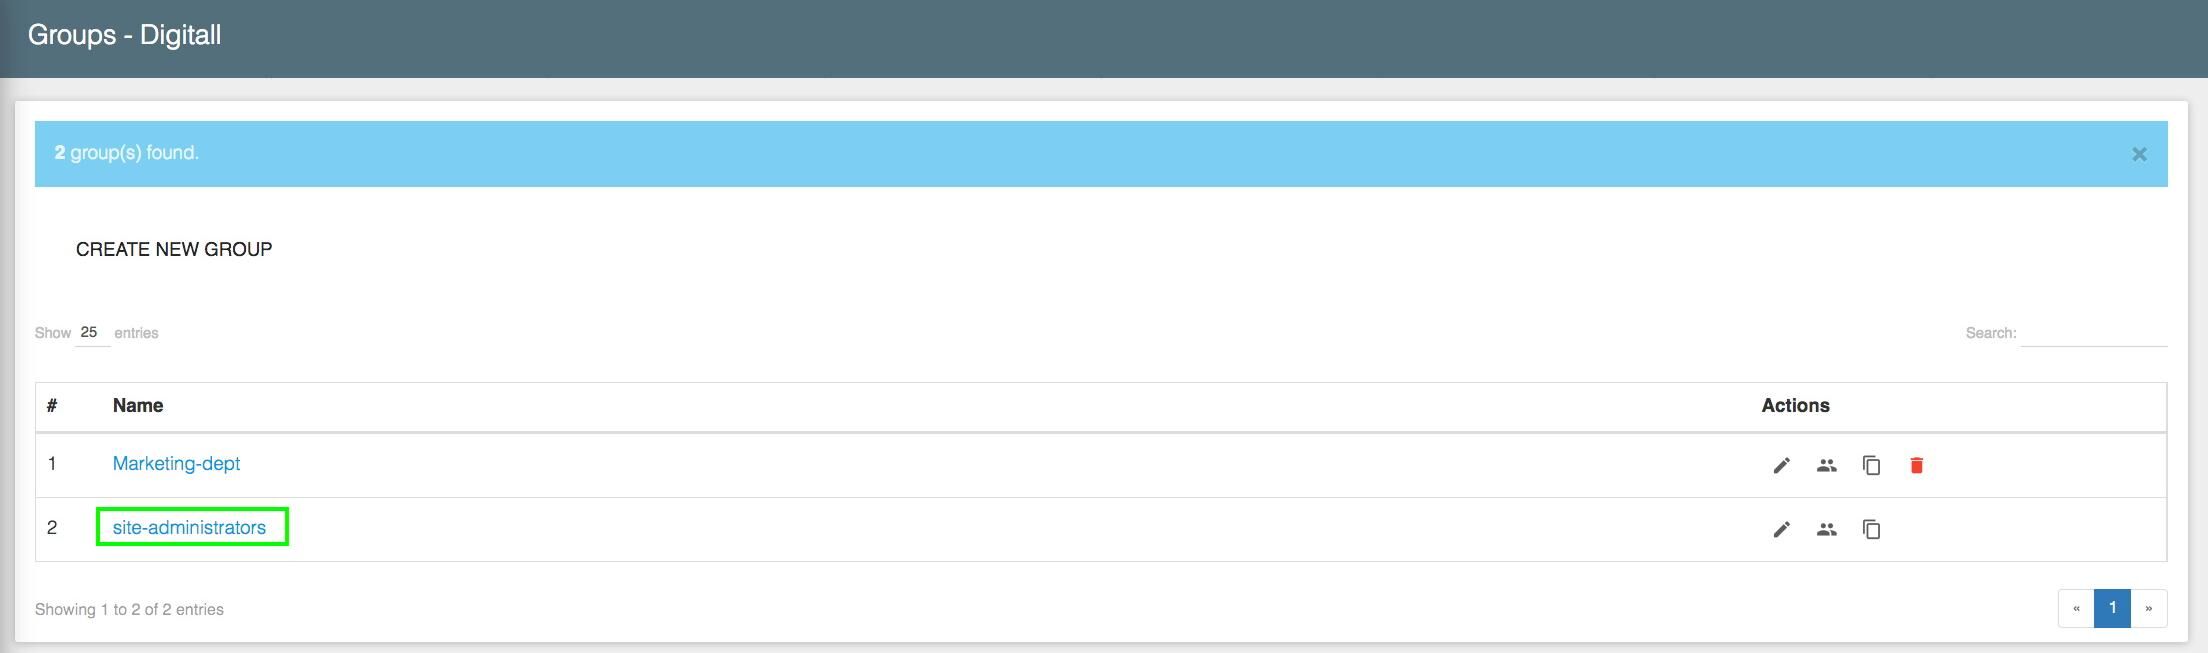
To remove a group, go to the list of groups, then click on the "Remove" icon next to the group you wish to remove. Members of the group (users or groups) are not deleted from the system.
Note: the system group "site-administrators" cannot be removed.
Duplicating a group
If you need to define a new group with similar members to those in another group, you can duplicate the existing group by clicking on the "Copy" icon next to its name. Jahia will then ask you to enter a name for the new group. Now all you need to do is add or remove members from the new group, without having to go through the entire group configuration process again.
Using groups with roles
Edit Roles and Live Roles can be assigned to users or groups through the Editing engine, on a specific node (page, content item …). The permissions associated with the role are then conferred to the users and the members of the designated groups. Right-click the desired node and choose "Edit", then click the "Edit roles" tab (or "Live roles" tab) to manage Edit (Live) roles for this node.

Click "Add new groups" to select the groups that will be associated with this role.

External group provider
Jahia allows the connection between a specific website and an external group provider. First, ask your current server administrator to connect Jahia with the external group provider you want to have access to.
When the connection is made the server administrator has to link it to your website through the target site field.
When this is done, you will find all the users and groups from this external provider into your website’s Users and Groups modules within the Site settings section.
Managing languages
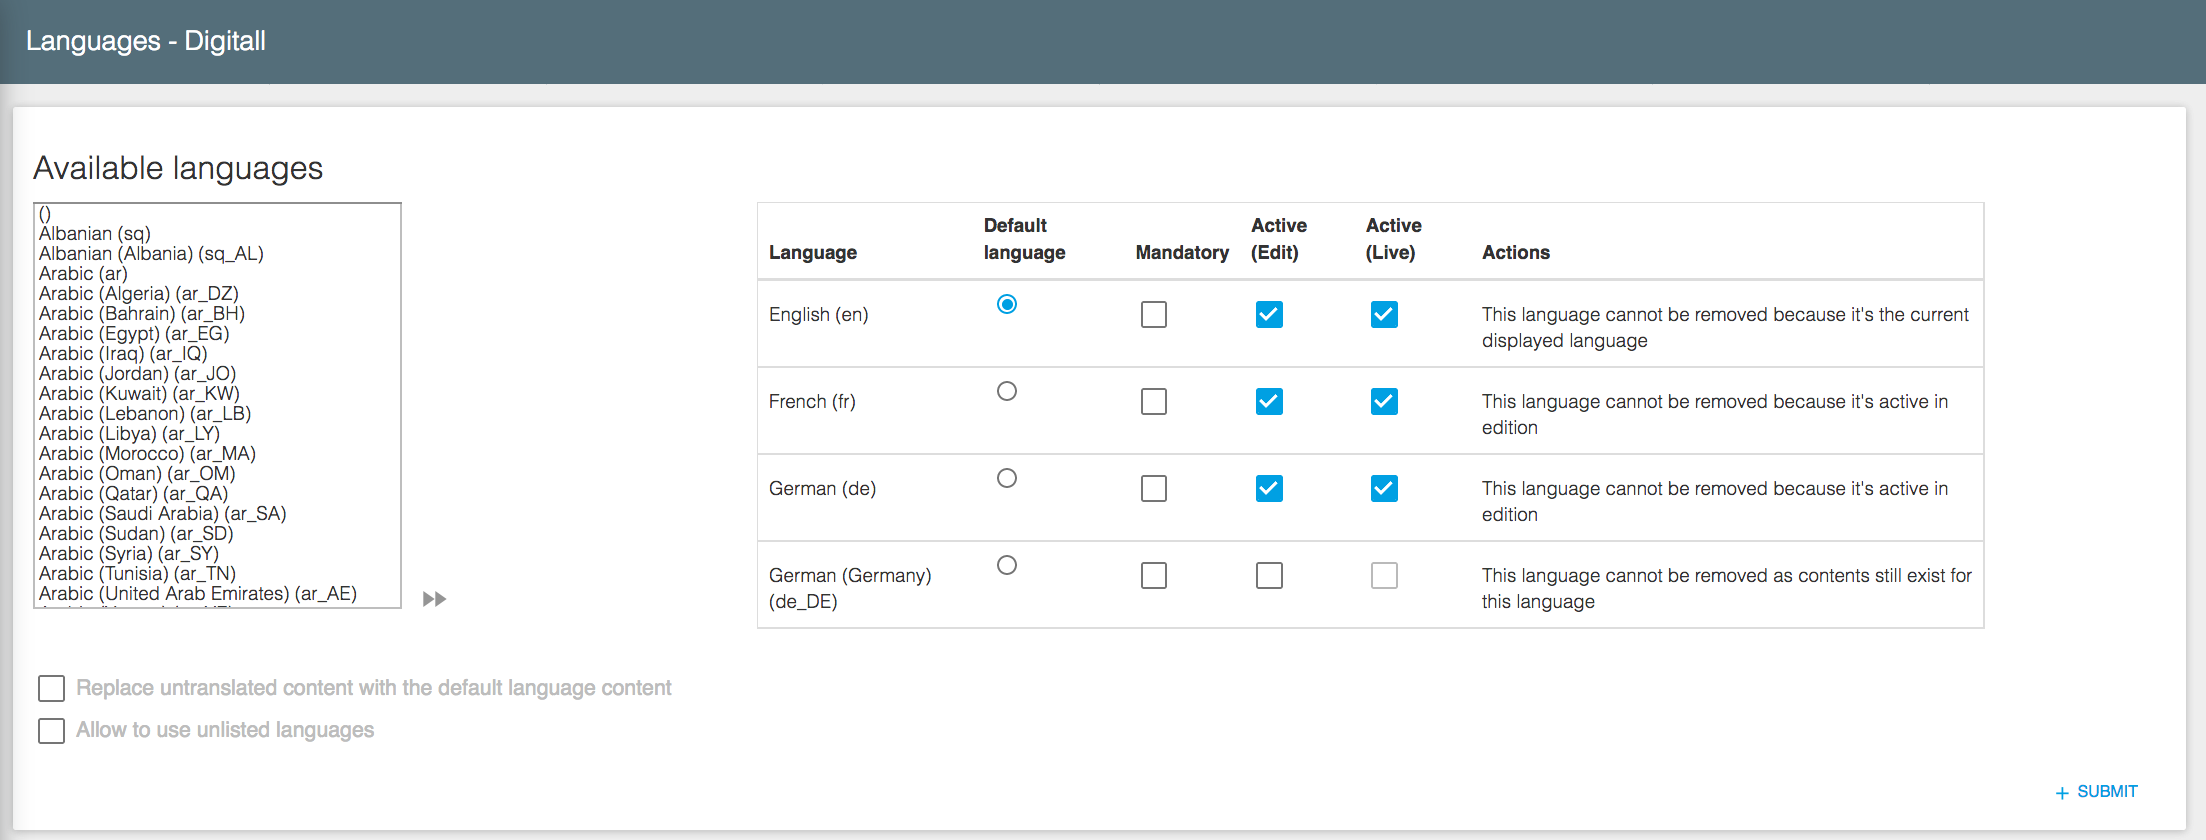
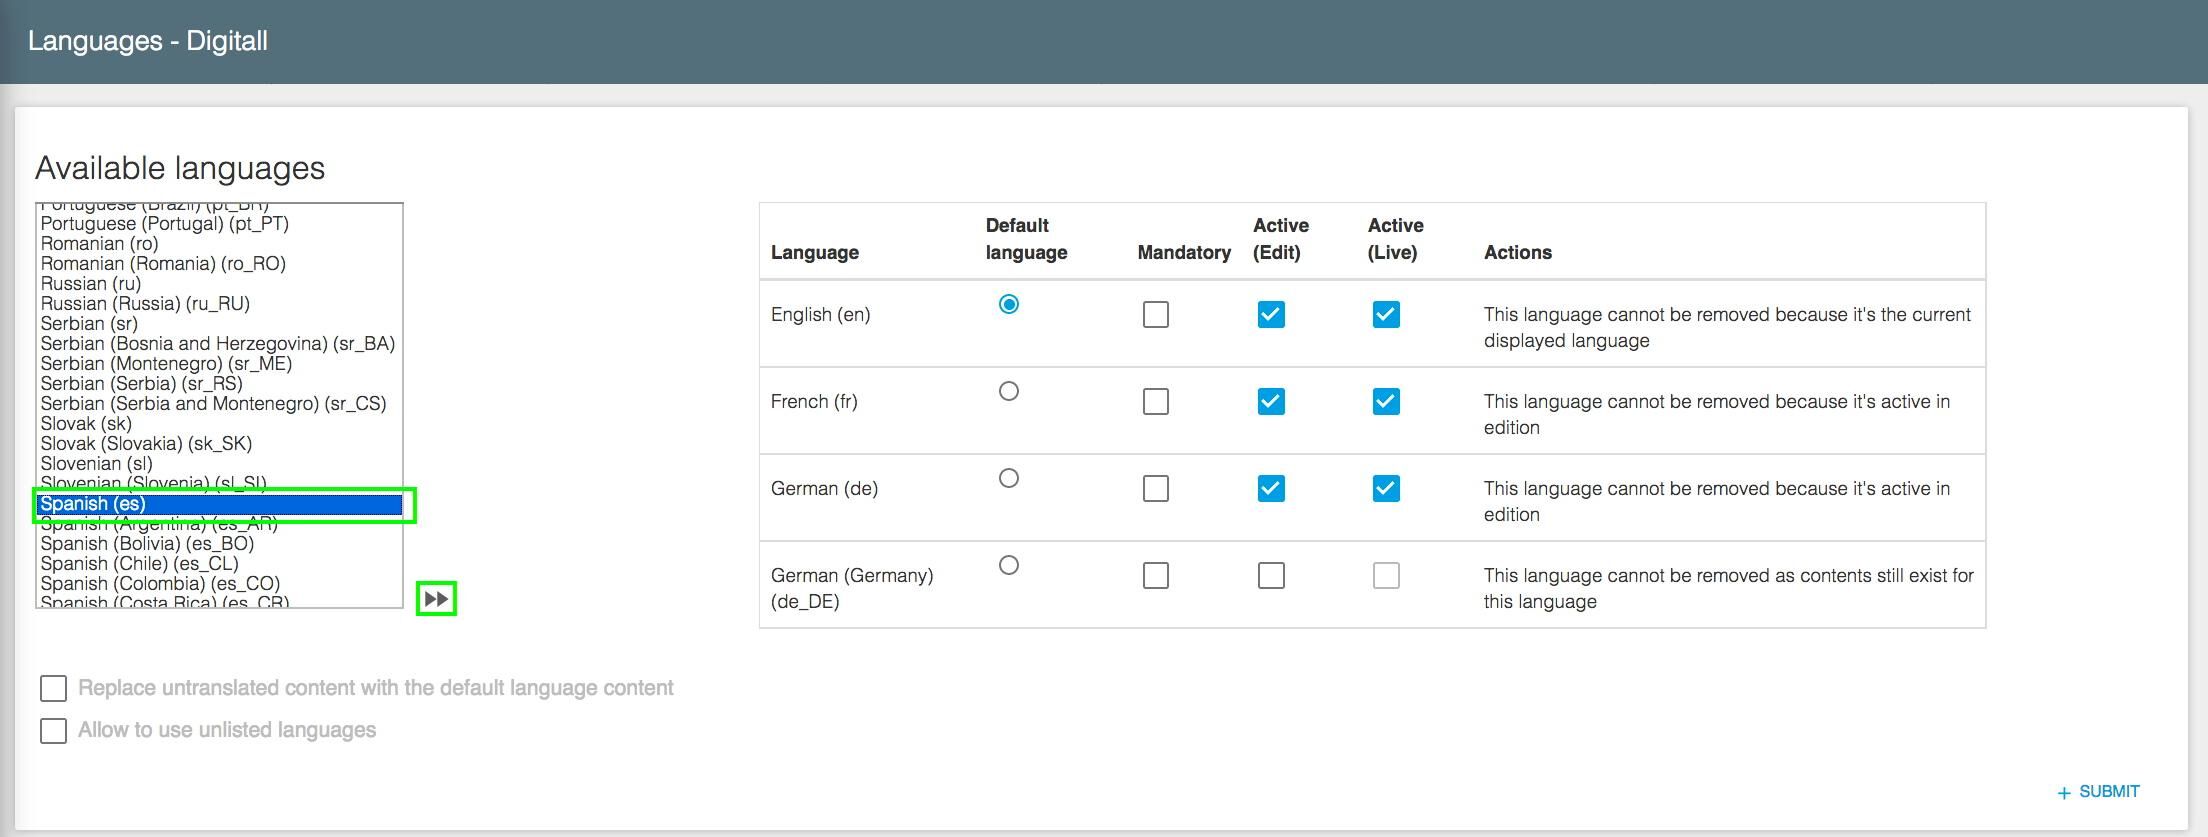
This panel allows you to manage language settings for the current site.
The right part of the panel displays languages already declared as usable on the site as well as options available for multilingual management.
The left part displays languages that can be activated on the site.
Options available for each language
Default language
Only one language can be defined as the default language among all declared languages.
The default language is the one where:
- System names (i.e. used by the system) of content can be authored and modified (in order to maintain URL consistency, system names are invariable and editable in only one language)
- Jahia will redirect visitors automatically if it doesn’t have the data necessary to serve pages in a specific language
- Jahia will serve non translated content if the substitution option has been activated on the current web project
The default language is the one used by Jahia to serve content if it fails to find a language corresponding to the preferences expressed or implied by the user. Jahia seeks for this user preference through a series of tests against all user related datasets.
The order of the tests is as follows
- Language specified in the URL
- Language specified in the user profile (for registered users)
- Preferred language declared in the browser options
- Browser language
Mandatory language
When this box is checked, content entered in this language may not be published if the fields defined as mandatory (that is to say, the fields that need a proper translation) have not been filled in. To preserve flexibility in editing, enabling this option does not prevent content capturing in a given language without automatic publishing of its translations into the languages declared as mandatory, but prevents many operations (such as publishing content online) if the criteria for mandatory language have not been met.
Active (Edit)
This option controls whether content written in a specific language can be changed. If this option is unchecked, content in this language are safely stored, but it is no longer possible to edit content in this language.
This option is appropriate if you want to stop translating new content in a given language on your site and you are happy with the existing, or if you want to completely disable a language (in which case this box and the next box must be checked) without removing the language altogether -and its related translated content.
At any time, it is possible to reactivate a previously disabled language: previously translated content will then reappear.
Active (On Line)
This option allows you to determine whether this language is accessible by people who consult the published version of your web project. If this box is unchecked and even if translations exist in this language, users can not access them.
When adding a language this box is always unchecked, so you have to manually activate it at the appropriate time.
This option is especially useful when a language is added to a site already active and we want to start translating it and even publish pages by rendering the language actually used by visitors only when the level of finish is considered sufficient to allow proper navigation of the new language.
Multilingual management
Adding languages
To add one or more languages, select (click) or more languages (Ctrl-click) on the list on the left part of the screen, then click ">>" to move them to the right, then "Submit".
You will notice that some languages are listed multiple times. In fact, the list is based on local languages (language of the region), the available languages are in fact a combination of language and region.
Jahia can identify these local languages from the browser preferences and will react differently depending on the detected language (fr_CA or fr_FR for example). You might have two separate sites with different content for Canadian and French.
If you prefer to manage the French generically, choose the French language (fr). If you do not intend to handle content specific to a country or region (eg en_US or fr_FR), you should always use the generic local language for the specified language.
The list of available locales and languages come directly from the Java Virtual Machine (JVM) used. Each JVM supports different languages. The official languages of ISO may not be present after the JVM. In this case, you can use another language that you never use (such as language available on the site) and change the language icon (flag) on the disc or template. Jahia will not automatically recognize the language for redirection for users, but they can switch between different languages from the home page.
Using the default language

For intranet or extranet requirements, you may need to display content regardless of the language of the user's browser. In the case, for example, where you do not want blank pages in some languages when the site has not been fully translated or made available in all languages, you can enable the option of mixed languages (i.e. Use several languages when browsing).
If this option is enabled and the content object does not exist in the current language, Jahia will display the content in the default language.
For instance: if English is the default language and some content is not translated into French, it could then be automatically replaced by English.
The use of this option is not recommended on sites open to the public because the result can be confusing to inexperienced users, but it can be acceptable on sites such as intranets if people are aware of this choice and are therefore not likely to be confused by having content in two languages on the same page.
Allowing access even for undeclared languages

By default, Jahia serves pages in the requested language through the URL and loads the resource bundle files (translations for the static elements declared in JSP pages) of the matching language.
If a user calls a page in an undeclared language, Jahia returns a 404 error because the page in question does not exist in this language.
Example: www.partners.com/sq/home/actualites2012.html (sq = Albanian)
Enabling this option will make Jahia ignore the language specification and serve the requested page in the default language of the site, loading resource bundles corresponding to the requested language -if they exist.
Important: This option should only be enabled if the previous option (replacement of untranslated content) is activated.
HTML Filtering
When editing a site, contributors often use a HTML-based rich text editor. Since contributors are allowed to use HTML tags and to copy and paste HTML content, you can prevent the use of specific HTML tags in rich text fields. To do so, you must specify a comma-separated list of forbidden tags in the "Markup filtering" option. When the contributor’s HTML contents will be saved, Jahia will automatically remove those tags from the submitted contents.
Filtering example: H1,script,table,tr,td,strong,hr

WCAG Compliance
Since contributors are allowed to copy and paste HTML content into rich text fields, W3C standards may not always be respected and the page layout may happen to be messed up.
Contributors can forget to close a tag, insert a table so wide that it messes up the page etc.
Jahia’s "WCAG Compliance" option lets you check if the generated code meets the standards.
Tag manager
The tag manager allows you to see all tags applied on all the content items of the current site
- In default repository (by authors in edit mode)
- In the live repository (by visitors)

Use the button located at the top right to switch from default to live repository.
The panel shows the complete list of tags for the selected repository in three columns
- Tags : display the tag as stored in the repository
- Occurrences: display the number of time this tag is applied on content items
- Actions: let the administrator execute several operations
Note that columns are sortable by clicking on their name.
The list is also filterable, by using the "search" field just above the table. The filtering is done on the fly as long as the administrator type characters in this field.
Operations
View usages
By clicking on the "view usages" entry the panel will display the full list of content items on which this tag has been applied.

It is then possible to
- Open the page containing this tag (in a new window) to view the content in-context, by clicking on its name.
- Remove (delete) the tag occurrence from a particular content (red menu, default action)
- Rename the tag applied on a particular content (red menu). Just type the new tag name that must replace the existing one then validate, the list is refreshed and, obviously, the occurrence has disappeared from the list.
Renaming a tag
From the tag list you can also rename a tag.
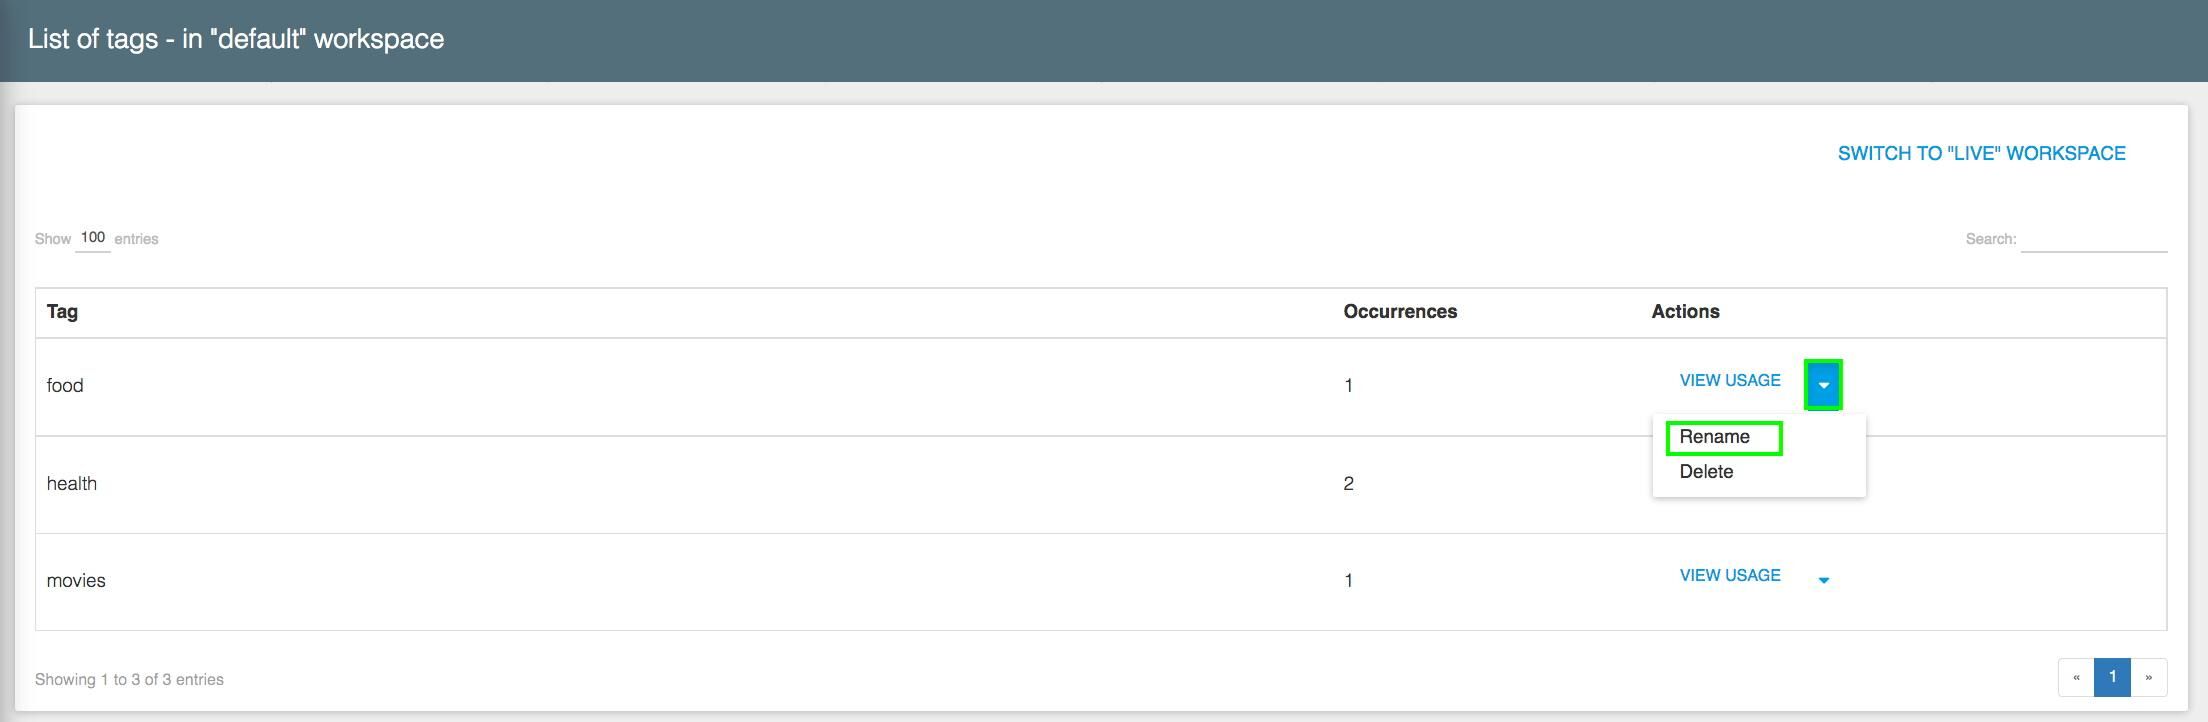
Choose rename in the menu
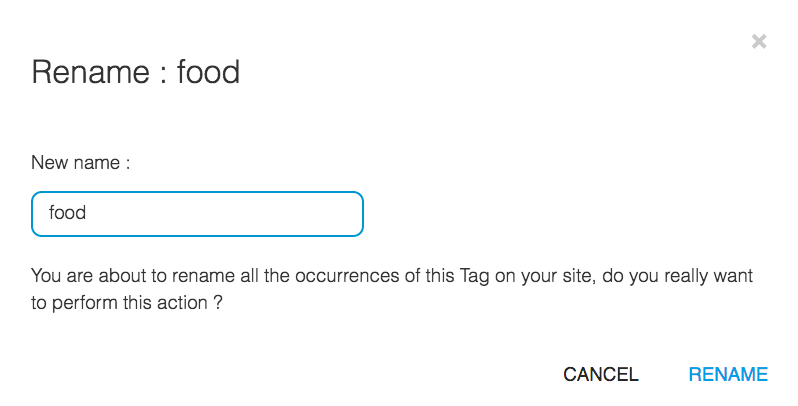
Type the new value then hit "rename". This will rename all the occurrences for this tag with the new value.
The delay for renaming depends on the number of occurrences, as each occurrence is a separate entry.
Deleting a tag

Choose delete in the menu
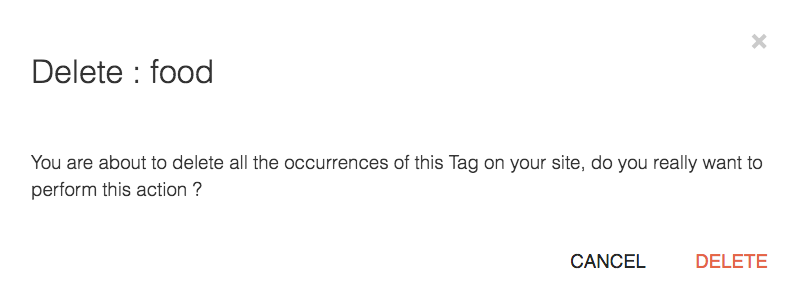
Confirm your choice by hitting the "delete" button in the confirmation window. Beware that this operation is irreversible and will delete all occurrences of this tag for the current website in the selected repository (default or live)
Displaying vanity URLs
This panel displays a list of all defined vanity URLs (user-friendly, search engine optimized URLs) in Jahia. For each URL, some information is displayed, including the corresponding "technical" URL, language, status and whether it is the default URL or not.
Please consult the vanity URL documentation.
Modules
This section displays the list of templates and modules currently deployed on the site.

Link Checker (only in Enterprise distribution)
The link checker is a powerful administration tool that allows site administrators to check an entire Jahia site for "dead" or broken external links. An external link is a link pointing to pages outside the platform, therefore outside of Jahia’s control.
Typically, an external link is prone to become "broken": the author may have mistyped the link (e.g., goggle.com instead of google.com) or the target page may simply disappear, change name or location after some time.
The link checker will browse all Jahia pages for external links submitted by authors, including content entered through the rich text editor. Then it will display a report that will help the site administrator to fix broken links.
The tool will scan all pages in the selected mode, for all languages.
To launch the scan, just click on the "Start checking" button, then on the "Display progress" button to view the results. The page will refresh automatically every 5 seconds. The "Clean stored results" button will clear older results before launching a new scan.
Please note that the link checker is very demanding for the server. Running it occasionally will help maintain high editorial quality for the site, but it is not recommended to use it continuously.
Auditing external links with the Link Checker
Use case scenario
In the ACME demo site, on the "Home" page, the author entered text and mistyped a link to http://beta.jahia.com instead of http://beta65.jahia.org. This is a "dead" link, pointing to a site that does not exist. The link is embedded in a BigText paragraph typed via the rich text editor provided by Jahia.
Launching a website analysis
In order to audit the links and be able to repair "broken" links, the site administrator can click the link checker’s "Start checking" button.
The duration of the audit process will depend on the volume of data to be analyzed.

As soon as the administrator launches the link checker, activity status details will be available in the lower part of the panel when clicking on the "Display progress" button:
Note that only broken links are displayed. Valid links do not appear in the report.
Description of the Link Checker report
There are five columns in the link checker report:
- Path: the path of the node containing the broken link
- Properties: the property in the affected node that contains the broken link
- Link: the link that generates the error
- Status: a description of the problem
- Code: the HTTP error code
Site roles
Please read the Page model documentation for a complete and detailed explanation of the site roles.