Jahia Starter Template best practices
Managing images
You can add images in a page by using:
- The <img> tag
- CSS
Adding images with the reference component
The Image (from document manager) component allows you to add an image directly from Page Composer. In an area, click the Any content button, then select Image (from document manager).
Select an image from jContent (or you can upload one in the picker) and generate an <img> tag in the page.
When using the Jahia Starter Template, developers and users with the viewDeveloperSection permission can customize the generated img tag by providing additional classes and attributes. See Override of jnt:imageReferenceLink default view.
Adding images with CSS
If you are integrating a template, some images may be added in the CSS using, for example, the background-image attribute. For example:
.image{
     background-image: linear-gradient(0deg, rgba(0,0,0,0.05), rgba(0,0,0,0.05)), url(//domain-name.com/images/example.jpg);
}
In Jahia, it is best to move such code from a CSS file into inline CSS, otherwise:
- You will have to point to an image which is either stored outside of Jahia is a published image
- If you want to reuse the component or change the image, it might be more difficult to do so
You need to locate the tags with the image class, and then add the style attribute, for example:
<div class="image" style="background-image: url(##FILE_URL_PREFIX##/images/intro-carousel/example.jpg)">
Where:
- ##FILE_URL_PREFIX##
Is the reserved keyword (macro) used to generate the URL to the image on your site. - images/intro-carousel/example.jpg
The example.jpg file is located in the intro-carousel folder, which is itself in the images folder (in the jContent>Media>files)
To update an image used with inline CSS in Page Composer, you can do either of the following:
- If you want to update the image for all the content referencing it, you need to:
- Browse to the image in jContent>Media.
- Right-click on the image and select Replace with.
- Upload the new image you want to use. This will replace the image everywhere.
- Publish it to apply the new version in live.
- If you don’t want to replace the image everywhere and rather select a different one, then update either the HTML file (and upload the updated version) or the HTML code (text) (using Content Editor) component to make the background-image attribute point to new image.
Keeping your images organized
Don’t hesitate to create folders to store your images in. For example, if you have a slider, you can create a folder with this slider name and upload there the images used by the slider. This will simplify the work when you update the slider later.
Importing images and replacing references in the HTML
To conveniently integrate a template and its images in Jahia, bulk upload of images and then update the HTML code.
To bulk upload images:
- Create a zip file of your images. You can use subfolders to organize your files.
- Upload the zip file in jContent>Media.
- Right click on it, then select Unzip.
- Remove the zip file.
To update the HTML code:
The HTML code that was provided to you must be slightly updated to reflect the way Jahia generates URL for files.
- Open the HTML source code in your code or text editor.
- Locate the tags that reference images. Remember, images can be referenced in <img> tags or in the style attribute of a tag.
- Use the search and replace feature to replace the URLs with the following pattern:
##FILE_URL_PREFIX##/PATH TO THE FILE for example, the html provided by the agency/download locally shows:
Replace it with:<div class="carousel-item" style="background-image: url(assets/img/intro-carousel/5.jpg)">
Where:<div class="carousel-item" style="background-image: url(##FILE_URL_PREFIX##/img/intro-carousel/5.jpg)">
##FILE_URL_PREFIX##
Is the reserved keyword (macro) used to generate the URL to the image on your site.img/intro-carousel/5.jpg
The 5.jpg file is located in the intro-carousel folder, which is itself in the img folder (which can be found in jContent>Media>files)
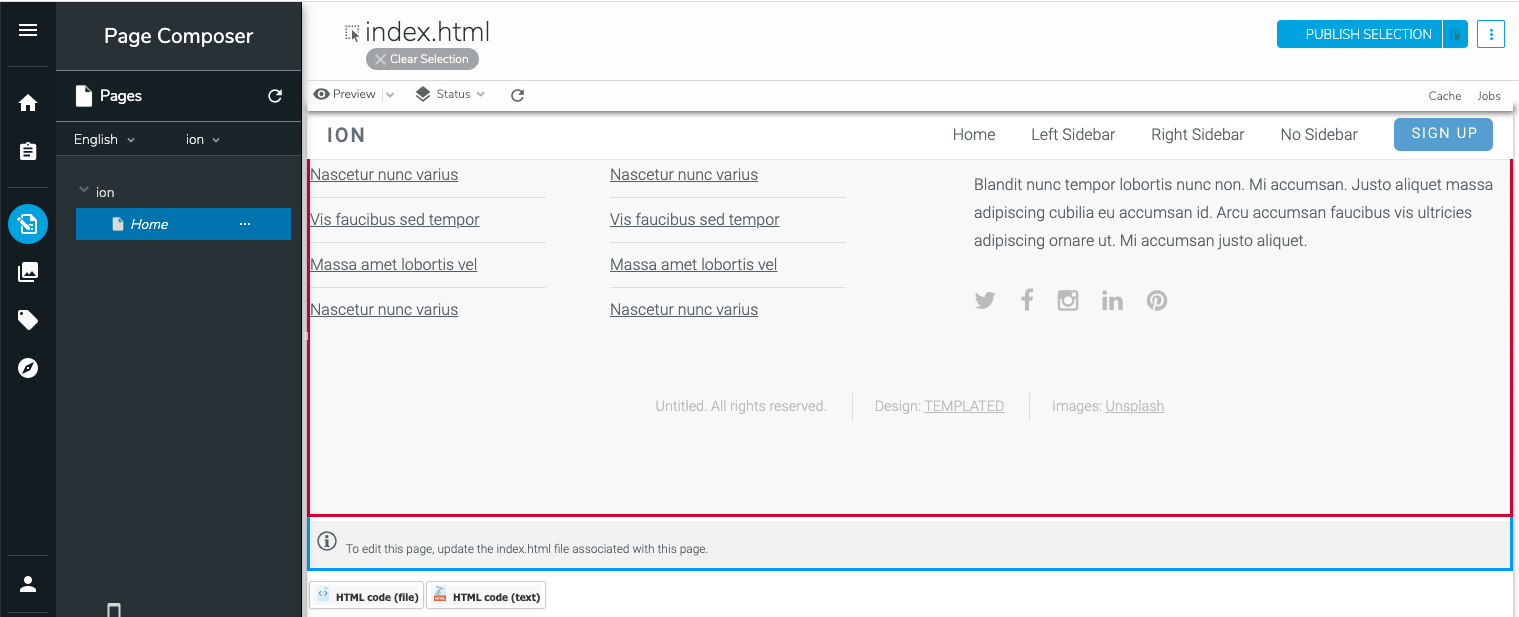
When to use HTML code (file) or HTML code (text)?
The HTML code (text) component is useful for a specific usage in a specific context. If you are working on a component/layout item that will be reused several times in your site, it is best to use HTML code (file) and provide the HTML in a file. This way, updates to the HTML in the file will also be updated in all the places it is used. When using HTML code (text), you would have to manually update each component of this type.
If you know that the section/component you are working on will be unique, or that you will copy this content and then change just one value, it is best to use HTML code (text).
Organizing your HTML files in folders
We recommend that you define a folder structure to store your HTML files in jContent. For example, create a HTML sources folder directly under the files folder, and then edit the permissions to only allow editing by your web developers to prevent contributor errors.
You can then create subfolders under \HTML source depending on your project structure. If you are using one HTML file per page template, you can create a templates folder to store the HTML files corresponding to the templates. You can have a page sections (or structure) folder to store reusable sections that can be added in a page.
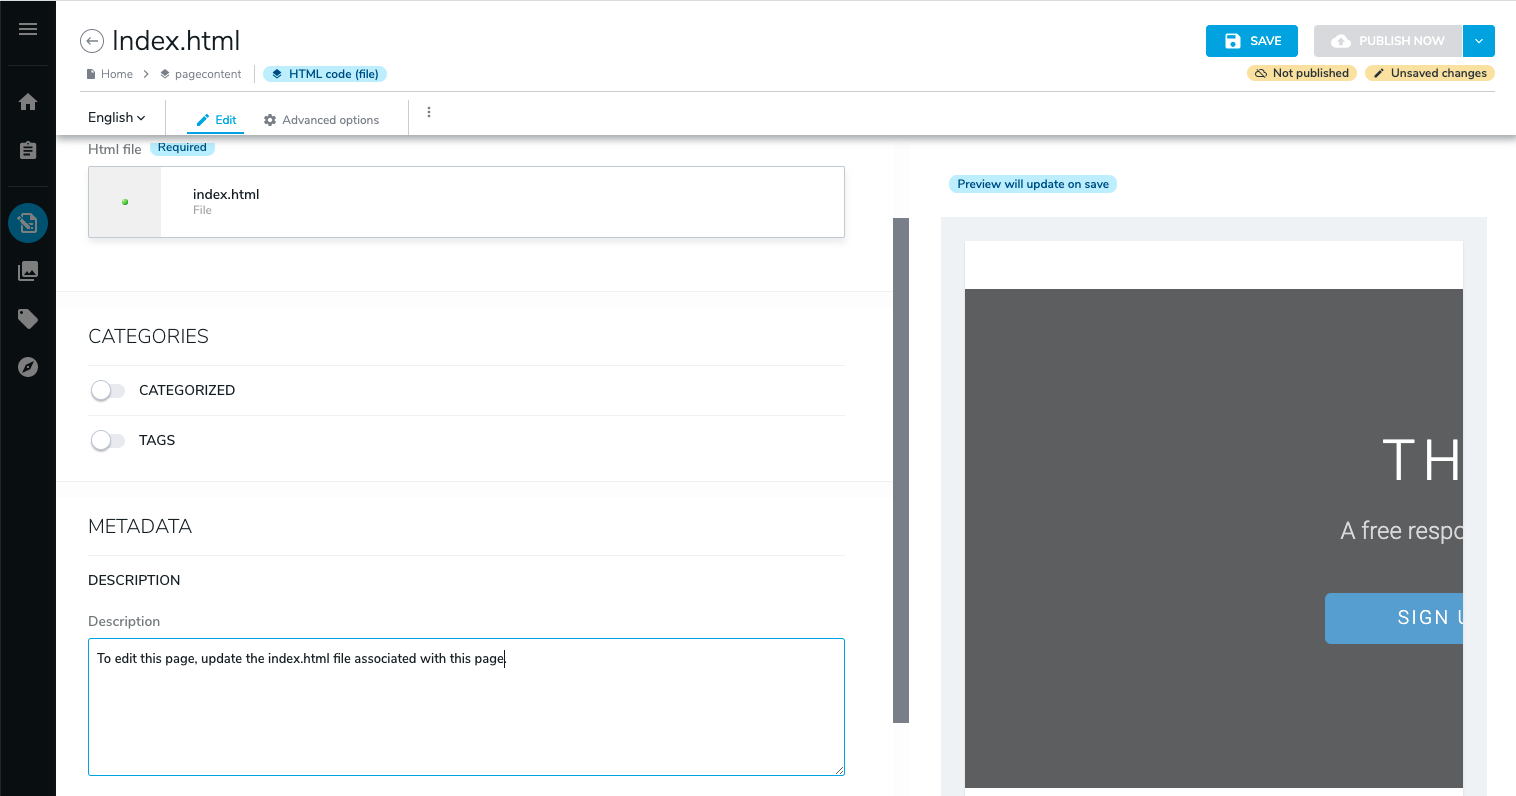
Showing a component description on hover
You can display context-sensitive information in Page Composer when hovering over a HTML code (file) or HTML code (text) component. An information banner then displays below the component, for example:
This can be useful for providing information for your contributors, for example to mention where an image is located, what kind of content to create in the section, or any other useful information.
This information is only displayed on hover in Page Composer. It is not visible in preview or live views.
To do so, you simply need to edit the HTML code (file) and HTML code (text) component and fill the Description field in the metadata section. This field is internationalized, so you will need to add a translation for all the languages. It also allows HTML code, so you can add links or use a custom formatting. It also implies that if you provide invalid HTML code, it may break the layout of the page in Page Composer.
Splitting HTML files and separating page layout from content
For a quick integration, you can use an HTML file for an entire page. But you can also split your HTML file in several pieces, to ease the reuse. For example, if you are using semantic markup, you can create one HTML file per section, and then reference all these section files in your page. This way, you will be able to reuse the same section in the same page, or in other pages.
Note that if you are splitting a file into pieces after originally using one file for the page, you will have to manually move the content previously created under each of the corresponding sections, using the Repository Explorer.
Page structure vs Component
The HTML code (file) and HTML code (text) components are meant to define a static structure for the pages, and allow placeholders for text, images and content lists. It has limitations when used as a replacement for dynamic and structured components.
Some examples:
- It is not the same to have one HTML code component, with a placeholder for an image, a placeholder for a title and one for a text and have a dedicated card component, in which you will directly contribute the image, title and text in Content Editor.
- For a slider, you won’t be able to easily add a new slide just by clicking on a “New content” button, as Page Composer injects HTML code which would break the slider code. Instead, you want a different display in Page Composer for your slider, to quickly go from one slide to another, and to easily add a new slide.
However, you will be able to have all the slides in the HTML and the possibility to edit the texts. The images can be updated directly from jContent, by using Replace with. - For a portfolio displaying cards on 3 columns for example, you won’t be able to easily create cards which will automatically fit the 3 columns. However, you can have in the HTML placeholders for the 3 cards, and then you would be able to contribute each card individually.
Nevertheless, you can use the HTML code components to quickly get your site up and running, and then develop your own components which would exactly fit your needs. For information on creating content types, see the Defining content types tutorial. See Rendering content - Views for information on creating views.
Use a mount point when developing locally
To speed up the development and integration of an HTML template into a Jahia site, you can mount a local folder into your site. This allows you to edit the HTML files directly from your file system and see the results in Page Composer without having to upload the new version of the file.
To use local mount points, you need to run Jahia locally (if you are using a Docker image, use the -v option to mount a local volume in your Docker container).
To use local mount points:
- Create your site using the Jahia Starter Template (“Start with your own HTML” in the site creation form).
- Create a VFS mount point, following Adding and managing mount points.
- In the root path, provide the path of your local folder containing your HTML source files.
- Select the Select a target local mount point checkbox.
- Select the files folder of your site (or a subfolder of it).
- In Page Composer, add an HTML code (file) component.
- Open the file selector for the Html file property, browse to tree to your local folder, and select a local file.
- Click Save.
- Open the local file using your favorite IDE or text editor.
- Update the HTML, add the Jahia placeholder attributes.
- Save your file.
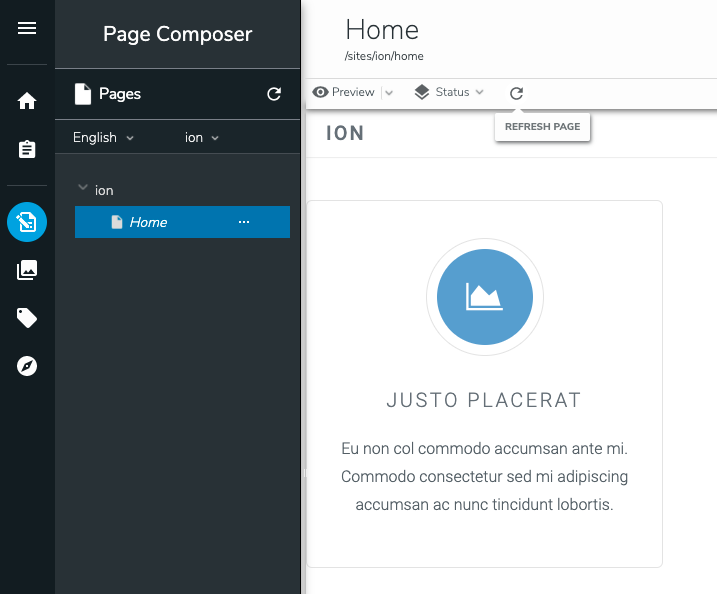
- In Page Composer, click the Refresh page button. Your changes are applied immediately.

- Once you are done editing your HTML file, using jContent to copy it and paste it under another folder which is outside your mount point.
- Edit the HTML code (file) component to point to this file. This is a required, otherwise you will not be able to export your site to a different server.
Models
You can use models to simplify the creation of pages, sections, and content over time. In other words, you can create pages and content that you can reuse, either as templates for new pages, or as a predefined page section/component that you simply have to edit.
For a better management of such models, we suggest you the following approach:
- In Page Composer, create a new page directly under the site (at the same level as the home page).
- Open the context menu of the site.
- Click New page and set the following suggested values and click Save:
- Title: Models
- System name: models
- Template name: Blank page
- Remove the edit permission to restrict specific users from creating or editing models. For example, only allow site administrators to edit page models.
- Click Advanced options in Content Editor.
- Click Edit roles.
- Remove the users and groups from the editor roles to prevent these users from creating and updating models.
- Ensure that you have a group of users who have the edit permissions, for example. a site-admin group.
- Click Save.
- Mark the Page as Work in progress. To prevent its publication and the publication of the models when publishing the entire site.
Note that you can go further, and remove the permission to publish the models to all the users by creating a “model-editor” role, which only provides permissions to create and edit content, but not to publish or start publication. Then, use this role in the step 4 to allow the edition - In Page Composer, create two menu labels under the Models page.
- Open the context menu on the Models page.
- Click Add>New menu label and create menu label with these values:
- Title: Page Models
- System name: page-models
- Click Save and close Content Editor.
- Repeat the operation to create a Component Models menu label.
- Create content inside the Models page to explain the users what this model section is about and how to use it.
Using page models to create page templates
As the Jahia Starter Template only provides one page template, you can build your own page templates using Page models.
In Page Composer, create a new page under the “Page Models” menu label previously created.
- Open the context menu of the Page Models menu label.
- Click New page.
- In the title field, provide the name of your page template.
- Scroll down to the Option section.
- Activate the Set the page as page model option. Provide a name. It is best to use the same as the page title.
- Click Save.
In Page Composer, contribute content to the page. We advise to use HTML code (file) to create your page structure, and define the content areas and other content placeholders. You can store your HTML files in a dedicated “page model” folder in jContent, see Organizing your HTML files in folders.
From now on, when you will be creating a new page, your page models will be available in the template selection field.
Creating reusable components
Reusing the same idea as page models, you can create components in the Component models section. Then create pages under the Component models menu label, and create components that users can copy and paste in the pages.
Consider the usage of these components:
- If they are structure components (like rows and columns), use the HTML code (file) components, as by updating the html file, you will update all the copies of the component.
- If editors are more likely to copy and edit the component, then prefer the HTML code (text) component, so one will be able to directly edit the HTML code of the copied component.
Example
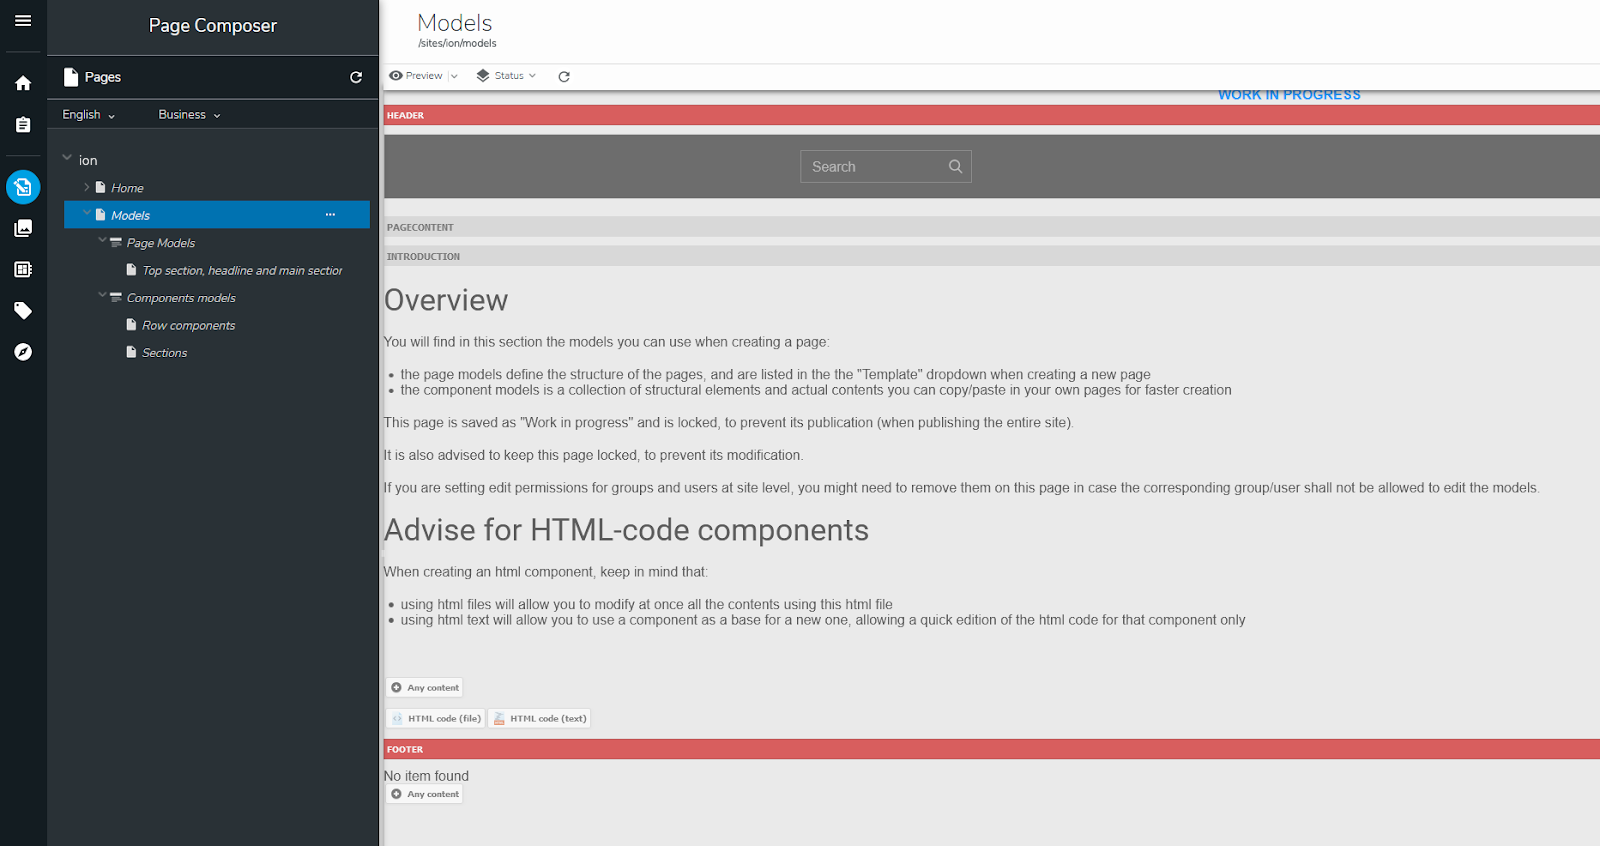
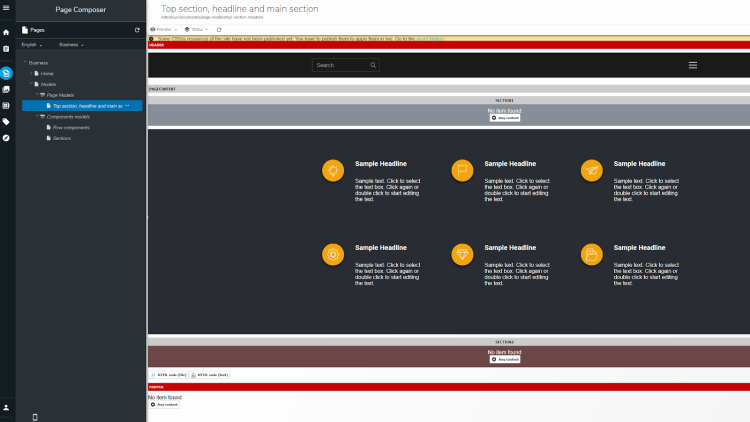
This example shows a “Models” page, marked as work in progress with a description text for the site editors.
There are two sections under this page:
- Page Models
Which contains only one page, named “Top section, headline and main section”, that can be used as a template when creating new pages. The page title is explicit enough.
- Component models
Which contains two pages:- Row components
This page contains components to create rows. So users can go in this page to copy components allowing them to create row structures in their pages. - Sections
This page contains full sections, ready to be used and updated in pages.
- Row components

Setting permissions
When creating your site, we suggest you create a site group for each role you will be using. Then, simply add or remove users in these groups.
- Create two groups “sitename-editors” and “sitename-editors-in-chief” following the procedure (replace sitename with the actual name of your site). If you are using models (see previous section) you may want to create a third group “sitename-models-editors”).
- Add users or already existing groups to these groups.
- In Page Composer, open the context menu for your site then click Edit.
- Click Advanced options>Edit roles.
- For the Editor role, click Add new groups. Select “sitename-editors” and click Add.
- For the Editor in chief role, click Add new groups. Select “sitename-editors-in-chief” and click Add.
- Click Save and close Content Editor.
Including the home page in the navigation menu
The Page Builder Components>Navigation Menu component displays up to two levels of pages, usually under the home page. If you want to include the Home page as part of the navigation menu, you can add an internal link to the home page:
- In Page Composer, open the context menu of the Home page.
- Click Add>New internal link and fill the following fields and click Save:
- target field: select Same window (_self)
- Title: type the name of what will be displayed in the navigation menu.
- Internal link > target: select the home page of the site.
- Go back to Page Composer, the Home internal link is now displayed in the navigation tree on the left and appears in the site navigation menu.
- You can move the internal link in the left navigation tree in order to change its location in the navigation menu. See Moving a page.