Using Content Editor
Content Editor is an application that you use to create content and publish it to your sites. Content refers to rich text, images, files, and dynamic page elements like navigation bars and lists. The type of content that you can add to a page depends on its content type. Jahia includes default content types and your administrators can create custom content types for your organization.
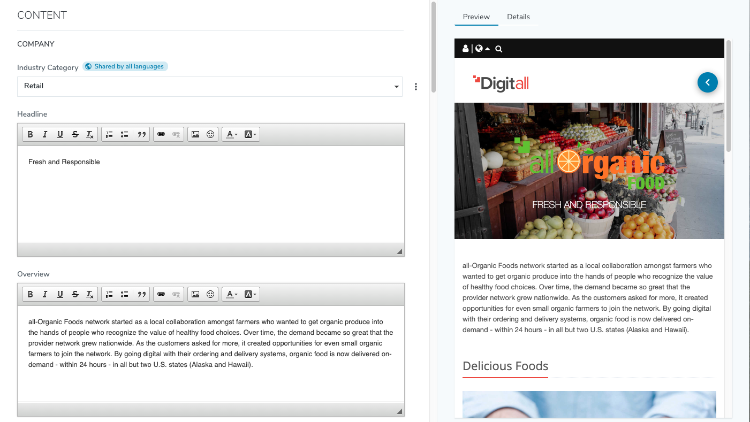
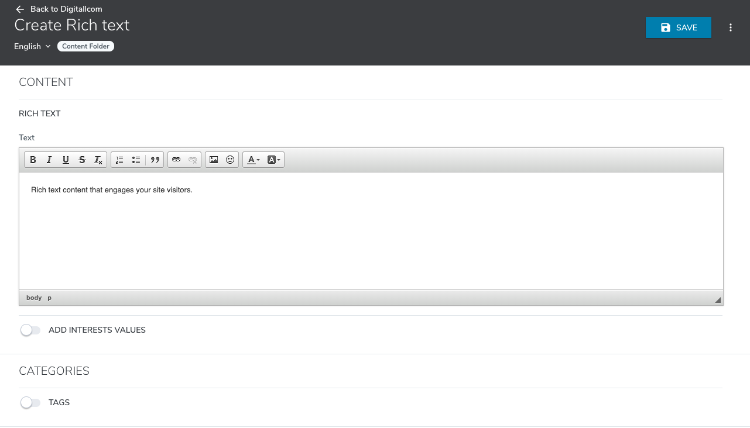
The following example from the sample Digitall site shows how you can create rich text content. You edit the rich text and specify other settings in the left of the editor and preview content on the right. The preview updates each time that you save.
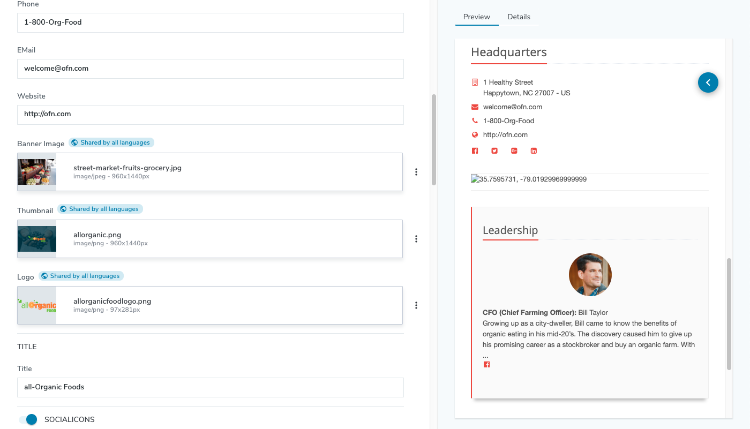
You can also add images, layout, and metadata information and see how they display in the Preview tab for this content type.
About the beta version
Content Editor 1.0 is a beta feature and is only available from Content and Media Manager. Later versions of Content Editor will be available for you to add or edit content directly in a page.
For more information on limitations with Content Editor, see Content Editor 1.0 Known Issues and Limitations.
Creating content in Content Editor
You open Content Editor from Content and Media Manager to create new content for your sites. The example below shows how to create rich text content.
To create content in Content Editor:
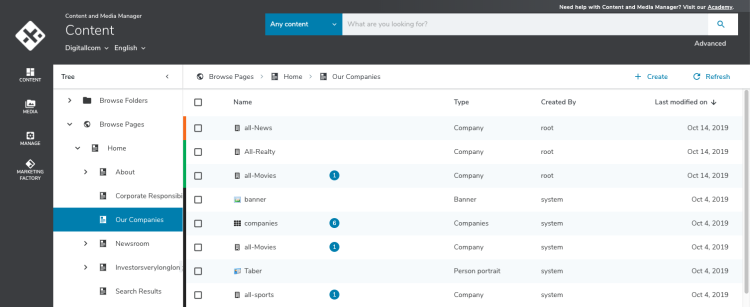
- In Content and Media Manager, select Create>New Content (beta) at the top right of the toolbar.
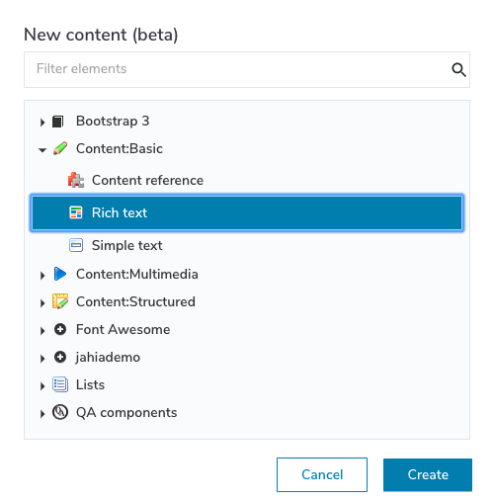
- In the New Content (beta) dialog, select a content type and click Create. For example, Content:Basic>Rich text and click Create.
- In the Create Rich text page, provide content and click Save.
The content object is created and content previews in the Preview tab.
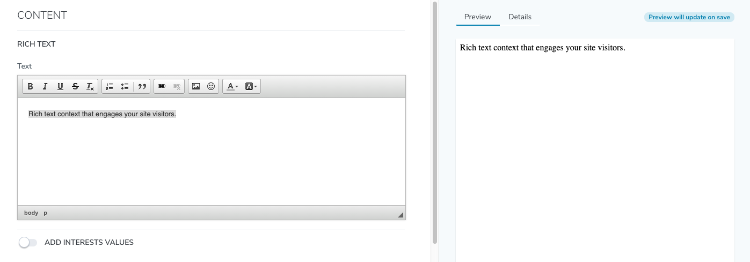
Saving your content updates the content in the Preview tab.
Editing content in Content Editor
You can edit content in Content Editor by opening it from Content and Media Manager.
To edit content in Content Editor:
- In Content and Media Manager, select your content in the navigation menu.
- In the main window, right-click on the content that you want to edit and select Edit Content (beta).

- In Content Editor, edit your content in the rich text editor and specify settings as needed.
- Click Save to save your content. Your content refreshes in the Preview pane.
Now you can return to Content and Media Manager or publish your changes.
Publishing content
When content is complete, you can publish it to make it available to your sites. You can either start a publication workflow or publish your content immediately, depending on your permissions and role. Everyone can request publication and you require additional permissions to publish without review.
When you start a workflow, the content is sent to other users for review.
To publish content in Content Editor:
- In Content and Media Manager, navigate to your content and open it for editing in Content Editor.
- To start a publishing workflow, request publication in one of the following ways, depending on your permissions:
- Click the Request publication button.

- Click the More Options button
 and then select Request publication.
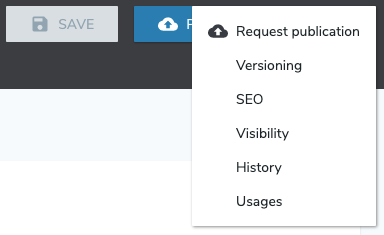
The Publication dashboard opens. For more information on requesting publication through a publication workflow, see Publication dashboard.
- Click the Request publication button.
- To publish content immediately, at the top right of the page click Publish Now.

A message indicates the publication is in progress.

A message then displays at the bottom left of the page indicating that publication is in a queue.

After your content is published, it is available to site visitors if it is used in a page or application on your site.
Unpublishing content in Content Editor
If necessary, you can unpublish content to make it unavailable on your live sites or applications.
To unpublish content in Content Editor:
- In Content and Media Manager, navigate to your content and open it for editing.
- At the top right of the page in Content Editor, click the More Options button
 and then select Unpublish.
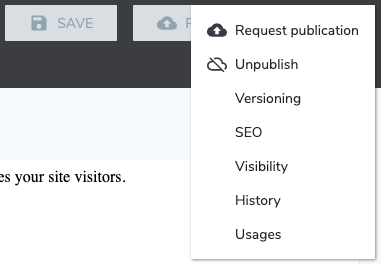
A message displays at the bottom left of the page indicating that the content is unpublished.

The content is no longer available in your sites and applications.
Managing your content
Content Editor provides additional options for managing your content from the More Options menu  at the top right of the editor. You can:
- View previous versions of content and restore a specific version
- Define vanity URLs for content
- Schedule when content is visible and hidden
- View actions that have been performed on content
- See where the content is referenced by other content types
 .
. Managing versions of your content
Jahia stores published versions of your content. You can view of list of published versions, compare a previous version with the current version, and restore a previous version.
Comparing a published version with the current content
You can prepare a previous version of content with the current version. The current version is either the last published version of your content or the current staging version.
To compare a published version of your content with the current content:
- In Content and Media Manager, navigate to your content and open it for editing.
- At the top right of the page in Content Editor, click the More Options button
 and then select Versioning.
 - In the Compare versions list, select the published version that you want to compare against the current version and click the Compare with staging version button.
- In the content comparison page, the previously published content displays in the left pane and the current content displays on the right.
- To show changes in the current content, in the right pane click Highlighting. Content that has been deleted in the newer version shows in with a red background and with strikethrough text. New content displays a green background.
You have compared published versions of a file.
Restoring a previously published version of your content
You can restore content from a previously published page. Note that the existing staging content will be lost.
- In Content and Media Manager, navigate to your content and open it for editing.
- At the top right of the page in Content Editor, click the More Options button
 and then select Versioning.
 - In the Compare versions list, select the published version that you want to compare against the current version and click the Compare with staging version button.
- To restore the previous version of your content, click Restore in the left pane. The content from the older published version is copied from the live workspace to the default workspace.
You have restored a previously published file.
SEO
You can define vanity URLs for pages and content and specify the default URL to use when the content or page is called. Vanity URLs must be unique on your site meaning that you cannot add a vanity URL if it is already defined for other content, whether the content is published or not.
For more information on vanity URLs, see Using vanity URLs.
Setting visibility settings for content
You can schedule when published content is visible online. This feature is used for time based publishing. Visibility conditions do not override permissions. For example, a user or group without read permissions will not see content or a page, regardless of visibility conditions. A user or group with read permissions will see content or a page only if the specific visibility conditions are met.
You can specify three types of conditions:
- Start and end date
Sets the time interval for when the page or content is available online. If no start date is set, the page or content is visible once published and until the end date occurs. If no end date is set, the page or content is visible once the start date is reached. For example,Visible from 11/15/2019 08:00 until 11/25/2019 08:00makes content visible for the specified range in November. - Time of the day
Set the daily time interval for when the page or content is visible. For example,Visible from 07:00 until 09:00makes the page or content visible from 7:00 am until 9:00 am daily. - Day of the week
Sets the days of the week when the page or content is visible. For example,Visible on [Saturday, Sunday]makes the page or content visible on Saturdays and Sundays.
Visible on [Wednesday] and another that content is Visible on [Friday].To specify that the page and content is visible only if all the visibility conditions are met, select the All conditions should match box.
Viewing content history
You can view a list of actions that have been performed on a content object. For example, you can see the date and type of action performed, the user who performed the action, and the property on which the action was performed.
To view content history:
- In Content and Media Manager, navigate to your content and open it for editing.
- At the top right of the page in Content Editor, click the More Options button
 and then select History.
A list of actions performed on the content object displays.
You have viewed history of actions performed on a content object.
Viewing content references
If content such as text or an image is referenced and reused on another page, you can view a list of those references. The same content can be integrated into multiple pages within a site or several sites. You can use this information to find the location of occurrences and to determine how changing content on one page will impact multiple pages.
You can also break the content references. Before you do so, note that this action cannot be undone and can affect other pages on your sites.
To view content references:
- In Content and Media Manager, navigate to your content and open it for editing.
- At the top right of the page in Content Editor, click the More Options button
 and then select Usages.
A list of content references displays. The first column contains a link to the page that contains the referenced content. The second column shows the path of the reference object. - To break the link between the content and its references, click Clean references.
Warning: Before breaking content references, ensure that you are aware of the content and pages that will be affected by the doing so. Also note that this action cannot be undone.