Headless React and GraphQL app tutorial
This tutorial shows you how to create a Javascript application from scratch using React and GraphQL with Jahia as a headless content backend. The application displays a news list that is managed by Jahia’s headless content management UI: Content and Media Manager.
The tutorial shows how to create a standalone application that could be deployed in any website. If you’re interested in building a Javascript application hosted in a Jahia module and deployed on a Jahia server, we recommend you use a different starting point. We have provided a starter module project on Github at the following URL: https://github.com/Jahia/dx-react-starter
After completing the tutorial, you’ll be able to:
- Create a React application
- Use Content and Media Manager to add sample content to your app
- Use GraphiQL to execute GraphQL queries and browser schema
- Set up a basic Apollo Client to perform GraphQL queries to Jahia
- Set up basic authorization
- Style the app’s UI using React Material
- Create a component that retrieves news objects from Jahia
- Use GraphQL field aliases to improve property retrieval
Jahia Days video
This tutorial is inspired by a live coding session that was presented at Jahia Days 2018. You can see the recording of this session here: https://www.youtube.com/watch?v=6fbkH-EIkcs
Requirements
You will need the following tools to use the tutorial:
- NodeJS & NPM
- Yarn
- DX 7.3 or Jahia 7.3.2 with the Content and Media Manager module installed (follow the first steps with Jahia tutorial if you haven't done this yet)
Technologies used
This tutorial uses the following technologies:
- Yarn
- Content and Media Manager
- ReactJS
- React Material
- GraphQL
- Apollo GraphQL client
- GraphiQL
- Jahia Security Filter
Creating a web project in Jahia
Web projects are virtual web sites that you can edit in Jahia. One single Jahia server can host several web projects for different teams and can handle separate domain names if needed.
To create a web project:
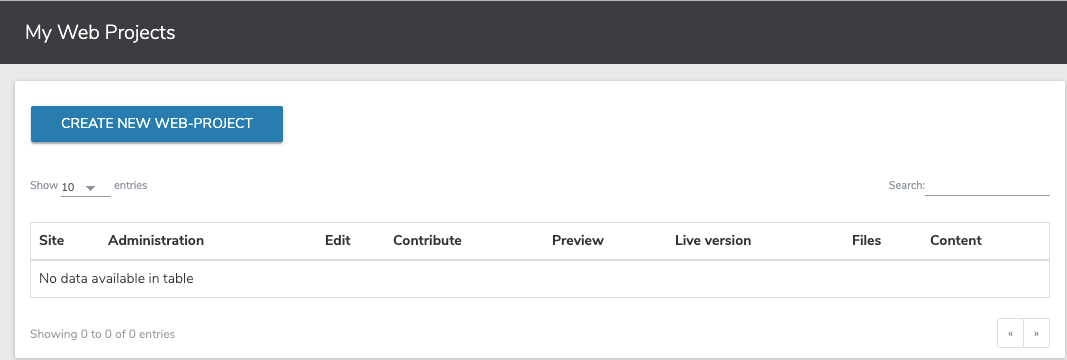
- In your dashboard, click My Web Projects in the left menu, and click Create New Web Project in the main pane.
- Create a project from a prepackaged site, in Use prepackaged project, select a project and click Next.

- Set the properties for your new web project and choose modules if needed in the dialogs that follow.
This will import a prepackaged site with existing data that helps you follow the tutorial. An import takes around 2-3 minutes. In the meanwhile, you can set up the front-end part of the project.
Creating and launching the standalone Javascript app
You use yarn create to generate a skeleton React application by executing the following commands on the command line:
- yarn create react-app my-app
- cd my-app
- yarn start
You will then see the URL that you can connect to using your browser to view the compiled application. You can then start performing changes that will be immediately visible in your browser, offering fast compile-deploy cycles.
Note that if some updates don’t work properly, just stop the server and restart it using yarn start. That should fix most issues.
React Material
React Material is used to style the application’s look and feel using Google’s Material design components. This library provides an out-of-the-box React component library that makes building applications with a consistent look and feel much easier and faster.
To add React Material to the project:
- Execute the following command on the command line at the root of the project:
yarn add @material-ui/core - Update the media viewport property to make it compatible with mobile devices:
<meta name="viewport" content="minimum-scale=1, initial-scale=1, width=device-width, shrink-to-fit=no" /> - To add an AppBar in App.js, first add the imports at the top of the file:
import AppBar from '@material-ui/core/AppBar'; import Toolbar from '@material-ui/core/Toolbar'; import Typography from '@material-ui/core/Typography'; import CssBaseline from '@material-ui/core/CssBaseline'; import Grid from "@material-ui/core/Grid/Grid"; import Paper from "@material-ui/core/Paper/Paper"; - Then replace the App class component generated by the create-react-app tool:
class App extends Component { render() { return ( <div className="App"> <header className="App-header"> <img src={logo} className="App-logo" alt="logo" /> <p> Edit <code>src/App.js</code> and save to reload. </p> <a className="App-link" href="https://reactjs.org" target="_blank" rel="noopener noreferrer" > Learn React </a> </header> </div> ); } } export default App; - With:
const App = () => {
    return (<React.Fragment>
        <CssBaseline/>
        <AppBar position="static" color="default">
            <Toolbar>
                <Typography variant="h6" component="h1" color="inherit">
                    Companies
                </Typography>
            </Toolbar>
        </AppBar>
        <Grid container>
            <Grid item xs={12}>
                <Paper>
                    {/*CompanyList placeholder*/}
                </Paper>
            </Grid>
        </Grid>
    </React.Fragment>);
};
The AppBar displays at the top of the page with the Companies title to prepare the layout for the CompanyList component.
Project structure
Before continuing, create the following folder structure in your project.
|____src
| |____components
| | |____Company
| | |____CompanyList
Component structure
Following React best practices, this tutorial assumes that each component is created in a folder that identifies the component. For example, the CompanyList component is created under src/components/CompanyList. By doing this, you can take advantage of using an index.js file to export your component as the default.
Creating the Company component
Next, you will create the Company component that will be rendered in the CompanyList.
- Create a Company.jsx file under src/components/Company and add the following content:
import React from 'react'; import {withStyles} from '@material-ui/core'; import CardMedia from "@material-ui/core/CardMedia"; import CardContent from "@material-ui/core/CardContent"; import Card from "@material-ui/core/Card"; import Typography from "@material-ui/core/Typography"; const styles = { card: { maxWidth: 300, maxHeight: 350 }, media: { height:'120px' } }; const Company = ({classes, title, description, image}) => { return ( <Card className={classes.card}> <CardMedia className={classes.media} image={image} title="Company" /> <CardContent> <Typography component="h1" variant="h4"> Company Name </Typography> <br/> <Typography component="p"> {description.length > 150 ? `${description.substr(0,100)}...` : description} </Typography> </CardContent> </Card> ); }; export default withStyles(styles)(Company); - Export the Company component as default by creating an index.js file:
import Company from './Company';
export default Company;
Creating the Company list component
Next, create a CompanyList component to retrieve the list of company objects from the Jahia server.
To create the CompanyList component:
- Create a CompanyList.jsx file in src/components/CompanyList with the following content:
Note: Ensure that you save the file.import React from 'react'; import {withStyles} from '@material-ui/core'; import GridList from '@material-ui/core/GridList'; import GridListTile from '@material-ui/core/GridListTile'; import Company from "../Company"; const styles = theme => ({ root: { display: 'flex', flexWrap: 'wrap', justifyContent: 'space-around', overflow: 'hidden', backgroundColor: theme.palette.background.paper, }, gridList: { paddingTop:'12px', width: 1020, height:660 } }); const CompanyList = ({classes}) => { const title = 'Company name'; const description = 'Lorem ipsum dolor sit amet, consectetur adipiscing elit. Vivamus a tortor hendrerit, dapibus libero eu, tincidunt nisl. Sed leo turpis, rutrum id condimentum quis, consequat eget enim. Nunc a tempor dui, eget tristique mi. Nunc ut ultrices sem, vitae posuere erat. Nulla sollicitudin blandit nunc, vel scelerisque orci vehicula eu. Nam sit amet sapien lectus.'; const image = 'http://via.placeholder.com/300x120'; return <div className={classes.root}> <GridList className={classes.gridList} justify="center" cellHeight={300} cols={3} spacing={32}> <GridListTile> <Company title={title} description={description} image={image}/> </GridListTile> </GridList> </div> }; export default withStyles(styles)(CompanyList); - Create an index.js file in the same folder with the following contents:
import CompanyList from './CompanyList'; export default CompanyList; - In the App.js file, add the import for the new CompanyList component at the top of the file:
import CompanyList from './CompanyList'; - Then replace:
{/*CompanyList placeholder*/} - With:
<CompanyList/>
Building queries with GraphiQL
Next, use GraphiQL to get familiar with Jahia GraphQL queries before integrating them in your app. This example shows how to execute queries on the nodesByQuery query field.
To build queries with GraphiQL:
- Open GraphiQL by navigating to the Jahia tools at http://localhost:8080/tools and then clicking on GraphiQL at the lower left.
Note that you can use the Documentation Explorer to get familiar with the Jahia GraphQL API. Open the explorer by clicking on Docs in the upper-right corner. - Execute the following query on the nodesByQuery query field:
Note that you are using an SQL2 query to retrieve the data.{ jcr(workspace:LIVE) { nodesByQuery(query: "SELECT * FROM [jdnt:company] as results WHERE ISDESCENDANTNODE(results, '/sites/digitall/')", queryLanguage:SQL2) { nodes { uuid name } } } }
If you get a login exception, make sure you are properly logged in to the CMS first. - Next, add properties to the query:
{ jcr(workspace:LIVE) { nodesByQuery(query: "SELECT * FROM [jdnt:company] as results WHERE ISDESCENDANTNODE(results, '/sites/digitall/')", queryLanguage:SQL2) { nodes { uuid name properties { name value } } } } } - Note that the i18n properties are not returned unless you specify a language to retrieve them in. For example, modify the query to look like this:
{ jcr(workspace:LIVE) { nodesByQuery(query: "SELECT * FROM [jdnt:company] as results WHERE ISDESCENDANTNODE(results, '/sites/digitall/')", queryLanguage:SQL2) { nodes { uuid name properties(language: "en") { name value } } } } } - Notice that the query generates too much data. Modify the query to only retrieve the properties that you need:
{
  jcr(workspace:LIVE) {
    nodesByQuery(query: "SELECT * FROM [jdnt:company] as results WHERE ISDESCENDANTNODE(results, '/sites/digitall/')", queryLanguage:SQL2) {
      nodes {
        uuid
        name
        title: displayName(language : "en")
        description : property(name : "overview", language : "en") {
          value
        }
        thumbnail : property(name : "thumbnail", language : "en") {
          url: refNode {
            path
          }
        }
      }
    }
  }
}
Connecting to GraphQL using Apollo Client
Next, add the Apollo GraphQL client library to be able to connect to Jahia’s GraphQL API.
To add the Apollo GraphQL client library:
- From the root of the project, execute the following commands on the command line:
yarn add react-apollo yarn add apollo-cache-inmemory yarn add apollo-client yarn add apollo-client-preset yarn add apollo-link-rest yarn add graphql - In App.js file add:
//... import {ApolloProvider} from 'react-apollo'; import {ApolloClient} from 'apollo-client'; import {HttpLink} from 'apollo-link-http'; import {InMemoryCache} from 'apollo-cache-inmemory'; const JWTDXToken = 'JWT_DX_TOKEN'; const httpLink = new HttpLink({ uri: 'http://localhost:8080/modules/graphql', headers: { 'Authorization': `Bearer ${JWTDXToken}` } }); const client = new ApolloClient({ link: httpLink, cache: new InMemoryCache() }); - Then modify the render body to the following:
(<React.Fragment> <ApolloProvider client={client}> <CssBaseline/> <AppBar position="static" color="default"> <Toolbar> <Typography variant="title" color="inherit"> Companies </Typography> </Toolbar> </AppBar> <Grid container> <Grid item xs={12}> <Paper> <CompanyList/> </Paper> </Grid> </Grid> </ApolloProvider> </React.Fragment>); - Next, you create a container for the CompanyList component that will fetch company data using GraphQL. Create a CompanyList.container.jsx in src/components/CompanyList and add the following imports:
import React from 'react'; import {Query} from "react-apollo"; import gql from 'graphql-tag'; import CompanyList from './CompanyList'; - You can now declare a query for retrieving all available companies:
const COMPANIES_QUERY = gql` query CompaniesListQuery($language: String) { jcr(workspace:LIVE) { nodesByQuery(query: "SELECT * FROM [jdnt:company] as results WHERE ISDESCENDANTNODE(results, '/sites/digitall/')", queryLanguage:SQL2) { nodes { uuid title: displayName(language : $language) description : property(name : "overview", language : $language) { value } thumbnail : property(name : "thumbnail", language : $language) { url: refNode { path } } } } } } `; - Next you define the functional CompanyListContainer component that uses the previously imported Query component to fetch and render the CompanyList:
const CompanyListContainer = () => { const variables = { language: "en" }; const generateURL = path => { return `http://localhost:8080/files/live${path}?t=thumbnail2`; }; return ( <Query query={COMPANIES_QUERY} variables={variables} fetchPolicy="network-only"> {({loading, data}) => { let companies = []; if (data && data.jcr && data.jcr.nodesByQuery) { //Build the company data as expected by the Company component data.jcr.nodesByQuery.nodes.forEach(node => { companies.push({ id: node.uuid, title: node.title, description: node.description.value, image: generateURL(node.thumbnail.url.path) }) }); } return <CompanyList loading={loading} companies={companies}/> }} </Query> ); }; export default CompanyListContainer; - Update the existing index.js so that CompanyListContainer is the default export. Change:
To:import CompanyList from './CompanyList';import CompanyList from './CompanyList.container'; - Lastly, you update the Company component to make data displays dynamically. Change:
To:<CardContent> <Typography component="h1" variant="h4"> Company Name </Typography> <br/> <Typography component="p"> {description.length > 150 ? `${description.substr(0,100)}...` : description} </Typography> </CardContent>
You now have a base Javascript application that retrieves content from Jahia using GraphQL and that uses React and React Material to display the content.... <CardContent> <Typography variant="h6"> {title} </Typography> <br/> <Typography component="div"> <p dangerouslySetInnerHTML={{__html: description.length > 150 ? `${description.substr(0, 100)}...` : description}}/> </Typography> </CardContent> ...
Setting up authorization
By default, Jahia’s REST and GraphQL API are closed even if nodes have public read permissions. The APIs are closed for security reasons. To open up the API and make it usable for your application, you must configure Jahia’s security filter module to allow public access. You can find more information about the security filter module here: https://github.com/Jahia/security-filter
To make the data publicly accessible:
- Add the
org.jahia.modules.api.permissions-myapp.cfgJahia configuration file to the digital-factory-data/karaf/etc folder with the following contents:
The scope setup here requires creating a JWT token when we integrate authorization in the Apollo Client in the Javascript code. Please be aware that the value of permission.myapp.pathPattern here, it should match the node paths which you are going to access.permission.myapp.api=graphql permission.myapp.scope=myapp permission.myapp.nodeType=jnt:news,jnt:contentFolder,rep:root permission.myapp.pathPattern=/,/sites/[^/]+/contents/.*,/sites/[^/]+/files/.* - You also must create a
org.jahia.modules.graphql.provider-myapp.cfgfile for the CORS authorization with the following content:http.cors.allow-origin=http://localhost:3000 - In Jahia, navigate to tools at http://localhost:8080/tools. Then, select Jahia API security config and filter : jwtConfiguration and create a new JWT Token using the following settings:
Scopes : myapp Referrer : (empty) IPs : (empty) - Click Save and copy the generated token. Replace the example JWT_DX_TOKEN value with the copied token.
Creating content using Content and Media Manager
Next, create and publish sample content from Content and Media Manager so that you have content to browse and display in your Javascript application.
To create and publish sample content:
- In Jahia, click the Jahia logo in the upper-left corner to open the Jahia menu, and then click Content and Media Manager.

- Click Browser Folders and then click + Create>New content folder. Create a new folder named
my-app.

- In the new folder, click + Create>New content. To create a company entry, select Content:jahiademo>Company and click OK.

- Enter a title, industry, headline and overview. The following example shows sample text entered in CMM.

- Publish the folder you created and your content is ready to be queried.

Learn more about Content and Media Manager in the Academy.
In this tutorial, you:
- Created a React application
- Used Content and Media Manager to add sample content to your app
- Used GraphiQL to execute GraphQL queries and browser schema
- Set up a basic Apollo Client to perform GraphQL queries to Jahia
- Set up basic authorization
- Styled the app’s UI using React Material
- Created a component to retrieve news objects from Jahia
- Used GraphQL field aliases to improve property retrieval