Advanced headless tutorial
Exposing JCR definitions via custom GraphQL entrypoints
In this section you will learn how to map existing JCR types to custom GraphQL API entry points using SDL Generator Tools and use these entrypoints to get data for your application.
- How to use the tool
- How to get Jahia to recognize the generated SDL schema
- How to run queries against custom entry points
This tutorial builds on the work done in the previous tutorial, the same module and components will be used/reused, so make sure to look at that.
We created a demo web application project with ReactJS and Apollo for reference. You can use this repository https://github.com/Jahia/companies-reactjs-app on the branch graphql-sdl.
Mapping a type
Let's see how to map a type.
Add a type
Navigate to http://localhost:8080/tools (your domain and port may differ)and select sdlGeneratorTool from bottom left
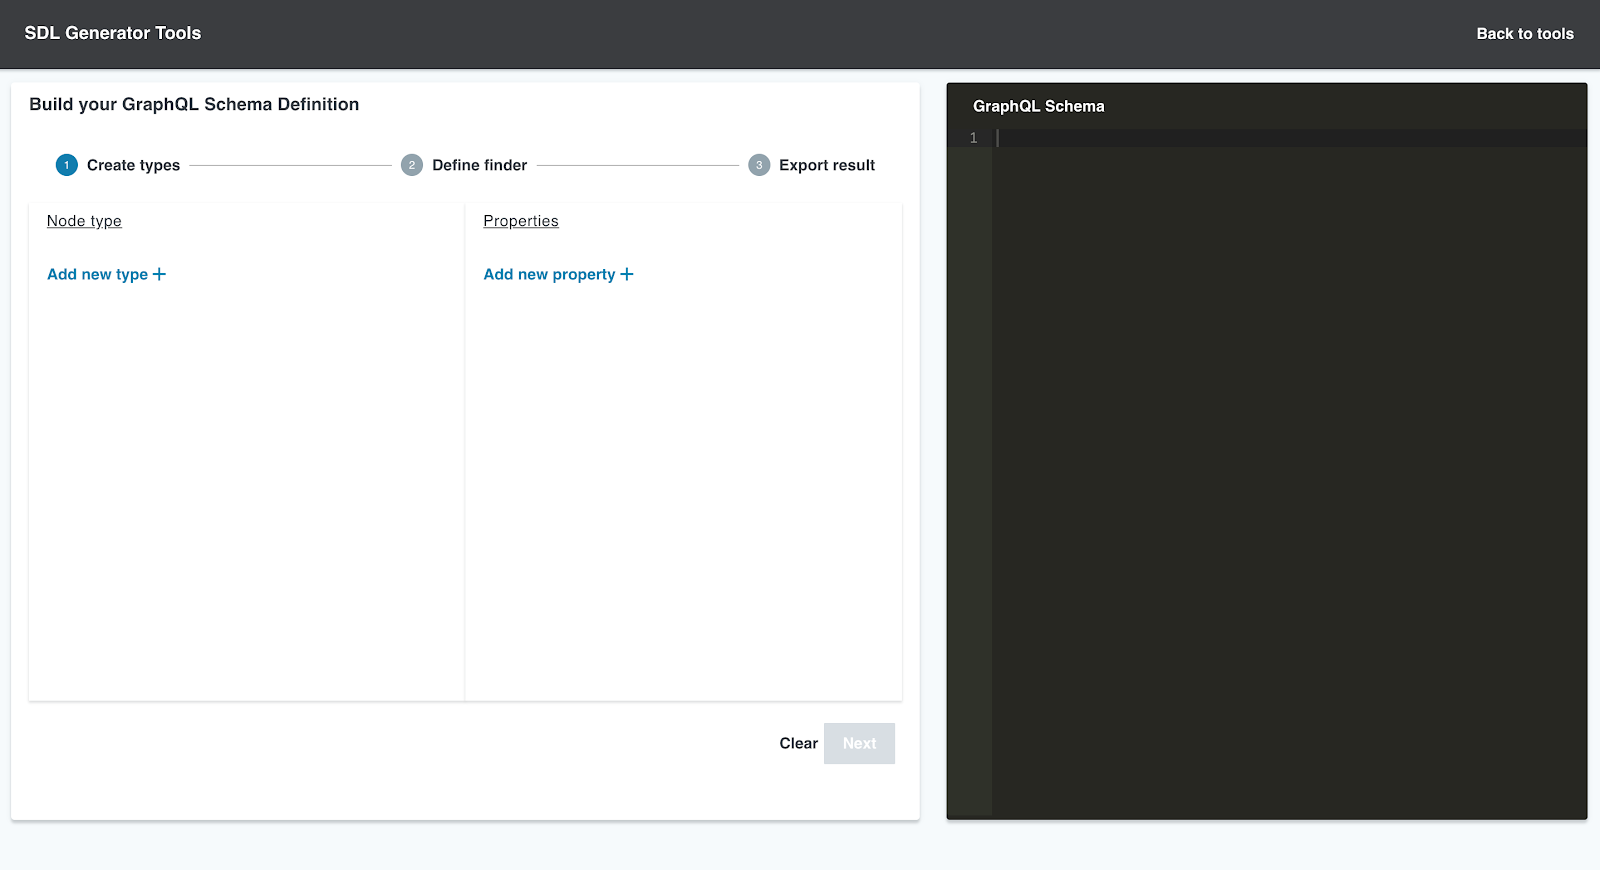
Click on Add new type and select the type you want.

If you flip the switch you will be able to access nodes of the given type by path or id if you need to do so.

Add a property
To select a property click on Add property. You will have two options: Select and map property to type and Select property.

If the property is not a complex object type, you should choose Select property. Example below shows selection of title property

You should choose Select and map property to type if the property you want is a weakreference or a child.

By default there are four predefined types:
- Asset
- ImageAsset
- Category
- Metadata
Now map industryCat property to Category type.

As list switch allows you indicate if you want the property to be fetched as list or not. It is automatically determined in most cases and should only be manually handled if Select a property field is empty in which the system cannot determine which type you want.
You can add more properties to achieve the following result.

Define finders
Once you have your type and properties setup you can transition to the next step to define a finder. A finder is nothing more than an entry point name.
On Define finder page select the type you want and click on Add a finder and add Company finder to have allCompany entry point.

In the dialog you will have all available finders based on property selections for a given type.
all...
all...Connection
...byTitle
...byTitleConnection
...byDescription
...byDescriptionConnection
...byEmail
...byEmailConnection
About finder types
There are three classes of finders: all finders, connection finders and by property finders.
All finders return you everything that's found for that particular type.
Connection finders allow you have pagination and by property finders allow you to select nodes by property, even if the property in question is a weakreference.
Once you have selected the type of finder you want and named it, you are ready to transition to schema export.
Export the schema
On the last step of SDL generation process you have two options: to copy resulting schema to clipboard or to download it as a file. It is up to you which option you decide to choose.
type Company @mapping(node: "jdnt:company") {
    title: String @mapping(property: "jcr:title")
    description: String @mapping(property: "overview")
    image: ImageAsset @mapping(property: "thumbnail")
    industry: Category @mapping(property: "industryCat")
}

extend type Query {
    allCompany: [Company]
}
Deploy your schema
Schema deployment is very straight forward. All you need to do is create a module, add graphql-extension.sdl file to META-INF folder and deploy that module. Once the module is deployed any modifications to the schema file will be handled without the need to deploy the module again.
You can check the status of your schema by visiting tools.
Run queries with React/Apollo
In order to use new entry point in the demo web application, there are a few changes that you need to make to ComponentList.container.jsx
Modify the query as follows.
const COMPANIES_QUERY = gql`
    query CompaniesListQuery($language: String) {
        allCompany(language: $language) {
            uuid
            title
            description
            industry {
                title
            }
            image {
                url
            }
        }
    }
`;
And change the rest of the component as follows
const CompanyListContainer = () => {
    const [selectedIndustry, updateSelectedIndustry] = useState('All');
    const variables = {
        language: "en"
    };
    //By default, there are no companies associated with `Technology` and `Goods` in the demo
    const industries = [
        'All',
        'Media',
        // 'Technology',
        'Retail',
        // 'Goods',
        'Healthcare'
    ];
    const generateURL = path => {
        return `http://localhost:8080/${path}?t=thumbnail2`;
    };
    return (
        <Query query={COMPANIES_QUERY} variables={variables} fetchPolicy="network-only">
            {({loading, data}) => {
                let companies = [];
                if (data && data.allCompanies) {
                    //Build the company data as expected by the Company component
                    data.allCompanies.forEach(company => {
                        companies.push({
                            id: company.uuid,
                            title: company.title,
                            description: company.description,
                            image: generateURL(company.image.url),
                            industry: company.industry.title
                        })
                    });
                }
                return(
                    <Fragment>
                        <Grid container justify="center" spacing={24}>
                            {industries.map((industry) => {
                               return (
                                   <Grid key={industry} item>
                                       <Typography style={{cursor: "pointer"}}
                                                   color={industry === selectedIndustry ? "textPrimary" : "textSecondary"}
                                                   variant={"h5"}
                                                   onClick={() => updateSelectedIndustry(industry)}>
                                           {industry}
                                       </Typography>
                                   </Grid>
                               )
                            })}
                        </Grid>
                        <Grid>
                            <CompanyList loading={loading}
                                         companies={companies.filter(company => selectedIndustry === 'All' || company.industry === selectedIndustry)}
                                         industries={industries}/>
                        </Grid>
                    </Fragment>
                )
            }}
        </Query>
    );
};
That's it, you are now ready to use your new GraphQL entry point.
In this tutorial, you:
- Used SDL generator tool to create custom type mapping
- Created a finder for custom type
- Exported and deployed SDL schema
- Modified React app to use new entry point
Where to go from here
- GraphQL, an introduction is also available here
- The Jahia GraphQL API
- The Jahia Security Filter module