CKEditor 4
Jahia CK Editor integration
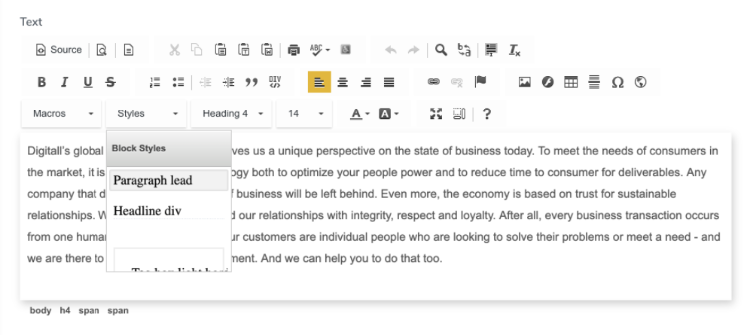
CKEditor is a WYSIWYG editor that content editors use to edit richtext content. By default, all richtext type content is edited with CKEditor. Jahia comes integrated with CKEditor 4. You can find the latest version of CKEditor available for your instance on store.jahia.com to benefit from the most recent features and bug fixes.
You can use the integrated editor on any custom content definition with richtext content type that will be editable with this editor. The following sample definition shows a content item with a title and description field, where the description is editable with CKEditor.
[jnt:titledParagraph] > jnt:content, jmix:editorialContent, mix:title, jmix:structuredContent
description (string, richtext) i18n
Jahia picker integration
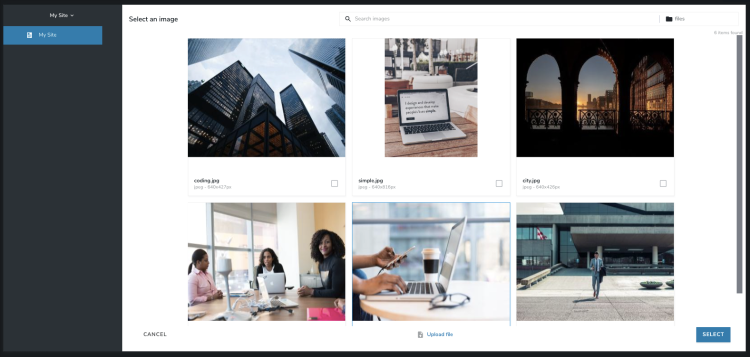
With CKEditor, users benefit from the full integration of Jahia pickers when they select files and images or browse their Jahia instance. Users see the familiar pickers interface when clicking on Add image, Add file, or other buttons to select content, pages, or files. For example, users see the interface when adding images to a site.
Macros
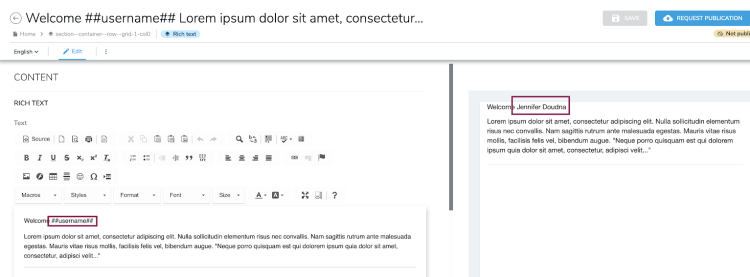
In the default CKEditor, content editors can add macros to text from the Macros dropdown. For example, the ##username## macro inserts the ##username## placeholder into your text. In Live and Preview, the placeholder is replaced with the name of the current user.
Autogrow
To make it easier to edit larger text, CKEditor comes with the Auto Grow plugin activated. CKEditor fields have a height of 200 pixels by default. When text fills the height of the textarea, the height increases up to 600 pixels maximum. To adjust the minimum and maximum height to your needs, see the CKEditor Auto Grow documentation.
Options for configuring the toolbar
You can configure the toolbar that displays to your users in CKEditor. There are different ways to customize the toolbar. You can:
- Make the toolbar dependent on user permissions. Choose from three different sets of tools for the toolbar.
For more information, see Using permissions to show toolbars. - Define the set of tools available in the toolbar directly in the content definition.
For more information, see Adding a new config at the property level in content type definitions. - Make the toolbar dependent on the template used for the current site.
For more information, see Adding a new config at the template set level.
Using permissions to show toolbars
If your custom configuration does not already override the CKEditor toolbar, you can use permissions and roles to show the basic, full, or light toolbar to users. To do so, you modify the WYSIWYG editor toolbar permission for a specific user role.
You can set this permission under either Permission on current site or Permission on current node. The permission on the current site overrules permissions set on the current node, as Jahia checks the permission on the current site first. If no permission is set on the current site, Jahia checks the permission on the current node.
The following permissions are available for displaying toolbars.
View basic wysiwyg editor
The basic editor included the following options:
- Basic document options
View source, new page, preview, print, copy paste functionalities, undo and redo, find and replace, select all, and more - Formatting options
Bold, italic, underlined, strikethrough, numbered list, bulleted list, block quote, increase and decrease indent, left, right, centered, and block alignment, insert link, image, anchor, table, and more - Global options
maximize, show blocks, and about

See the toolbar_Basic default configuration
View full wysiwyg editor
In additional to all basic wysiwyg editor options, the full editor also includes:
- Advanced formatting options
Text colour, background colour, font type and size selector, paragraph formatting styles (Heading 1, Heading 2, paragraph), and predefined styles (computer code, marker text) - Macros
Predefined values automatically retrieved from your site or user profile, for example username, author name, creation date, link to homepage

See the toolbar_Full default configuration
View light wysiwyg editor
The light editor only includes:
- Bold, italic, underline, strikethrough, remove format, insert and remove numbered list, and insert and remove bulleted list

See the toolbar_Light default configuration
Specifying a predefined toolbar
To specify a predefined toolbar:
- In Jahia, navigate to Administration>Server>Users and Roles>Roles and permissions.
- Click on the role that you want to edit.
- In Role details, select Permission on current site or Permission on current node.
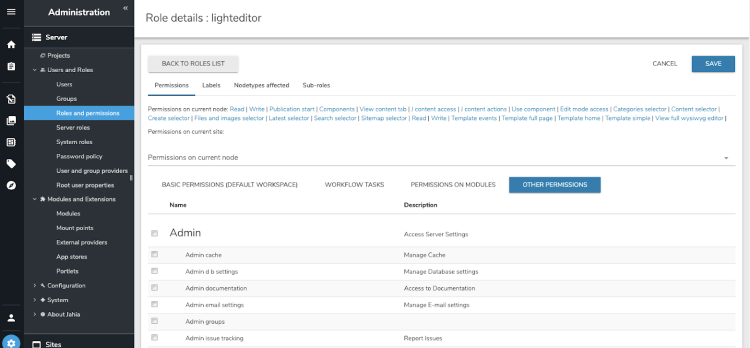
- Select Other permissions and scroll down to Wysiwyg editor toolbar.
- Select one of the following options: View basic wysiwyg editor, View full wysiwyg editor, or View light wysiwyg editor.

- Save your changes.
Loading embedded plugins
You can use plugins to add custom tools to CKEditor. For the full list of available plugins, see the CKEditor 4 documentation. The default CKEditor in Jahia includes a set of plugins. To see the plugins included in your CKEditor version, check the list on github. For information on plugins which require additional sources, see Adding a CKEditor plugin.
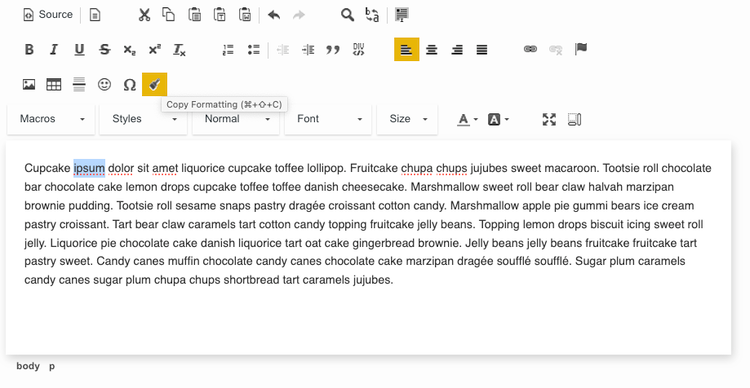
This example shows how to add the copy formatting tool from the default plugin. Load it by adding this code for the platform through Tools>CKEditor configuration. For more information, see Adding a new config at the platform level.
CKEDITOR.editorConfig = function(config) {
    config.extraPlugins = 'copyformatting';
    config.toolbar_Full[9] = ['Image', 'Table', 'HorizontalRule', 'Smiley', 'SpecialChar', 'CopyFormatting'];
}
Which renders as:
Defining custom configurations
CKEditor configuration loads in the following order:
- Configurations at the property level in your content type definition.
- Configurations defined in your template set.
- The configuration defined at the platform level.
If no configurations are defined, the default CKEditor configuration applies, depending permissions set for a user role. For more information, see Using permissions to show toolbars.
Adding a new config at the property level in content type definitions
You can define a custom configuration at the property level directly in the definition of a content type. With the following definition, the summary field of the myArticle nodetype will display the CKEditor with a minified toolbar:
[jnt:myArticle] > jnt:bigText, jmix:basicContent, jmix:editorialContent
- summary (string, richtext[ckeditor.toolbar='Mini']) i18n
You can also define the custom configuration file per field in a similar way. This definition forces CKEditor to use the defined configuration file when authoring content for the field. For example:
[bootstrap4mix:text] mixin
 - text (string, richtext[ckeditor.toolbar='Tinny',ckeditor.customConfig='$context/modules/bootstrap4-components/javascript/ckconfig.js']) i18n
Adding a new config at the template set level
You can extend or override the CKEditor configuration for all rich text fields in your web projects that use a template set by including the /javascript/ckeditor_config.js file in the template set bundle. The format of the file is the same as CKEditor's default config.js file. For more information, see Setting CKEditor Configuration - Using the config.js File.
Adding a new config at the platform level
You can customize or override the CKEditor configuration globally by providing it in an OSGi fragment bundle whose host is the ckeditor bundle. To automate the bundle packaging and deployment process, use the CKEditor configuration utility, which is located in the Tools Area (http://[digital-factory-server]:[port]/tools/ckeditorConfig.jsp).
The tool allows you to build and download the configuration bundle or build and deploy the bundle into that Jahia instance to test the configuration immediately. The format of the provided configuration is the same as the one in the CKEditor's config.js file. For more information, see Setting CKEditor Configuration - Using the config.js File.
Note that you may have to restart the server to load the custom configuration at the platform level.
You can use this to reorder your tools or to add or remove tools. An online tool to help you building your custom configuration can be found at CKEditor Toolbar Configurator.
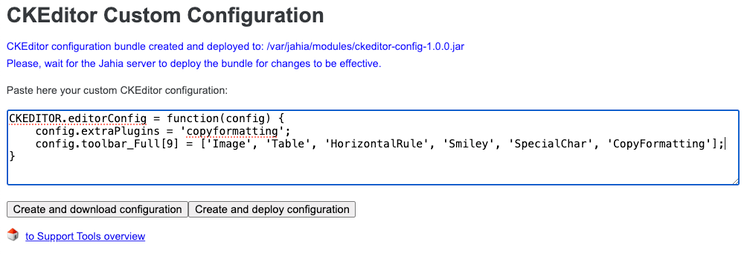
This example shows how to add the Copy formatting button as the last tool in the Insert toolbar group.
CKEDITOR.editorConfig = function(config) {
    config.extraPlugins = 'copyformatting';
    config.toolbar_Full[9] = ['Image', 'Table', 'HorizontalRule', 'Smiley', 'SpecialChar', 'CopyFormatting'];
}
This shows the code add to CKEditor Custom Configuration.
This example shows how to reorder toolbar groups. You can also rearrange buttons, remove tools, and add custom line breaks between toolbar groups like this:
CKEDITOR.editorConfig = function( config ) {
 config.toolbarGroups = [
  { name: 'document', groups: [ 'mode', 'document', 'doctools' ] },
  '/',
  { name: 'editing', groups: [ 'find', 'selection', 'spellchecker', 'editing' ] },
  { name: 'styles', groups: [ 'styles' ] },
  { name: 'clipboard', groups: [ 'clipboard', 'undo' ] },
  { name: 'forms', groups: [ 'forms' ] },
  { name: 'basicstyles', groups: [ 'basicstyles', 'cleanup' ] },
  { name: 'paragraph', groups: [ 'list', 'indent', 'blocks', 'align', 'bidi', 'paragraph' ] },
  { name: 'links', groups: [ 'links' ] },
  { name: 'insert', groups: [ 'insert' ] },
  { name: 'colors', groups: [ 'colors' ] },
  { name: 'tools', groups: [ 'tools' ] },
  { name: 'others', groups: [ 'others' ] },
  { name: 'about', groups: [ 'about' ] }
 ];

 config.removeButtons = 'About,Maximize,NumberedList,Outdent,Blockquote,BidiLtr,JustifyLeft,Link,Form,Undo,Cut,Styles,Find,SelectAll,Scayt,CopyFormatting,RemoveFormat,Subscript,Superscript,Indent,CreateDiv,JustifyCenter,JustifyRight,JustifyBlock,BidiRtl,Language,Unlink,Flash,Anchor,HorizontalRule,Smiley,SpecialChar,PageBreak,Iframe,ShowBlocks,Checkbox,Radio,TextField,Textarea,Select,Button,ImageButton,HiddenField';
}
Adding a CKEditor plugin
CKEditor is a modular framework that can be extended with many plugins. You should monitor the version compatibility between CKEditor and the plugins to ensure a smooth integration. Please get in touch with the plugin editor if necessary. A list of the embedded plugins can be found here. To enable one of the embedded plugins, you only have to activate it in your config.js file, defined in any module.
To adding an additional plugin:
- In the templateSet module, add the
plugin.jsfile under the/javascript/ckeditor/plugins/<nameOfThePlugin>/plugin.jsfolder. -
In the CKEditor configuration file, add the following line to load the plugin.js file:
CKEDITOR.plugins.addExternal('<nameOfThePlugin>', ((typeof contextJsParameters != 'undefined') ? contextJsParameters.contextPath : '') + '/modules/<nameOfYourTemplateSet>/javascript/ckeditor/plugins/<nameOfThePlugin>/plugin.js');Note: If using platform-level configuration, OSGi fragment resources are referred from the host fragment (i.e. ckeditor) so path to use should be/modules/ckeditor/javascript/ckeditor/pluginsinstead of/modules/<nameOfYourTemplateSet>/javascript/ckeditor/plugins - In the config function, add your plugin to the extraPlugins variable:
CKEDITOR.editorConfig = function( config ) { ... config.extraPlugins = '<nameOfThePlugin>'; ... }
The additional plugin is now available to all rich text editors inside Jahia.
Example CKEditor configurations
You can also provide template-set specific CKEditor configurations:
- Toolbar set (see Toolbar Customization)
- CSS styles (see Styles)
- Templates (see Templates)
- And more
Here is an example of the config file in the sample-bootstrap-templates module (ckconfg.js) that provides a custom toolbar and defines custom styles and templates. The custom file is used in several fields from the sample-bootstrap-templates module.
