Note: Marketing Factory is renamed to jExperience in version 1.11 and Apache Unomi is renamed to jCustomer. The 1.10 documentation has been updated to reflect the product name change.
In jExperience, an audience is your entire population of visitors, whether they are anonymous or identified. A profile is a record of a unique visitor. This topic explains how to use audience information, and how to search and export profiles.
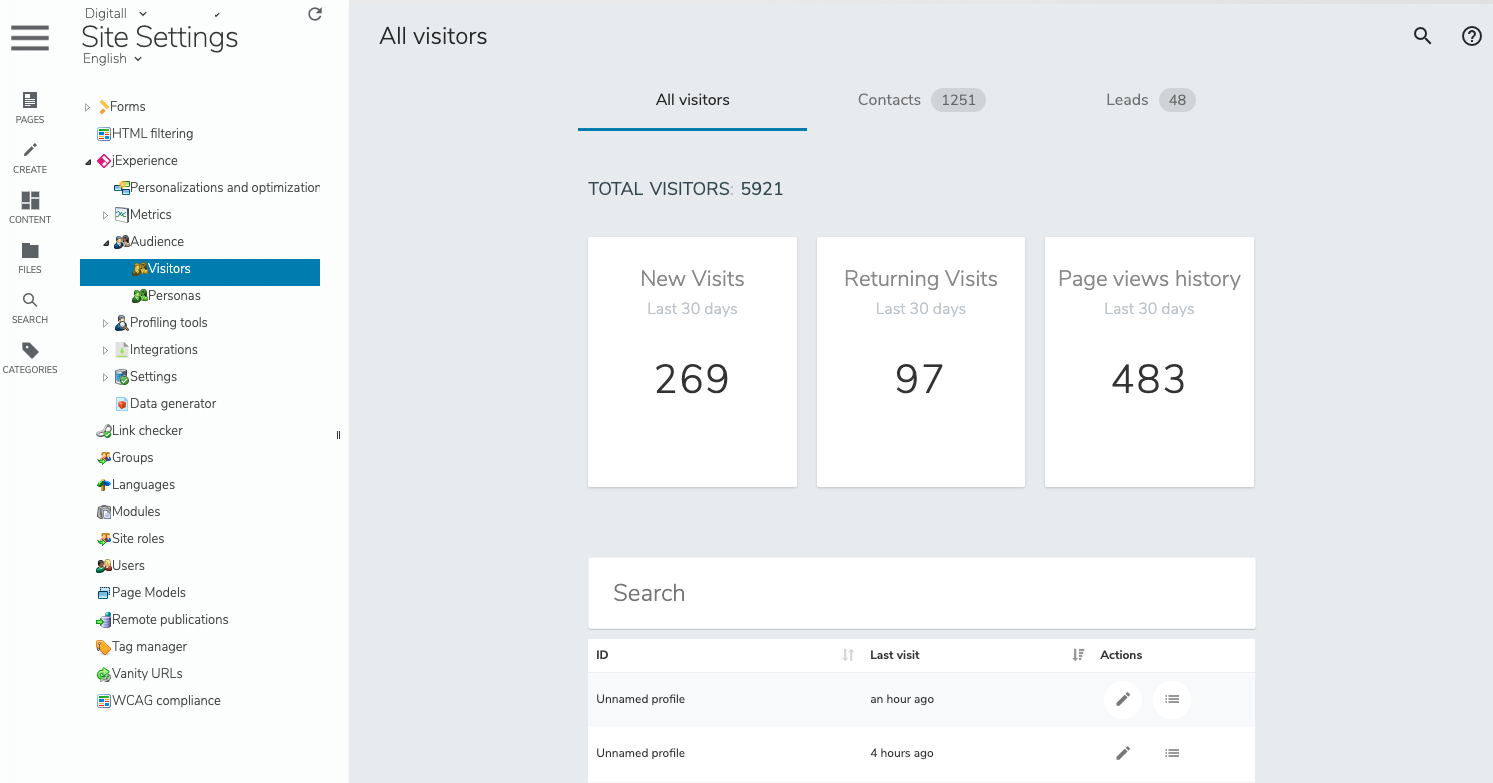
Opening the All visitors page
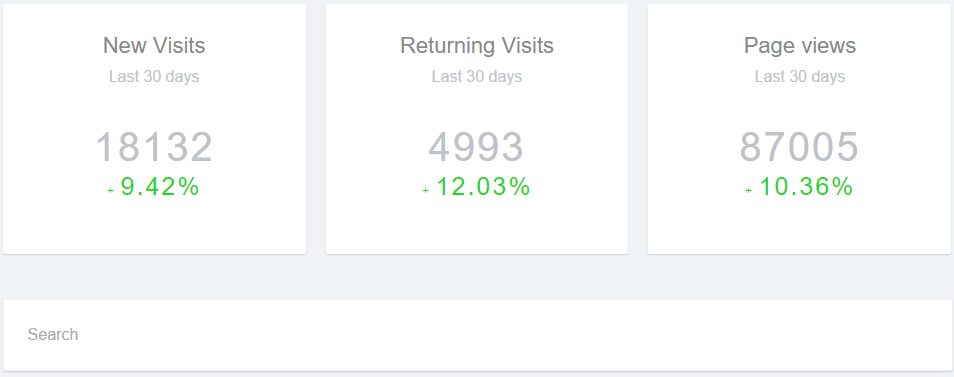
The visitors page enables you to see at a glance your repository of visitors and statistics about your site traffic. The visitors pages displays the total number of:
Unique profiles that you have collected
New visits to the site in the last 30 days and a comparison to the previous 30 days
Returning visits in the last 30 days and a percentage comparison to the previous 30 days
Pages viewed in the last 30 days and a percentage comparison to the previous 30 days
You can also view contact and leads information, search visitors, contacts, and leads, perform an advanced search, and import and export profiles.
To open the All visitors page:
In Site Settings, click Audience in the left menu.
Click Visitors. The All visitors page displays.
Searching for profiles
You can search your profiles repository by performing a full text or advanced search.
Performing a full text search
Full text search is a convenient way to find profiles but is not very granular. To get a more precise view of your visitors, you should use the advanced search.
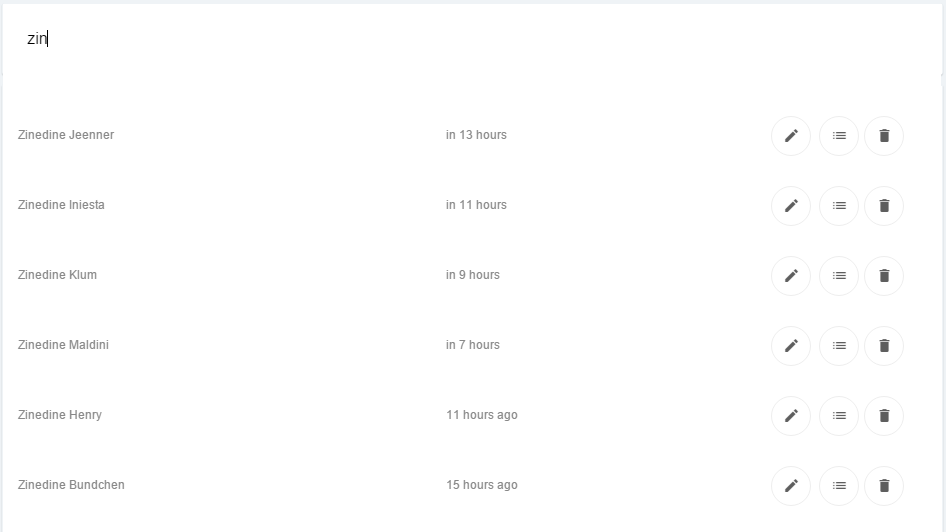
You can perform a full text search directly from the dashboard. Type the search terms you are looking for in the search field.
The list of matching profiles displays in real-time under the search field as you type.
Note: Full text search is performed on all profile properties, not only on the name property or the profiles that display in the search results table. You may have to view an individual profile's details to see the property that matches the search term.
In the below example, the search term paris provides one result.
You can view and edit profile details by clicking on the edit icon . In the example, you can see that the visitor lives in Paris (the value for City is Paris), which is why this profile appeared in the search results.
You can assign a profile to one or multiple lists by clicking on the list icon , which is more convenient than going into the profile page itself if you have multiple profiles to assign.
You can also delete a profile from the results list by clicking the delete icon . Note that deletions cannot be undone and all data about a deleted user will be completely lost.
Note: Full text search is not case sensitive. For example, Paris= paris and Paris = PaRis.
Performing an advanced search
To perform an advanced search (by criteria):
In Site Settings, click Audience in the left menu.
Click Visitors. The All visitors page displays.
At the top right of the page, click Advanced search. The Search dialog displays. Note: The advanced search works similar to the conditions builder.
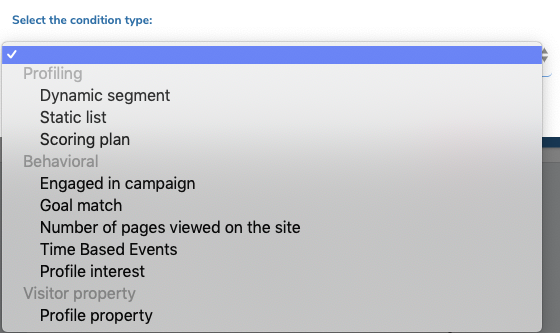
Click New condition and choose a condition type to search on.
Search conditions in jExperience are divided into the following categories:
Goals
All the goals you have created for your site or campaigns
Past events
Any navigation action that a user has performed on your site
Profile interest
The value for a specific interest
Profile property
Any property that has been collected
Profile segment
Segments that visitors belongs to
Click Search.
jExperience returns a list of matching profiles and the following search box displays on top of the result list.
When you perform an advanced search, search criteria applies until you cancel the search. This means that if you choose the Contacts or Leads tabs, jExperience will provide the list of visitors in those segments that also match your search. You do not have to redefine your search when moving from one tab to another.
Using the search box, you can do the following:
To modify your search scope, click Edit search.
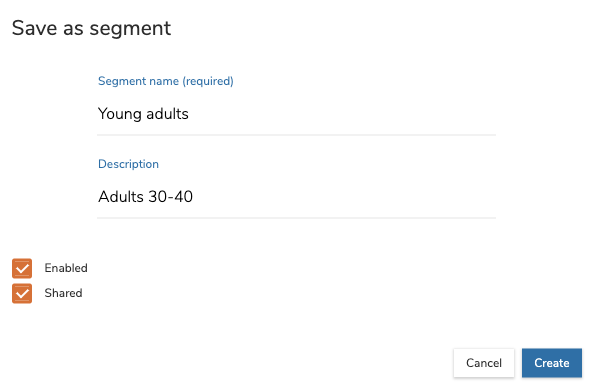
To create a new segment based on your search conditions, click Save as segment. Enter a name for the new segment and a description. To enable the segment immediately, leave the Enabled box selected. To share the segment with other realms, select the Shared box. See the Managing dynamic segments for more information.
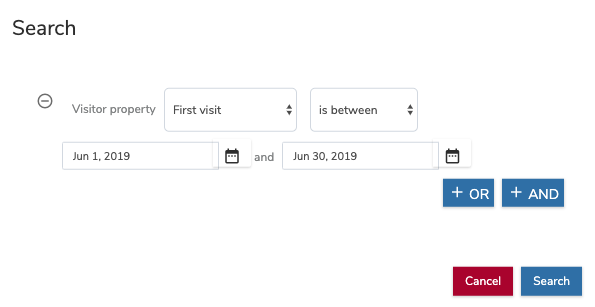
To create a static list that contains all the visitors returned by your search, click Save as static list. For example, assume that you want to save all the new visitors where the first visit occurred in the month of June 2019. You would perform the following advanced search:
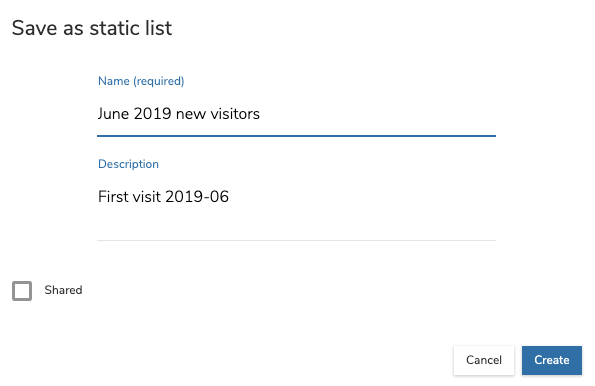
Then, save the search results in a new list for use later for a personalized drip campaign. Storing this search as a segment would not make much sense because, once the month of June is complete, the list will always remain the same. It is not possible to have a new visitor access the site in June 2015 once you are in the new month of July 2015. Therefore, a static list of visitors is more appropriate. Click Save as static list to create the list. Give a name to the list and a description, then click Create.
To remove all active search filters, click Cancel search.
Exporting profiles
You can export visitor profiles into a convenient CSV format. You can open CSV files in Microsoft Excel or similar spreadsheet editors. CSV files can be imported by default into nearly every third-party system you may want to use, such as databases, mail automation and newsletter systems, CRMs, and ERPs.
To export all profiles:
In Site Settings, click Audience in the left menu.
Click Visitors. The All visitors page displays.
Click on the upper right menu. (Display a sub-menu)
Choose Export. (The download starts)
The export feature is contextual to the current search scope. If you have an on-going search, then only the profiles found for this search scope will be exported. This is true both for simple search (full text) and advanced search (criteria).
Also, if you go into the Contacts page or the Leads page, the export feature will apply only to the visitors that match the contact or lead conditions.
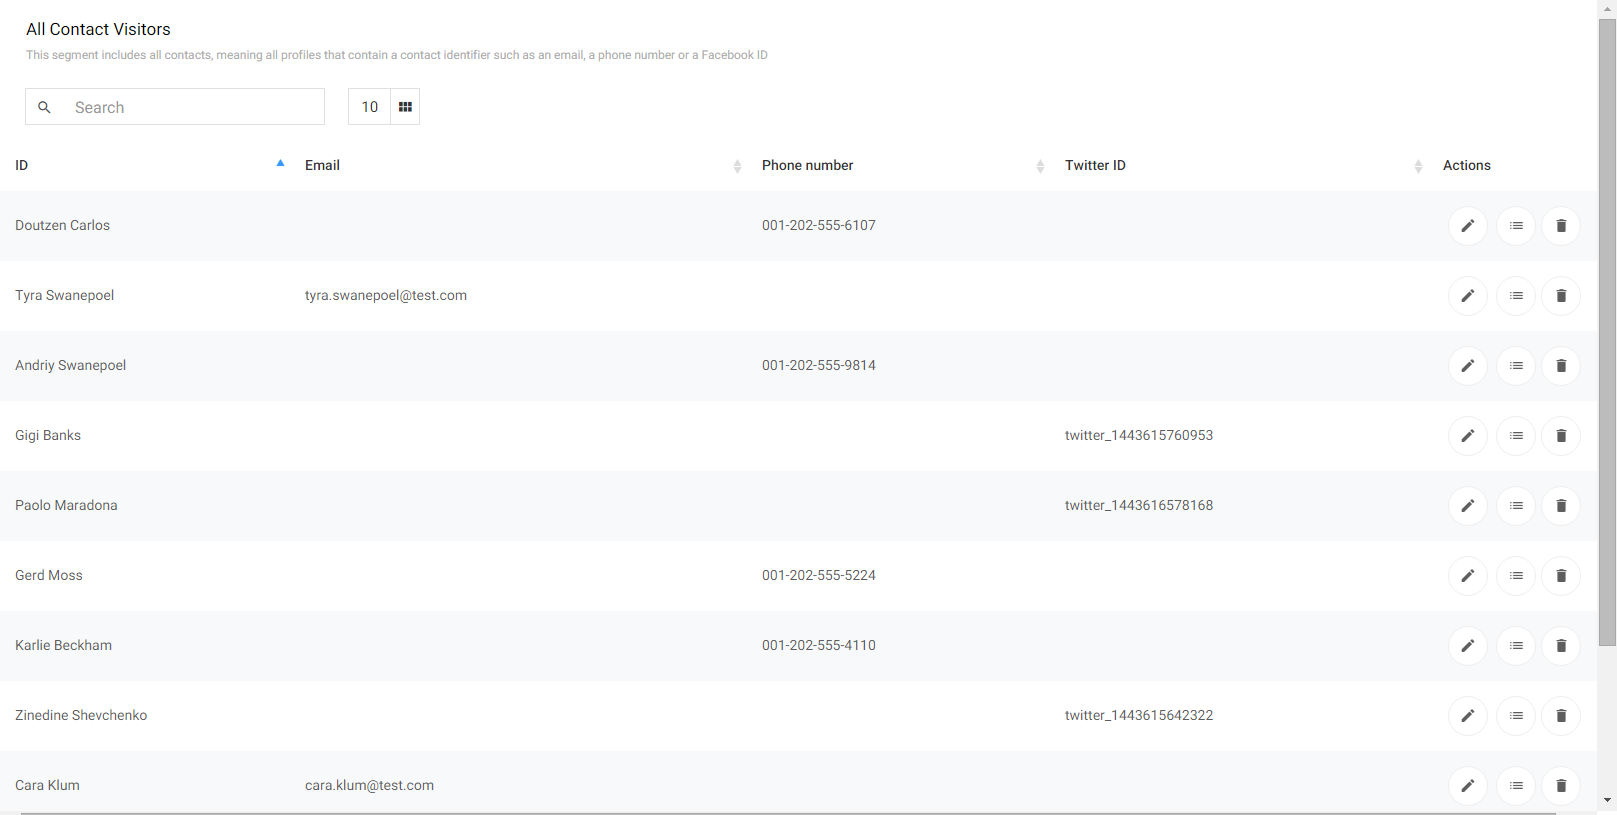
Viewing contacts and leads
You view contacts and leads pages clicking the Contacts and Leads tabs to display a subset of your audience. jExperience indicates how many matching contact and lead profiles are stored in the profile repository.
jExperience divides your audience into the following categories:
Visitors
All visitors who came at least once to your site. This population can be very large and can contain many nearly empty and fake profiles due to spammers or automated bot visits.
Contacts
Visitors on whom jExperience has collected at least one data point that allows you to start a direct conversation: email address, telephone, address, Facebook ID, and LinkedIn ID. A contact does not require a visitor name.
Leads
Contacts assigned to someone responsible for engaging with the contact, usually in a sales process.
Note: Contacts and leads are pre-built segments included with jExperience by default. They respect conditions that you can be fully customize.
The Contacts and Leads pages provide more details than the All visitors page because more data has been collected about visitors belonging to these groups.
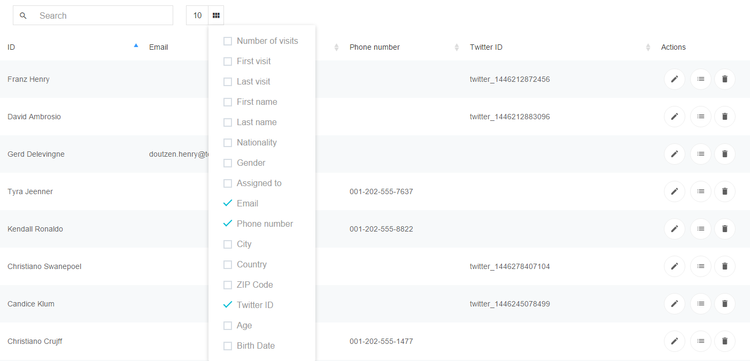
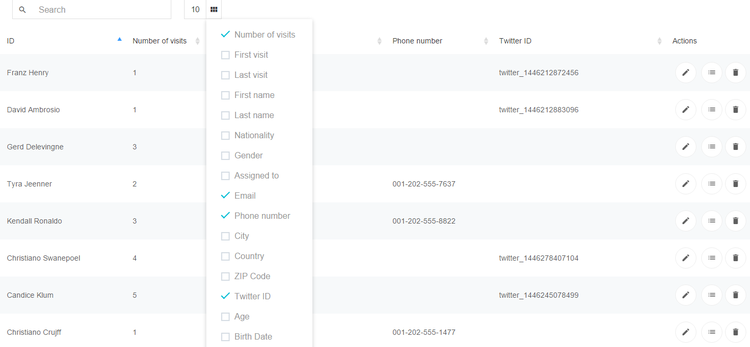
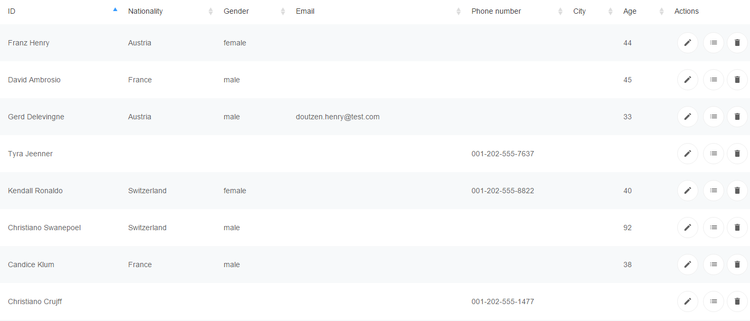
Searching and filtering the profiles list
You can:
Search the contacts or leads list by typing in the Search field. The search performs a full-text search on all contact or lead properties. The list updates in real-time as you type.
Change the number of records that display on the page, by clicking 25 to change the value.
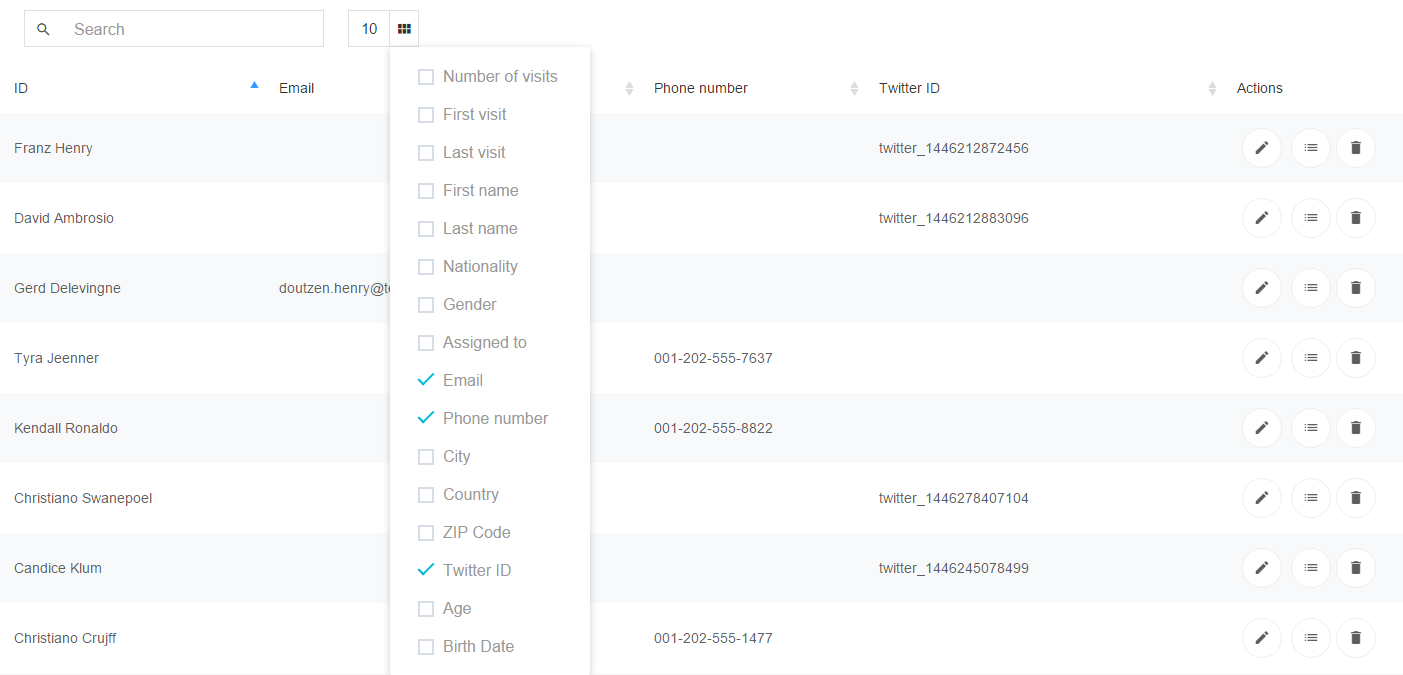
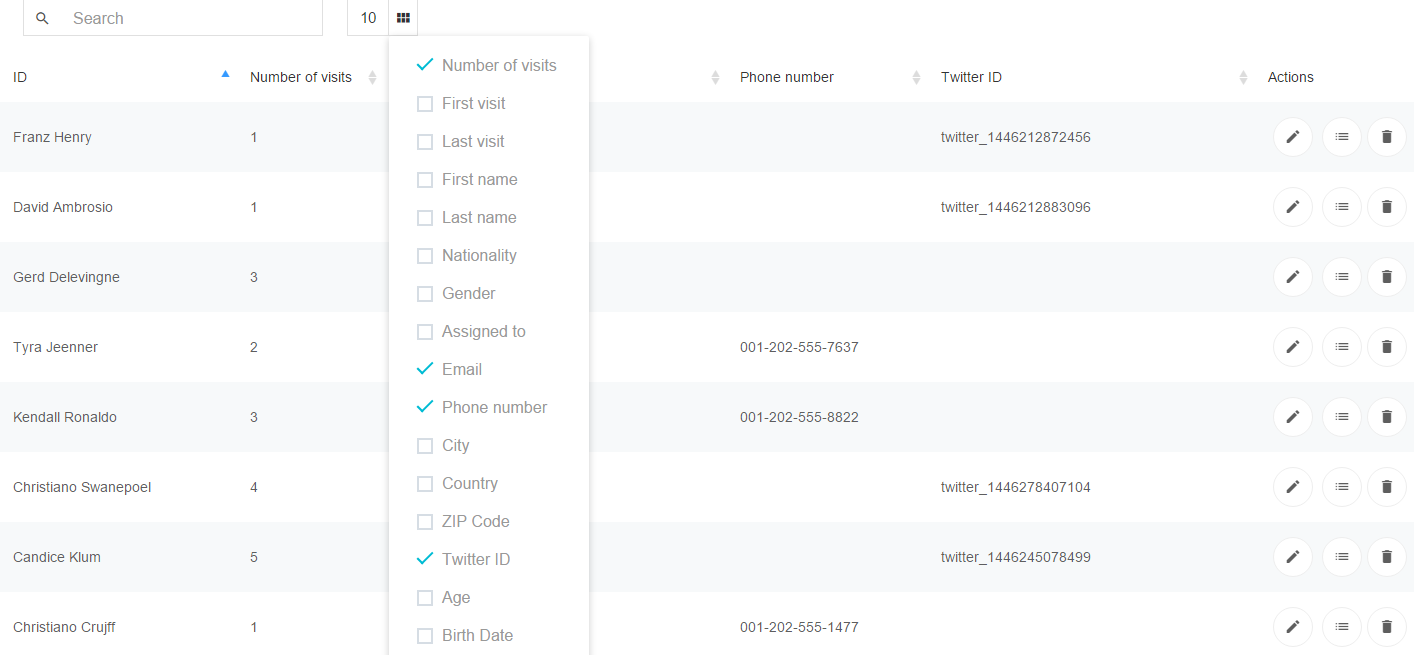
Change the columns that displays in the contact or leads table. Click the grid icon and select or clear properties that you want to display in the table.
Changes occur in real-time and you can select or clear multiple items.
Click outside of the drop-down menu to close the menu.


 . In the example, you can see that the visitor lives in Paris (the value for City is Paris), which is why this profile appeared in the search results.
 , which is more convenient than going into the profile page itself if you have multiple profiles to assign.
 . Note that deletions cannot be undone and all data about a deleted user will be completely lost.