Contributing content to your site
1 Content creation
Content creation is quickly introduced here and in more detail via the presentation of content types here.
2 Update a Content
In order to modify a content in edit or contribute mode, simply double-click on it, or right-click on the content and select "Edit" in the contextual menu. This will open the edit engine.
Note that some contents are not editable in contribute mode.
3 Work in Progress
It is possible to mark a content as a “Work in progress”, referred as WIP in this documentation, to prevent its publication. This feature is useful in order to avoid the unexpected publication of a content being created or being modified.
Understanding how Work in Progress works
When starting a publication, the sub-content created under a content that is marked as WIP, won’t be published. In concrete terms, if you mark a content in a page as WIP and then publish the page, the content and its sub-contents (even if they are not marked as WIP) will not be published. If you try to publish the content itself only, the message “Nothing to publish” will be displayed.
On the other hand, any content not marked as WIP can be individually published (by right clicking on it), even if its parent content is marked as WIP. For instance, if the page is marked as WIP, you can still directly publish a content in the page.
This is summarized in the table below:
|
Page and content status |
Publish site | Publish page |
Publish content |
|---|---|---|---|
|
Page marked as WIP Content is publishable |
|
|
|
|
Page marked as WIP Content marked as WIP |
|
|
|
|
Page is publishable Content is publishable |
|
|
|
|
Page is publishable Content marked as WIP |
|
|
|
Any editor/contributor can edit a content previously saved as WIP. To prevent others from editing a content, you must lock this content.
There are a few subtleties depending if the site is available in one or several languages.
Site available in one language
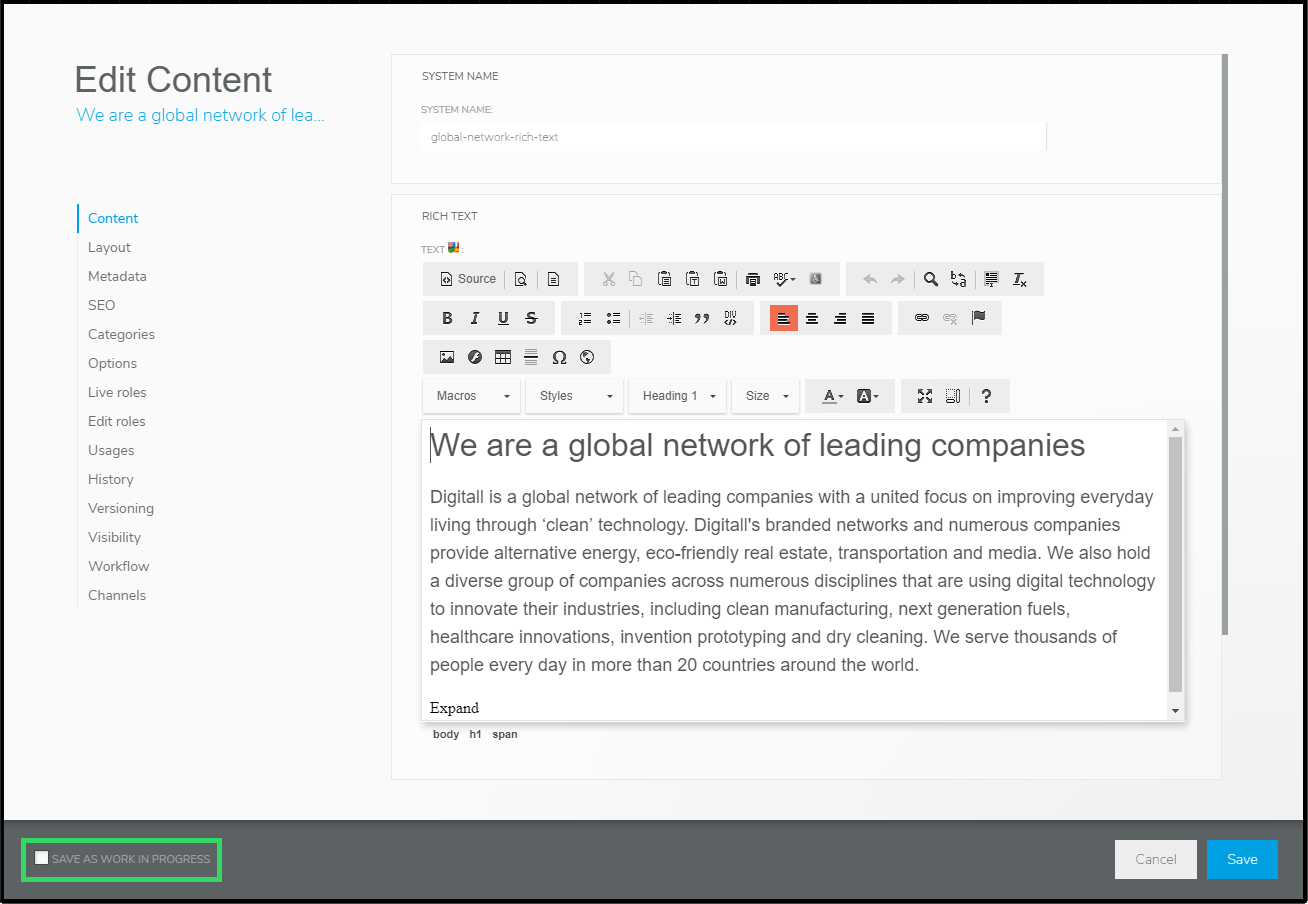
If the site is available in only one language, simply check the corresponding box at the bottom of the edit engine to save the content as WIP:
Once your content is ready to be published, simply uncheck the box and save the content. You will then be able to publish it.
When a content is marked as WIP, the different fields are highlighted in yellow.
Site available in several languages
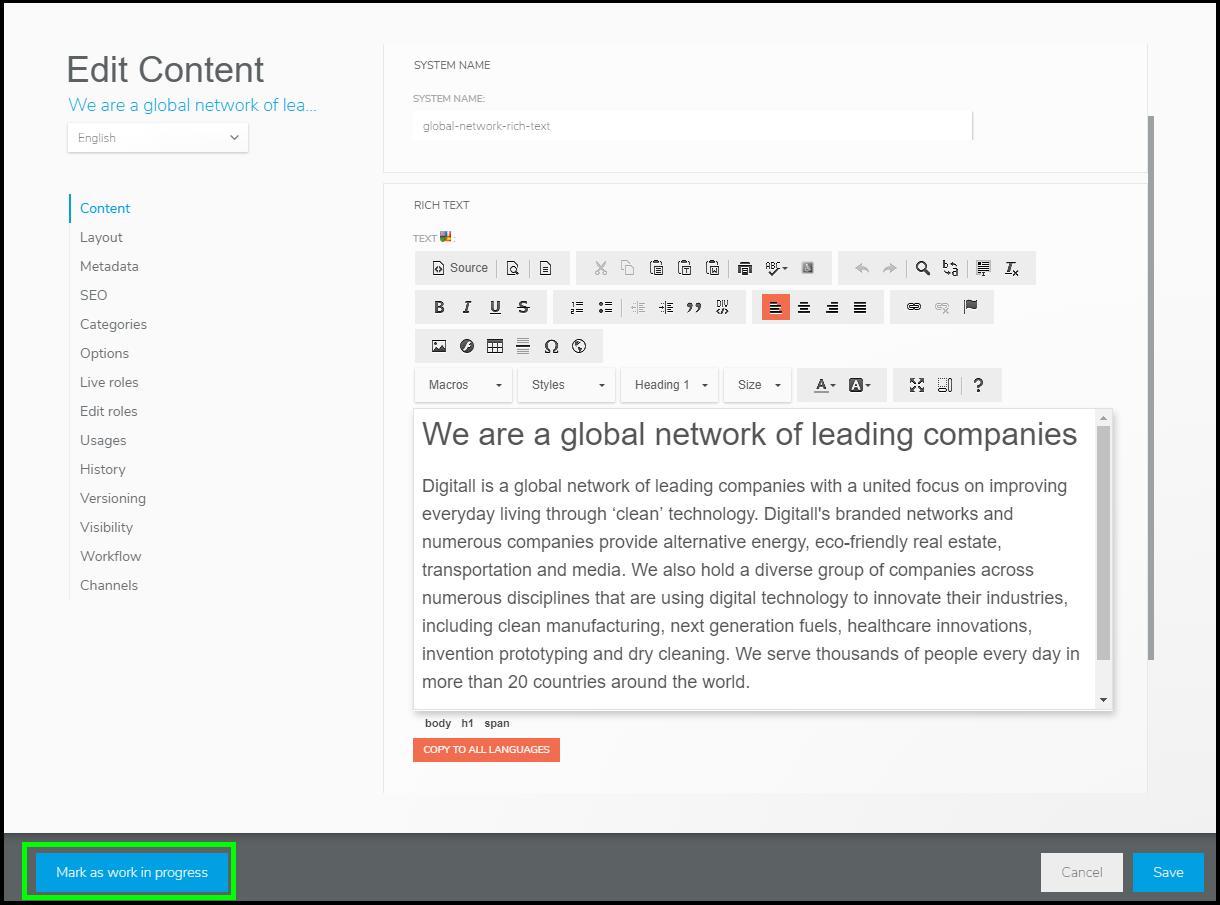
Starting with version 7.2.3.1, the interface is different if the site is available in several languages, as a content can be marked as WIP for all the languages or just in one language (e.g. when its translation is in progress). When a content is available in several languages, it is also important to keep in mind that:
- Some fields can be translated and have different values for every language. They are called “localised properties”
- Some fields have a unique value for all the languages and cannot be translated. These are “non localised properties”.
The publication of a content in one language publishes all the properties: the localised and non localised ones.
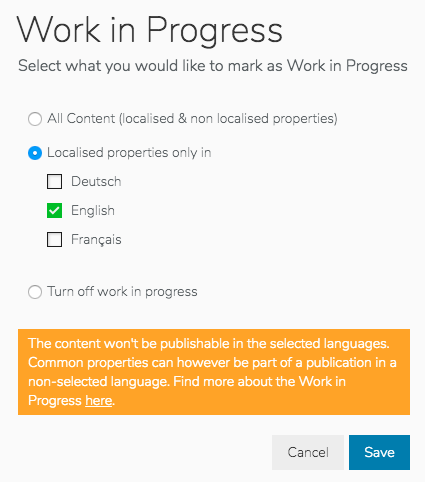
Because of this specificity, it is possible to mark the content as WIP on per language basis, or once for all languages (“All content”):
- All content: similar behavior as if there’s only one language. The content cannot be published in any language. Non-localised properties cannot be published.
- Per language: the content cannot be published in the given language. But it can be published in the other languages: non-localised properties can be published.
These options are available when clicking on the “Mark as work in progress” button:
The table below summarizes the different cases, using a site available in 3 languages (English, French and German) as example:
|
Work in progress option |
Publication in English | Publication in French |
Publication in German |
|---|---|---|---|
|
All content |
|
|
|
|
Localised content: English |
|
|
|
|
Localised content: English and French |
|
|
|
|
Turned off |
|
|
|
When using the anthracite theme, it is easy to identify the properties which cannot be published as they are highlighted in yellow:

4 Lock Content
Locking content prevents other users from editing it. When you open the content editing form, it is locked for other users, so it's impossible for two users to edit the same content at the same time. The lock is removed as soon as you close the edit engine, by saving or canceling your changes.
If you put on hold your work on a content, and want to prevent others from editing it, you can lock the content by opening its contextual menu and selecting "Lock". You can remove the lock in the same way, via the contextual menu of your content.
5 Content Deletion
The deletion process of a content is different if content has already been published or not. It is however a two-step process in any case.
The deletion of a content is not specific to a language: if your content exists in multiple languages, then once deleted, it will be deleted in all languages.
The deletion of a content also implies the deletion of the sub-contents. This is also the case for pages: deleting a page will also delete its sub-pages.
Remember, you can unpublish a page or content so that it is no longer visible online (for a selected language).
5.1 Mark content for deletion
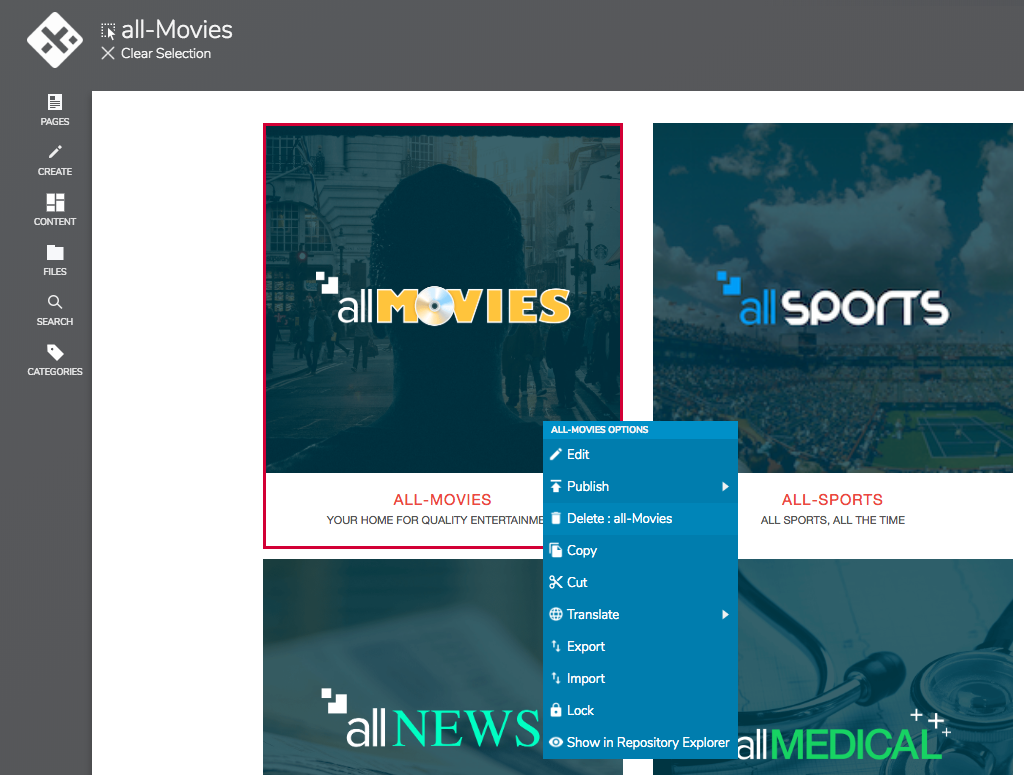
The first step is to mark a content for deletion. This is done through the contextual menu of the content (via a right click on the content): it is then necessary to select the entry "Delete":
A confirmation window will appear, in which you can add a comment that will be visible from the trash:
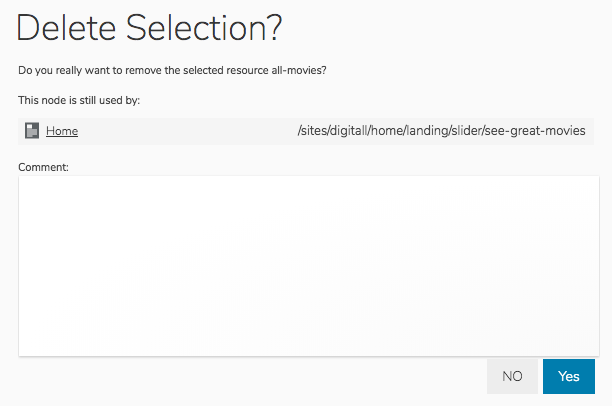
A content marked for deletion still appears in Edit and Contribute modes, however with an overlay indicating that the content is ready to be deleted. A content marked for deletion is no longer displayed in the different preview modes, but is still displayed online (if it was previously published).
Contents marked for deletion are not editable.
At this point, it is possible to cancel the deletion of the content, from its contextual menu ("Undelete") of the contents or from the trash.
5.2 Never Published Content
If content marked for deletion has never been published, it can be permanently deleted by choosing the "Delete (permanently)" option. A confirmation window is then displayed, because this operation cannot be canceled.
A content marked for deletion, and which was never published, can also be permanently deleted if it is part of a publication (for instance if the rest of the page is actually being published).
5.3 Previously Published Content
Any content marked for deletion will be permanently deleted, in working version and in the live version, if it is published. It is therefore necessary to start the publication of a content marked for deletion in order to permanently delete it online.
If you simply want a content to be no longer visible online, but still editable in edit and contribute modes, then you need to unpublish the content (in the desired language if your content exists in many languages).
5.4 Special Case of Mounted Folders
It is possible that your Digital Experience Manager is connected to other file storage systems, so you can use such files seamlessly in your web projects. The permanent deletion of these files stored on external systems is done in a single step.
6 Copy and Paste Content
It is possible to copy a content and paste it on a different page of your web project, or even in a different web project. To do so, you just need to right-click on a content, and then select “Copy” in the contextual menu. Then the button “Paste” will be displayed in every areas or content lists where you can paste the content. This “Paste” button will still be displayed when navigating in your site, allowing you to paste the content in a different page.
It is also possible to select several contents (by holding down the "Ctrl" key of your keyboard while clicking on several contents) and copy them all at once. All the copied contents will be pasted when clicking on a “Paste” button.
6.1 “Paste” vs “Paste as reference”
Copy and pasting a content will create a copy a the content, totally independent from the original one. Meaning that any modification made on the source content will have no impact whatsoever on the new content created by the “Paste” operation.
When using “Paste as reference”, you will actually create a reference to the created content. Please consult the section related to references.
6.2 Copy and paste page
In order to copy a page, you need to click on the “Copy” option in the contextual menu by right-clicking on the page (or by clicking on the “...” button related to the page).
Then you need to open the contextual menu of the parent page under which you want to paste the page. You then have two options:
“Paste”: this will copy the page and its subpages. All the contents are duplicated, meaning that they are now independent from the source page, and can be modified without impacting the source ones
“Paste one page”: this copies only the page, and not the subpages
7 Move Content
Several ways exist to move a content from an area to another, another page, or another site.
7.1 Cut and Paste
You can move a content from an area or content list to another area of the same page, or to another page, or to another site by right-clicking on it, then selecting “Cut”. Then the button “Paste” will be displayed in every areas or content lists where you can paste the content. This “Paste” button will still be displayed when navigating in your site, allowing you to paste the content in a different page.
7.2 Drag and Drop
You can move a content inside the same page using drag and drop. By default, the entire content is draggable, meaning that you can click, and hold the click, anywhere on the content in order to drag it, before dropping it anywhere else on the page. Your server administrator may have selected another strategy, where one has to hold the click on the top left corner of a content in order to be able to drag it:
The content can only be dragged by using the small icon in the top left corner of the content
Once the content is dragged, a “preview” is displayed and an icon ( or
)indicates if the content can be dropped or not.
If you release the click while the content can’t be dropped, then the drag-and-drop operation is cancelled, and the content remains where it initially was.
Note that your administrator may have deactivated the drag-and-drop.
7.3 Move the Content within an Area or Content List
If you want to move the content within the same area or content list, then you need to open the edit engine of the area (or content list), and then manually re-order the contents of the list in the “List ordering” tab.
7.4 Move a Page
You can move a page in the “Pages” panel of the edit mode, using either “cut and paste” or drag and drop.

8 Export Content
Content export features allow you to download contents on your computer, in order to be able to import it on a different site or server for instance.
To do so, you need to open the contextual menu of a content by right-clicking on it, and then “Export”:
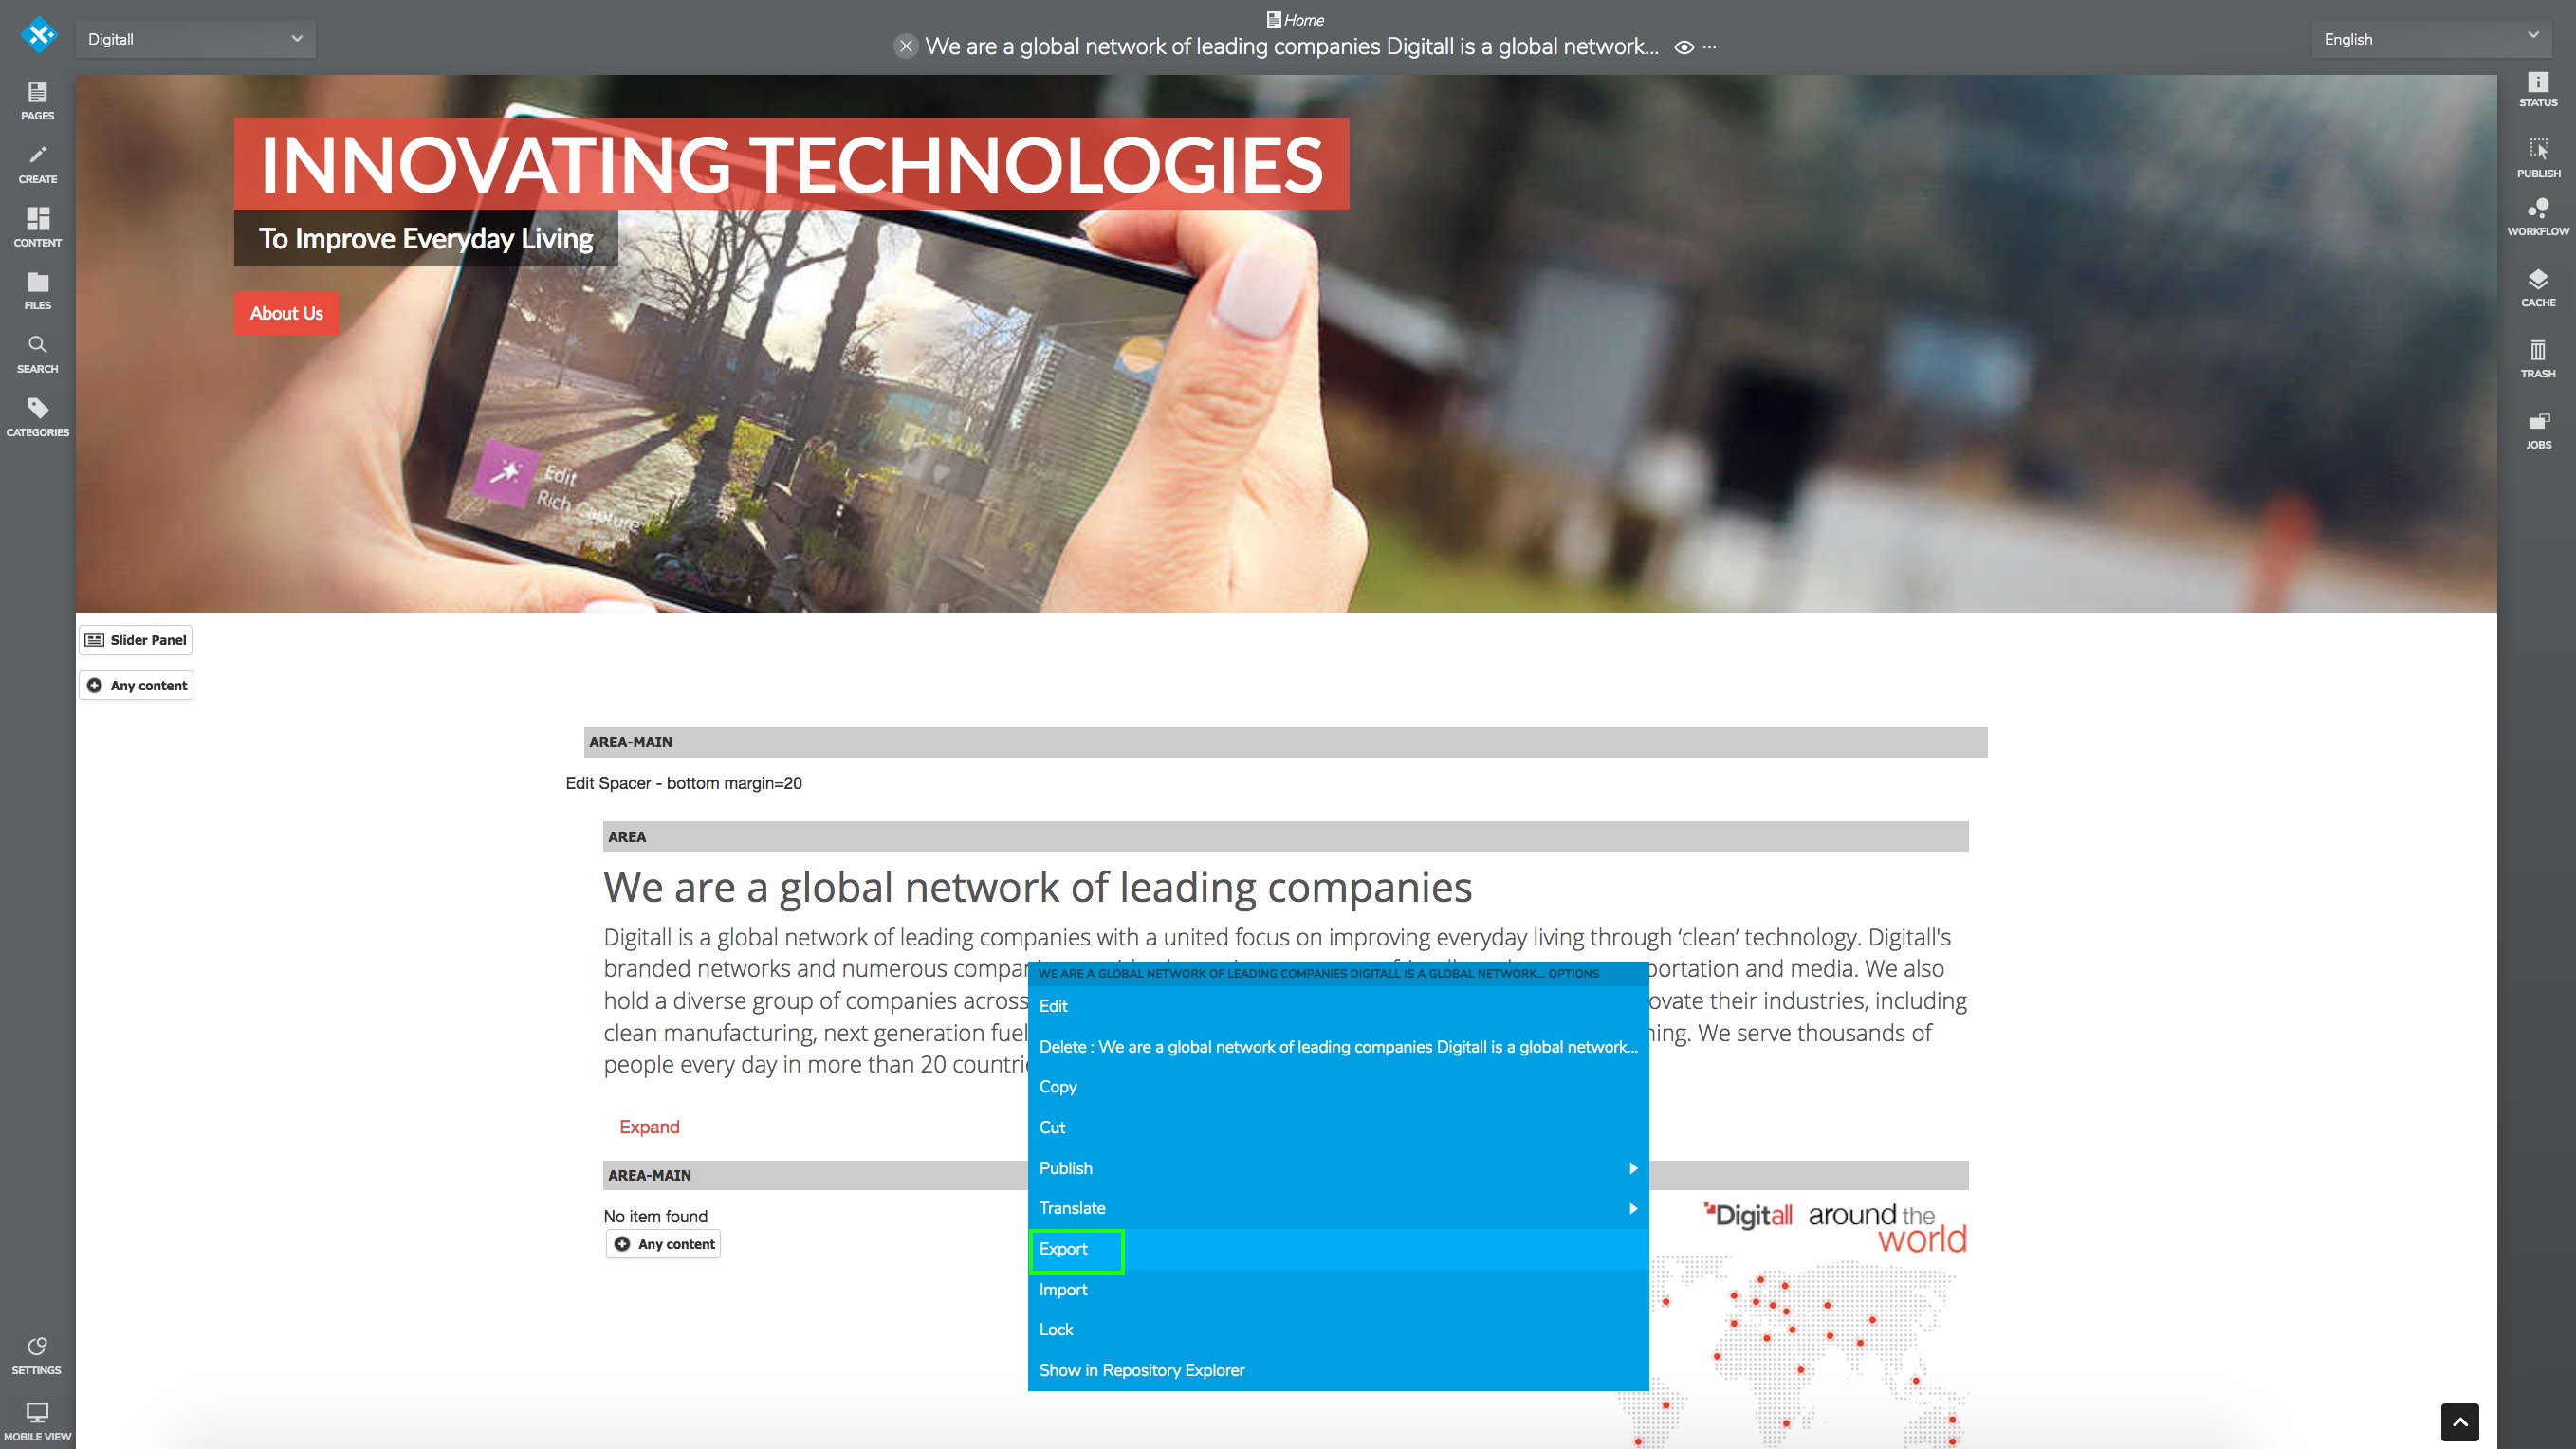

You then have 3 export options:
- Export XML: export the content from the workspace in an xml file (this option is not available for pages)
- Export Zip: export the content from the workspace in a zip file
- Export Zip with live content: export in a zip file the content as it is in the workspace and the content as it is online (“live content”).
Exporting a content will export all sub-contents. For instance:
- Exporting a page will export all the contents of the page and the sub-contents
- Exporting a content-list will export all the contents created in the list
9 Import Content
Once a content has been exported, it can be re-imported. To import a content, open the contextual menu of the parent content/page, then click on “Import”. You then need to select the exported file (either zip or xml) and click on “OK”. Note that the import operation can takes some time depending on the size of the imported file, therefore the operation is performed in the background. You will need to refresh the page in order to see the imported content.
Important: the “import” option is available in the contextual menu of all the contents, however the operation can fail if you try to import incompatible content. For instance, you cannot import a page in an area or in an editorial content.
Most common usages of content import:
- An exported page is imported under another page
- An exported content or list of contents, is imported in an area or another list of contents